Blooming
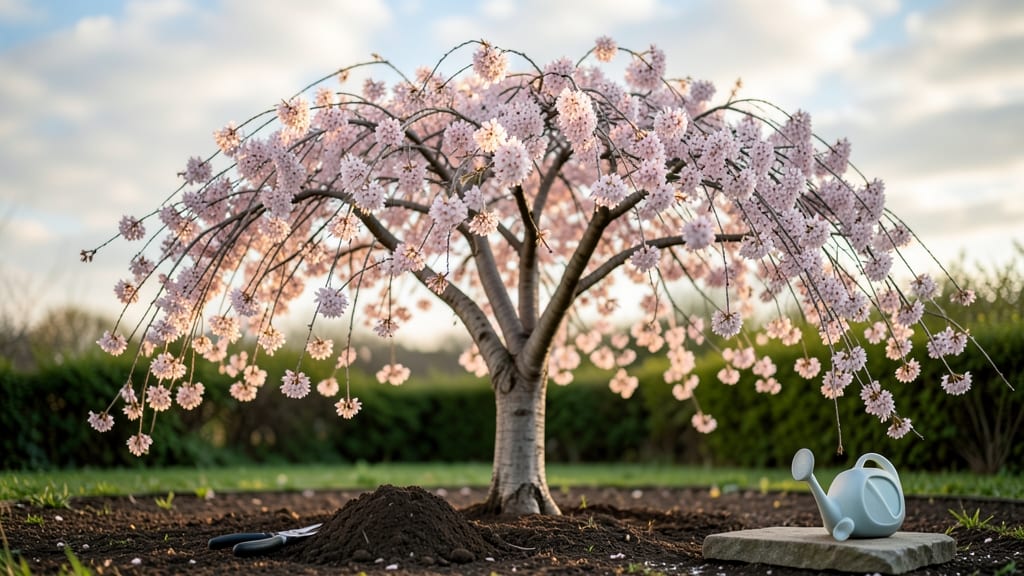
Planting a real cherry blossom tree means bringing a burst of spring magic to your yard—especially when you choose varieties like Prunus serrulata or Prunus avium that thrive in the Pacific Northwest’s mild, wet climate. 🌸 I’ve grown these trees for years, and the secret to their stunning blooms lies in mimicking their natural habitat: rich, well-draining soil, consistent moisture, and plenty of winter chill.
The first year is all about setting them up right so they’ll reward you with those iconic pink clouds of flowers for decades.
You’ll need a spot with full sun (at least 6 hours daily) and soil that drains well but holds moisture—think of it like a balance between a damp forest floor and a sunny meadow.
Most nurseries carry young trees in 5- or 7-gallon pots, which transplant beautifully in early spring or fall. Pruning is minimal at first, but removing dead or crossing branches now prevents problems later.
The key is patience: it takes 3-5 years for a young tree to mature enough for its first full bloom, but once it does, the sight of petals drifting in the breeze is worth every bit of care.
Once established, these trees handle our region’s rainy winters and cool summers like champs—just watch for canker disease (a fungal issue) and borers (those pesky wood-eating insects).
A thick layer of mulch keeps roots cool in summer and insulated in winter, while a late-winter pruning session opens the canopy for better air circulation. The payoff? A tree that not only survives but thrives, turning your yard into a local hotspot when blossoms peak in spring.
For the Pacific Northwest, ‘Kwanzan’ (with its deep pink flowers) and ‘Mount Fuji’ (a compact, double-blooming variety) are my top picks—they handle our damp winters better than many others.
Start small with a young tree, and in just a few years, you’ll have a living centerpiece that brings neighbors out for photos every spring. The best part? These trees keep giving, with some varieties blooming lightly even in summer.
📚 In This Guide
- What you need
- Instructions
- Tips and common mistakes
- Wrapping up and next steps
What you need
- ● Cherry Blossom Tree (Prunus serrulata or hybrid): 1–3 bare-root or potted saplings (choose varieties like Kanzan, Yoshino, or Shirotae for PNW resilience).
- ● Age: 1–3 years old (younger trees establish faster).
- ● Planting Site: Full sun (6+ hours daily) or partial shade (3–6 hours).
- ● Well-draining soil (amend with compost if clay-heavy).
- ● Space: 20–30 feet wide and 15–20 feet tall (account for mature size).
- ● Soil Amendments: 5–10 lbs of organic compost or aged manure per planting hole.
- ● 1–2 lbs of slow-release fertilizer (10-10-10 or acid-loving plant blend).
- ● Tools: Shovel or trowel (for digging).
- ● Garden gloves (to protect your hands!).
- ● Watering can or hose (with adjustable nozzle).
- ● Mulch (3–4 inches of wood chips or pine straw).
- ● Tree stakes (2–3) + soft ties (to support young trees in windy PNW areas).
- ● Drip irrigation system (for consistent moisture, especially in summer droughts).
- ● Pruning shears (for shaping and removing dead branches).
- ● Soil pH tester (ideal range: 5.5–6.5; amend with sulfur if needed).
- ● Pest/disease monitor (e.g., Japanese beetle traps or neem oil for prevention).
Step-by-step instructions for planting a Pacific Northwest cherry blossom tree
Here's how to get your tree thriving in wet winters and mild springs.
🌱 Step 1: Choose the Right Variety and Planting Time
For the Pacific Northwest, select a Prunus serrulata or Prunus subhirtella variety that tolerates wet soil and cooler springs. These handle the region's 40-50°F average winter lows better than southern cultivars. I always plant in late fall or early winter—this gives roots time to establish before spring rains arrive.
Check your local frost dates. If you're in western Washington or Oregon, aim for planting between November and February. The ground stays workable longer, and you avoid the stress of summer heat on a newly planted tree. Avoid planting in spring—you'll miss the critical root growth window before summer drought sets in.
🪴 Step 2: Prepare the Planting Site with Proper Drainage
Cherry blossoms hate soggy roots, so amend heavy PNW soil with 2-3 inches of compost mixed into the top 12 inches of native soil. The tree needs well-draining conditions to prevent root rot. I like to dig a planting hole that's twice as wide as the root ball but only as deep—never deeper, or the tree will suffocate.
Loosen the sides of the hole with a shovel to prevent soil compaction. If your yard has clay soil, add 10% coarse sand to the backfill mix. The goal is soil that crumbles easily when squeezed—if it forms a hard clod, you need more amendment. Place the tree so the top of the root ball sits 1-2 inches above ground level—this prevents water pooling at the trunk.
☀️ Step 3: Plant and Stake for Wind Protection
Remove the tree from its container and gently tease out any circling roots with your fingers. Position it in the hole so the trunk faces south or southeast to maximize spring sunlight. Backfill with your amended soil mixture, tamping lightly every 4-6 inches to remove air pockets. Water deeply as you fill to settle the soil.
Stake the tree only if your site gets winter winds over 20 mph. Use two stakes positioned 12-18 inches from the trunk, tied loosely with soft fabric strips (never wire—it cuts bark). The tree should have room to sway naturally. Mulch with 3-4 inches of wood chips in a 3-foot diameter circle, keeping mulch 6 inches away from the trunk to prevent rot.
💧 Step 4: Water Deeply and Monitor Through First Season
Water immediately after planting with 10 gallons of water spread evenly around the root zone. The soil should be moist to a depth of 12 inches. In the first year, water once every 7-10 days during dry spells, aiming for 1-2 gallons per watering. You'll know it's enough when water runs out the bottom of the hole—this ensures deep root development.
Check soil moisture weekly by pushing a 6-inch screwdriver into the ground. If it goes in easily, wait another week. If it's dry at 3 inches, water immediately. The first year is critical—consistent moisture prevents transplant shock. Avoid overhead watering after planting; direct water to the root zone to prevent fungal issues.
Tips & tricks for Pacific Northwest cherry blossom cultivation
Between us, the Pacific Northwest's unique climate can make or break your cherry blossom's success. Here's what I've learned after years of trial and error.
Variety Selection: While Prunus serrulata and Prunus subhirtella are your best bets, don't overlook Prunus avium varieties—they handle our region's wet springs better than you'd think. I planted a Prunus avium 'Kanzan' last year, and it's thriving where neighbors' Prunus serrulata struggled with fungal issues. The key is looking for cultivars labeled "wet soil tolerant" at local nurseries.
Soil Preparation: That 2-3 inches of compost in the top 12 inches of soil isn't just about drainage—it's about creating a sponge-like environment that holds moisture without suffocating roots. I've seen too many trees fail because people skipped this step. Pro tip: Mix in 1 cup of bone meal (optional) when amending—it gives a slow-release phosphorus boost that cherry blossoms love for root development. The bone meal won't harm the tree if you forget it, but it gives that extra insurance.
Wind Protection: The stakes aren't just for show—they're critical if your yard gets winter winds over 20 mph. I learned this the hard way when my first tree nearly snapped in a storm. Use soft fabric strips (like old t-shirts) instead of wire—they won't cut into the bark as the tree grows. And here's a trick I picked up from local arborists: Angle the stakes outward slightly (like an "A" frame) to provide more support without restricting natural movement.
Watering Strategy: Those 10 gallons after planting aren't just for show—they're about settling the soil around the roots. The real secret is the 6-inch screwdriver test I mentioned. If it goes in easily, you're good. If it hits resistance at 3 inches, water immediately. I've had clients overwater and drown their trees because they ignored this simple check. Remember: cherry blossoms want their feet wet, not swimming.
Pro Tips for Real Cherry Blossom Tree
- Between us, the Pacific Northwest's unique climate can make or break your cherry blossom's success.
- Variety Selection: While Prunus serrulata and Prunus subhirtella are your best bets, don't overlook Prunus avium varieties—they handle our region's wet springs better than you'd think.
- Soil Preparation: That 2-3 inches of compost in the top 12 inches of soil isn't just about drainage—it's about creating a sponge-like environment that holds moisture without suffocating roots.
Frequently asked questions
Got questions about growing a real cherry blossom tree in the Pacific Northwest? You’re not alone! Here are answers to the most common queries—from planting timing to troubleshooting—so you can cultivate your dream tree with confidence.
When is the best time to plant a cherry blossom tree in the PNW?
The ideal window is late fall (November) to early spring (March), when the tree is dormant. This gives roots time to establish before summer heat arrives. Avoid planting in summer or extreme cold—both stress young trees. Pro tip: Water deeply after planting to settle soil around roots!
How long does it take for a cherry blossom tree to bloom?
Patience is key! Most real cherry blossom trees (like Prunus serrulata) take 3–5 years to produce flowers after planting, depending on variety, climate, and care. Dwarf varieties may bloom slightly sooner. Ensure full sun (6+ hours/day) and well-drained soil to speed up the process.
Can cherry blossom trees survive PNW winters?
Native PNW varieties (e.g., Prunus subhirtella) are hardy to USDA Zone 5–8, handling frost and rain. Mulch the base in winter to protect roots, and avoid heavy pruning in late fall. Watch for: silver leaf disease (common in wet climates)—prune infected branches immediately.
What’s the best alternative if I can’t grow a real cherry blossom tree?
If your site lacks sun or has poor drainage, consider these PNW-friendly bloomers:
- Japanese maple (Acer palmatum) – Stunning foliage and drought-tolerant.
- Magnolia (Magnolia stellata) – Early spring blooms, shade-tolerant.
- Dwarf Korean lilac (Syringa meyeri) – Fragrant and compact.
Why aren’t my cherry blossom leaves turning green?
Pale or yellowing leaves often signal nutrient deficiency (especially nitrogen) or pests like aphids. Test soil pH (ideal: 6.0–7.0) and amend with compost. For pests, spray with neem oil or introduce ladybugs. Yellow edges? Could be overwatering—check drainage!
Bonus Tip:
For maximum blooms, prune lightly after flowering (late spring) to remove dead wood. Avoid heavy pruning—it reduces next year’s flowers! And never fertilize in fall (it encourages late-season growth vulnerable to frost).
Wrapping up and next steps
Growing a real cherry blossom tree in the Pacific Northwest isn’t just about adding beauty to your landscape—it’s a rewarding journey that connects you to nature’s fleeting yet magical moments. 🌸 With the right Prunus species, soil prep, and seasonal care, you’ll soon enjoy bursts of pink, white, or soft lavender blooms that transform your yard into a serene sanctuary.
Whether you’re a novice gardener or a seasoned green thumb, the key is patience and passion!
Ready to take the next step? Start by choosing your tree—visit a local nursery or trusted online supplier to pick a climate-adapted cultivar. Then, mark your calendar for spring planting and watch your dream blossom (literally!) to life. Happy growing! 🌱