Trees
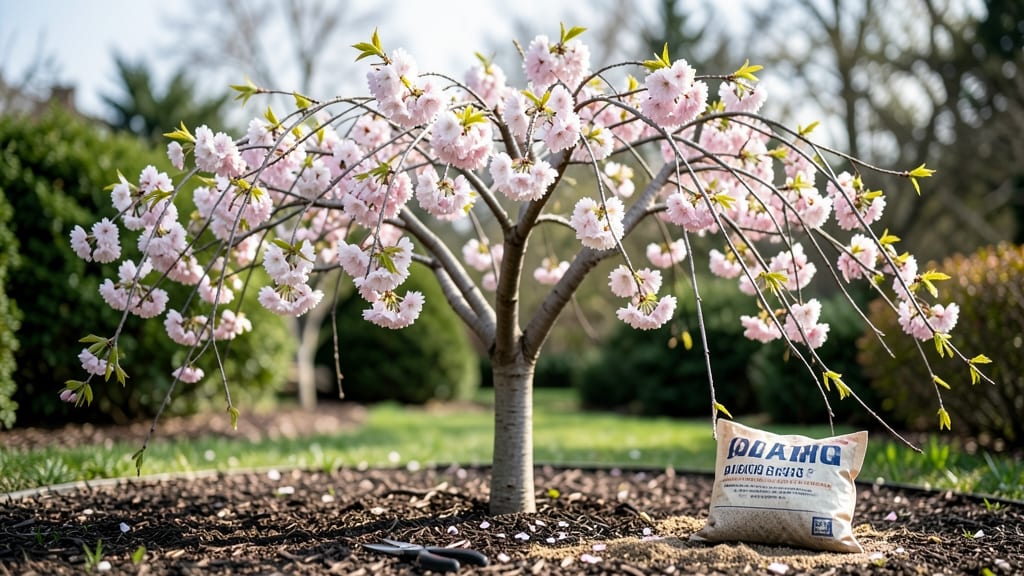
Spring transforms trees into living canvases—photos of trees in spring capture the magic of pink blossoms, fresh green leaves, and golden catkins in one breathtaking season. 🌸 I still remember the first time I stood beneath a cherry tree in full bloom, the air thick with perfume and sunlight filtering through delicate petals like stained glass.
This isn’t just about pretty pictures—it’s about understanding the why behind spring’s vibrant colors. Dogwoods blush pink, maples unfurl chartreuse leaves, and willows cascade with fuzzy catkins.
Each species tells a different story, and knowing their blooming patterns helps you plan garden spaces that feel like a springtime masterpiece year after year.
With the right timing and lighting, you can photograph these transformations yourself—soft morning light on blossoms, the contrast of new leaves against old bark, or the way sunlight dances through emerging foliage.
The results will inspire your own outdoor projects, from pruning decisions to planting new trees that bring that same magic to your yard.
Whether you’re a photographer, gardener, or just someone who loves spring’s quiet beauty, these images and tips will help you see trees in a whole new light. Let’s dive into the details that make spring foliage so unforgettable.
📚 In This Guide
- What you need
- Instructions
- Tips and common mistakes
- Wrapping up and next steps
What you need
- ● Camera: DSLR, mirrorless, or even a high-quality smartphone (e.g., iPhone 13+, Google Pixel 7+).
- ● Lens: Wide-angle (16-35mm or equivalent) for sweeping landscapes.
- ● Telephoto (70-200mm or equivalent) to isolate details like buds or bark.
- ○ Optional: Macro lens (60mm+) for close-ups of flowers or new leaves.
- ● Tripod: Sturdy lightweight model (e.g., Manfrotto Compact, Joby GorillaPod) for low-light or long-exposure shots.
- ● Remote shutter: Bluetooth/Wi-Fi trigger (e.g., Vello ShutterBoss) to avoid camera shake.
- ● Polarizing filter: Circular polarizer (e.g., Hoya HD) to reduce glare and enhance colors.
- ● ND filter: Neutral density (e.g., 3-stop ND) for smooth water effects or slower shutter speeds.
- ● Reflector: 5-in-1 (e.g., Neewer 43-inch) to bounce light onto shaded areas.
- ● Lens hood: UV filter or dedicated hood to minimize lens flare.
- ● Memory cards: 2x 128GB+ (fast Class 10/UHS-II) to avoid running out of space.
- ● Portable charger: 20,000mAh+ (e.g., Anker PowerCore) for long shoots.
- ● Cleaning kit: Microfiber cloth, lens pens, and compressed air for gear maintenance.
- ● Weather protection: Rain cover for camera/lens (e.g., Peak Design Rain Cover).
- ● Notebook/tablet: For sketching compositions or notes on lighting conditions.
- ● Drone (e.g., DJI Mini 2) for aerial shots of forests or tree canopies.
- ● GPS tagging device (e.g., Garmin inReach) for tracking locations.
- ● Portable LED panel (e.g., Godox SL-60W) for controlled lighting in overcast conditions.
- ● Field guide to spring blooms (e.g., National Audubon Society Field Guide) for plant ID.
How to capture spring’s tree canopy transformation
Spring reveals trees in their most dramatic light—here’s how to photograph that vibrant change.
🌿 Step 1: Scout Locations for Peak Color
Head out when buds first swell and leaves emerge—this is your golden window of 2-3 weeks before full foliage obscures the show. Look for trees with bright green new growth or pink/white blossoms against dark branches. Avoid overcast days; you want dappled sunlight to highlight textures.
I always check local parks or botanical gardens first—they often have mature specimens with striking canopies. If you’re photographing in your yard, focus on younger trees or those with weeping branches for dynamic shapes. Bring a notebook to sketch tree positions and lighting angles before the sun moves.
☀️ Step 2: Time Shots for Soft, Even Light
Shoot during the hour after sunrise or before sunset—this golden hour eliminates harsh shadows and makes colors pop. Avoid midday sun; it washes out greens and creates unflattering contrasts. If you must shoot later, use a polarizing filter to deepen blues and reduce glare on leaves.
Watch for morning dew on fresh spring leaves—it adds a magical glow. I like to include foreground elements like wildflowers or bark textures to frame the tree. For wide-angle shots, step back until the entire canopy fills the frame, then zoom in on individual branches for detail.
📸 Step 3: Adjust Settings for Spring’s Bright Contrasts
Set your camera to aperture priority mode (f/8-f/11) to keep the entire tree in focus from roots to treetops. Use ISO 100-400 to avoid graininess in bright conditions. For blossoming trees, try macro mode to capture delicate petals up close—just ensure the background stays blurred.
If your camera has a white balance preset for shade, use it to prevent greenish tints. For dramatic shots, underexpose slightly by ½ to 1 stop—spring’s vibrant colors look even more intense when pulled back in post. Always shoot in RAW format to preserve details for editing later.
✂️ Step 4: Edit for Crisp, Natural Vibrancy
Boost saturation by 10-15% to enhance spring’s natural colors, but avoid overdoing it—subtlety keeps the scene believable. Use selective sharpening on leaf edges and branch details while softening the sky slightly to draw focus to the tree. I like to add a slight vignette to darken edges and frame the canopy.
For black-and-white conversions, push contrast and clarity to highlight textures like bark and new leaves. If your shots look flat, try a split-toning effect—warm tones for blossoms, cool tones for greenery. Always compare edited images to the original to ensure you’ve preserved the tree’s natural beauty.
Tips & tricks for perfect spring tree photography
Spring’s fleeting beauty demands preparation—here’s how to elevate your shots from good to breathtaking.
Location Intelligence: Don’t just walk out the door—scout your subjects first. The 2-3 week window when buds swell is critical. I’ve missed peak color by days because I didn’t check a tree’s progress. Look for mature specimens with dramatic bark or weeping branches that create natural framing. Pro tip: Visit your location at the same time you plan to shoot to visualize the light patterns.
Golden Hour Strategy: That hour after sunrise or before sunset isn’t just a suggestion—it’s non-negotiable for spring photography. If you must shoot later, bring a polarizing filter to cut through haze and enhance those fresh green hues. I’ve ruined shots by waiting too late; the light changes faster than you think. For extra magic, arrive early to capture morning dew on leaves—it adds a dreamy quality that’s impossible to recreate.
Camera Settings That Matter: Spring’s bright contrasts demand precision. Stick to f/8-f/11 aperture to keep everything sharp, and keep ISO between 100-400 to avoid noise. The ½ to 1 stop underexposure mentioned in Step 3 might feel counterintuitive, but it preserves detail in those vibrant greens and pinks. Always shoot in RAW—you’ll thank yourself later when editing those tricky shadows.
Editing Secrets: When boosting saturation by 10-15%, focus on the leaf edges and branch details first. Use a slight vignette to draw eyes into the canopy, but don’t overdo it—subtlety is key. For black-and-white conversions, push contrast and clarity specifically on bark textures and new leaves to create depth. I’ve seen photographers ruin great shots by over-editing; compare your edited image to the original constantly.
Pro Tips for Photos Of Trees In Spring
- Spring’s fleeting beauty demands preparation—here’s how to elevate your shots from good to breathtaking.
- Location Intelligence: Don’t just walk out the door—scout your subjects first.
- Golden Hour Strategy: That hour after sunrise or before sunset isn’t just a suggestion—it’s non-negotiable for spring photography.
Frequently asked questions
Got questions about capturing the magic of spring’s tree transformation? Here are some answers to help you snap the perfect shots—no green thumb required!
When is the best time of day to photograph spring trees?
The golden hours—just after sunrise or before sunset—are ideal for soft lighting and vibrant colors. Overcast mornings also work well, diffusing harsh shadows. Avoid midday sun, which can wash out details or create unflattering contrasts. Pro tip: Shoot during blue hour (twilight) for moody, atmospheric shots!
How do I know when trees will be at their peak spring color?
Timing varies by tree species and location! Research your area’s phenology (e.g., cherry blossoms peak in late April, while maples may wait until May). Check local weather forecasts—cooler springs delay blooms, while warm spells can trigger early foliage. Use apps like National Phenology Network for real-time updates.
What’s the best camera setting for spring tree photos?
Start with aperture priority mode (A/Av) for sharp foliage (try f/8–f/11). Use a low ISO (100–400) to avoid grain, and slow shutter speeds (1/60s or slower) for waterfall or misty effects. For macro shots (like buds), switch to manual focus—autofocus struggles with tiny details!
Can I take great spring tree photos with just a smartphone?
Smartphones excel in bright conditions—just enable HDR mode to balance shadows/highlights. Clean your lens, use the portrait mode for bokeh effects, and download free editing apps like Snapseed or Lightroom Mobile for quick enhancements. Angle shots upward to emphasize height!
What if it rains or the weather ruins my photo plans?
Rainy days can add drama! Use a weather-sealed camera or a waterproof phone case to shoot through drizzle. Focus on reflections (puddles, wet leaves) or misty forests for ethereal vibes. Cloudy skies act as a natural diffuser—perfect for even lighting. Just avoid muddy lenses!
Wrapping up and next steps
Spring brings a breathtaking transformation to trees, turning ordinary canopies into vibrant masterpieces of nature’s artistry. 🌿 Whether you’re capturing the delicate blush of cherry blossoms or the lush greens of oak leaves, these photos are more than just snapshots—they’re a celebration of renewal and beauty.
Now that you’re equipped with the right tools and tips, it’s time to grab your camera and step outside!
Start small: head to a local park or your backyard and practice framing shots that highlight texture, color, and light. Share your favorites with friends or even on social media—your photos might inspire others to see the magic in spring’s fleeting moments. Happy shooting!