Pruning
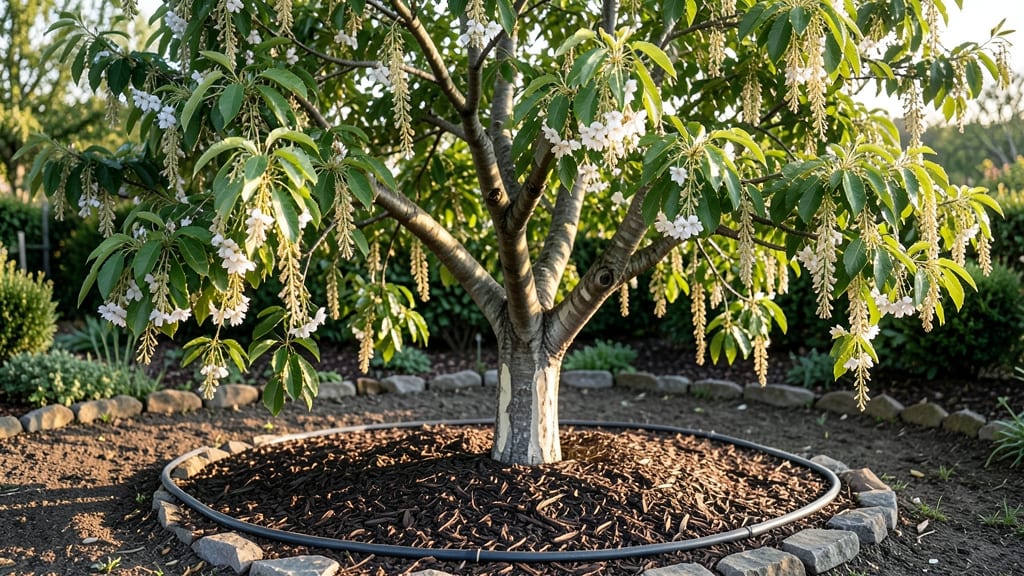
Caring for a cherry tree means balancing fruit production with long-term health—and pruning is where it all starts. 🌿 I’ve learned that skipping this step leads to crowded branches, fewer cherries, and a tree that struggles to support its own weight.
The key is timing: winter pruning for structure and summer pruning to shape growth, both done with sharp tools and a clear plan.
You’ll need basic tools—a pruning saw for thick branches, loppers for medium stems, and clean pruners for fine cuts—plus a pair of gloves to protect against thorns. Start by removing dead, diseased, or crossing branches first; these take priority over shaping.
The goal is to open the canopy to sunlight and air, which means fewer pests and better fruit set next season.
What you’ll end up with is a tree that produces more cherries per branch, stronger wood that resists storms, and a shape that fits your yard beautifully.
The first year after proper pruning, you’ll notice thicker stems and fewer broken limbs—signs the tree is investing energy where it matters most.
This approach works for both sweet and tart varieties, whether you’re growing in containers or full ground. The only difference is scale: dwarf trees need lighter pruning, while standard varieties can handle more aggressive shaping. Let’s get those branches looking intentional!
📚 In This Guide
- What you need
- Instructions
- Tips and common mistakes
- Wrapping up and next steps
What you need
- ● Pruning shears: Bypass pruners (for cuts under ½ inch) – 1 pair (look for sharp, ergonomic handles like Fiskars or Felco).
- ● Lopping shears: For branches ½ to 2 inches thick – 1 pair (e.g., Pruners Plus or Corona).
- ● Pruning saw: For branches 2+ inches thick – 1 saw (e.g., Fiskars X7 or Bahco).
- ● Gloves: Heavy-duty, cut-resistant (e.g., Mechanix or Wolverine) – 1 pair.
- ● Disinfectant: 70% isopropyl alcohol or bleach solution (1 part bleach to 9 parts water) – small bottle (to sterilize tools between cuts).
- ○ Pruning sealant: Optional but helpful for large cuts (e.g., Tanglefoot Tree Wound Pruning Sealer) – small tube.
- ● Safety gear: Long sleeves/pants (to protect from thorns).
- ● Safety glasses (if sawing thick branches).
- ● Extension pole: For high branches (e.g., 20-30 ft telescoping pole) – 1.
- ● Ladder: Sturdy, 3-sided (if tree is over 10 ft tall) – 1.
- ● Rope or harness: For large trees (if working at height).
- ● Marking spray: White or pink (to mark cuts) – small bottle.
- ● Notebook/pencil: To log pruning notes (e.g., branch sizes, dates).
How to prune a cherry tree for healthy growth and fruit
Here's the seasonal approach I've used to keep my cherry trees thriving for over a decade.
⏰ Step 1: Winter Pruning (Late Dormancy)
Schedule this pruning in late winter (February-March) while the tree is still dormant but buds have begun swelling. This is when you remove dead, diseased, or crossing branches—the foundation of a healthy tree. I start by examining each branch for signs of disease like cankers or fungal growth, cutting those out first with clean, sharp pruners.
Next, I remove any branches that cross or rub against others, as these create wounds that invite pests. Look for branches growing inward—they compete for sunlight and reduce fruit production. I aim to open up the center of the tree to improve airflow, which prevents fungal issues later. Always cut back to a bud or lateral branch rather than leaving a stub.
🌿 Step 2: Spring Pruning (After Flowering)
This second round happens 4-6 weeks after flowering, when the tree has set fruit but before new growth surges. Focus on light shaping rather than heavy cuts. I remove any water sprouts (fast-growing vertical shoots) and branches that grew too vigorously last season, as these steal energy from fruit production.
Thin out clusters of fruit if needed—overcrowded fruit leads to small, poor-quality cherries. I leave one strong fruit cluster per spur (the short branches where cherries form) to maximize size. Avoid pruning when the tree is under stress from drought or extreme weather; wait until conditions stabilize.
☀️ Step 3: Summer Maintenance (Light Trimming)
Mid-summer isn't about heavy pruning but corrective trimming. If you notice branches growing too aggressively or shading out others, make small cuts to redirect growth. I also remove any suckers (shoots growing from the base) immediately—they drain energy from the tree.
Watch for signs of stress like yellowing leaves or stunted growth. If you spot pests like aphids or borers, prune infected areas 1-2 inches below the damage to prevent spread. Thin out the canopy slightly if the tree looks too dense, ensuring sunlight reaches the center where most fruit forms.
✂️ Step 4: Fall Cleanup (Post-Harvest)
After harvesting cherries in late summer or early fall, remove any dead or diseased wood that became apparent during the season. This is also when I clean up the area around the tree—raking up fallen leaves and debris reduces overwintering pests. Sterilize your pruners with rubbing alcohol between cuts to prevent spreading disease.
I avoid heavy pruning in fall, as it stimulates new growth that won't harden off before winter. Instead, focus on sanitation: remove all pruned branches from the site and dispose of them in the trash (not compost) to prevent fungal spores from reinfecting the tree. This step keeps next year's fruit production strong.
Tips & tricks for perfect cherry tree pruning
Took me years to figure out these pruning secrets—here's how I keep my cherry trees thriving without the common mistakes.
Tool Prep: Always sterilize your pruners with rubbing alcohol between cuts, especially in Step 1 when removing diseased branches. I keep a small bottle in my tool belt and wipe them down after every 3-4 cuts. This prevents spreading fungal spores between branches, which is critical for keeping your tree healthy through all four seasons.
Bud Identification: When cutting back in late winter (Step 1), look for outward-facing buds on the branch you're keeping. These buds will grow into new branches that create more sunlight exposure for fruit production. I make my cuts just above the bud at a 45-degree angle to prevent water from pooling and causing rot.
Fruit Thinning Visual: In Step 2, when thinning fruit clusters, aim to space them about 6 inches apart. You'll notice the remaining cherries grow larger and more flavorful as they have room to develop. I use a small piece of twine to mark the ideal spacing on one branch, then replicate that pattern on others.
Seasonal Timing: The 4-6 week window after flowering (Step 2) is crucial—this is when the tree has set fruit but hasn't yet committed energy to new growth. Pruning too early risks losing potential fruit, while waiting too long stresses the tree. I set calendar reminders for when my local cherry trees typically bloom to time my pruning perfectly.
Pro Tips for Cherry Tree Care
- Took me years to figure out these pruning secrets—here's how I keep my cherry trees thriving without the common mistakes.
- Tool Prep: Always sterilize your pruners with rubbing alcohol between cuts, especially in Step 1 when removing diseased branches.
- Bud Identification: When cutting back in late winter (Step 1), look for outward-facing buds on the branch you're keeping.
Frequently asked questions
Got questions about keeping your cherry tree thriving? Here are some of the most common concerns—and their solutions—to help you prune like a pro year-round!
When is the best time to prune a cherry tree?
For sweet cherries, prune in late winter or early spring (before buds swell) to avoid silver leaf disease. Sour cherries can handle summer pruning too—just remove dead wood anytime. Avoid heavy pruning in fall, as wounds may not heal before winter.
How much can I prune off without harming the tree?
Never remove more than 25% of the canopy in one season. Light pruning (10–15%) annually is ideal for shaping and airflow. Over-pruning stresses the tree, reducing fruit production. Think of it like a haircut—small, regular adjustments work best!
Why are my cherry tree’s leaves curling or dropping?
Curling or dropping leaves often signal pests (aphids, mites) or disease (bacterial canker, silver leaf). Check for sticky residue (aphids) or dark spots (fungus). Prune infected branches 6+ inches below damage and sterilize tools with rubbing alcohol. For pests, use horticultural oil in early spring.
Will pruning increase my cherry harvest?
Pruning improves fruit quality by boosting sunlight and airflow, reducing disease and encouraging larger, sweeter cherries. Focus on removing water sprouts and crossing branches. Just avoid over-thinning—leave enough leaves to feed the tree!
Can I prune a young cherry tree the same way as a mature one?
No—young trees (under 3 years) need structural shaping to establish a strong framework. Remove competing leaders and weak branches early. Mature trees (5+ years) benefit from renewal pruning to rejuvenate growth. Always prune 1/4-inch above a bud for clean cuts.
Pro Tip: Label your cuts!
Use colored tape or paint to mark branches you plan to remove. This helps you visualize the tree’s shape before making final cuts—especially useful for complex pruning tasks. Safety first!
Wrapping up and next steps
Caring for your cherry tree with year-round pruning isn’t just about trimming branches—it’s about nurturing a thriving, fruit-bearing beauty that rewards you for years to come! 🌳 With the right tools, timing, and techniques, you’ll encourage strong growth, better airflow, and those juicy, sweet cherries you’ve been dreaming of.
Remember, consistency is key, so check your tree regularly and adjust your approach as it matures.
Now that you’re armed with expert tips, roll up your sleeves and get pruning! Start with a fresh assessment of your tree this season, and watch as it flourishes with every careful cut. Happy pruning—and happy harvesting! 🍒✨