Trees
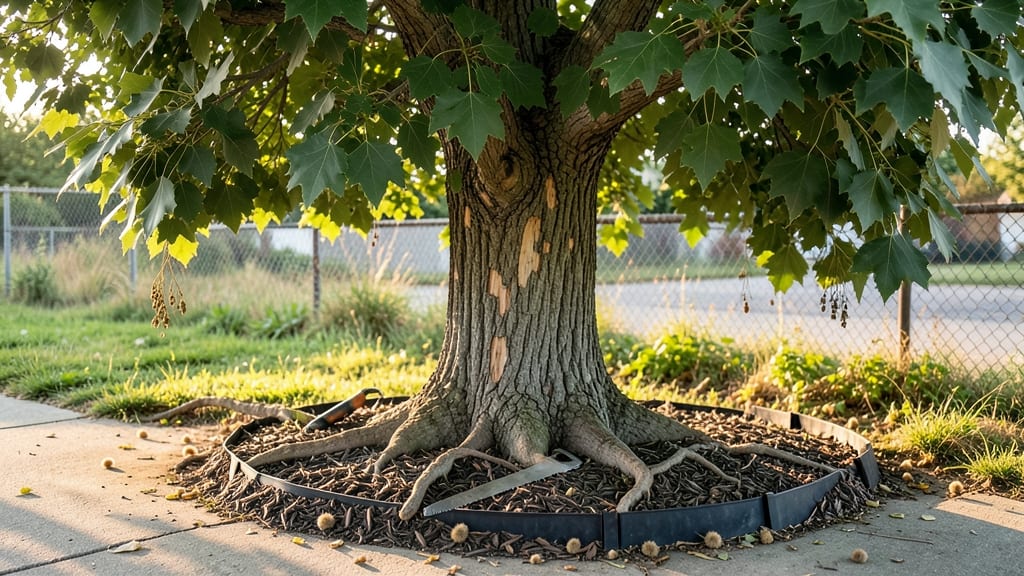
Stopping neighbor tree roots from invading your garden doesn’t have to mean a fight—it’s about smart barriers and open communication. 🌳 I’ve seen roots lift sidewalks and choke out prized plants, but the right approach keeps both sides happy while protecting your garden.
The key is choosing physical solutions that work with the tree’s natural growth, not against it.
You’ll need a few simple tools: heavy-duty landscape fabric, metal edging, or even buried plastic root barriers (like those used for invasive species). These create a gentle boundary that redirects roots downward instead of letting them creep into your flower beds.
The best part? These methods are invisible once installed, so your yard stays clean while the tree stays healthy.
Within weeks, you’ll notice fewer roots popping up in your garden beds, and your plants will have the space they need to thrive. The barrier method also prevents future headaches—no more digging up invasive roots or arguing with neighbors.
Plus, it’s a one-time fix that lasts for years, saving you from seasonal battles.
Before you dig, check local laws—some areas regulate tree work, especially on shared property lines. A quick chat with your neighbor (with photos of the damage) often opens the door to collaboration. Together, you can find a solution that works for both of you—and your garden will thank you.
📚 In This Guide
- What you need
- Instructions
- Tips and common mistakes
- Wrapping up and next steps
What you need
- ● Physical Barriers: 1–2 rolls of root barrier fabric (HDPE or PVC, 30–60 mil thickness, 3–4 ft wide)
- ● OR corrugated metal or plastic sheets (1/4"–1/2" thick, 2–3 ft wide)
- ● Digging & Installation: Shovel or trenching tool (for digging a 12–18" deep trench)
- ● Post-hole digger (if working with deeper barriers)
- ● Measuring tape (25 ft)
- ● Stakes and landscape staples (for securing fabric)
- ● Protection & Finishing: Gloves (heavy-duty, cut-resistant)
- ● Safety goggles
- ● Landscape fabric or mulch (to cover the barrier top)
- ○ Optional: Root killer gel (for localized treatment, if needed)
- ● Wheelbarrow (for hauling soil/debris)
- ● Level (to ensure barrier is straight)
- ● Spray paint (to mark trench lines)
- ● Water (to dampen soil for easier digging)
How to install physical barriers against neighbor tree roots
Here's the straightforward approach I've used to protect foundations and sidewalks.
🪴 Step 1: Assess the Root Spread and Damage
Start by identifying the active root zones. Look for roots emerging within 12-18 inches of the tree trunk—they're the most aggressive. Walk around your property and mark where roots lift sidewalks, crack foundations, or disrupt drainage. I use white spray paint to outline these areas since they'll guide where to install barriers.
Real talk: if the tree is mature and established, you're dealing with a decades-old root system. The barrier won't stop all roots, but it will redirect growth and prevent new damage. Focus on areas where roots are actively pushing up or expanding.
✂️ Step 2: Choose and Install Root Barriers
For most residential situations, I recommend HDPE plastic root barriers that are 30-60 mils thick and 2-3 feet deep. These are flexible, durable, and won't degrade like metal or wood. Cut them to fit your marked areas, leaving 6-12 inches of overlap at corners and edges to prevent roots from slipping underneath.
Dig a trench along your marked lines using a post-hole digger or trenching tool. The trench should be 1-2 inches wider and deeper than the barrier to allow for backfilling. Tap the barrier into place gently—don't force it. For extra security, I use landscape staples to secure the barrier to wooden stakes every 3 feet along the trench.
💧 Step 3: Backfill and Protect the Barrier
Backfill the trench with the excavated soil, tamping it down firmly every 6 inches to eliminate air pockets. Avoid compacting too hard, though—you want roots to hit resistance, not a solid wall. For added protection, I cover the top 6 inches of soil with landscape fabric before replacing the ground cover or mulch. This prevents roots from finding weak points where the barrier meets the soil surface.
Here's the thing—roots will still grow toward the barrier but won't penetrate it. Over time, you'll see new root growth pushing against the barrier instead of lifting your sidewalk. This takes patience, but within 1-2 growing seasons, you'll notice a significant reduction in damage.
☀️ Step 4: Monitor and Maintain the Barrier
Check the barrier zone every 3-4 months during the growing season. Look for roots pushing against the barrier or trying to grow over it. If you spot roots climbing the barrier, trim them back with pruning shears—this encourages the tree to redirect energy downward where the barrier is effective.
If you notice the barrier itself shifting or soil settling around it, top off with additional soil or mulch. Over time, the barrier may need reinforcement, especially in high-traffic areas where soil compaction occurs. I've had barriers last 10+ years with minimal maintenance, but they're not permanent—eventually, the tree may outgrow even the deepest barriers.
Tips & tricks for effective tree root barriers
These practical insights will help you get the most out of your root barrier installation—and avoid common pitfalls that can compromise effectiveness.
Material Selection: HDPE plastic is my go-to because it's flexible and won't degrade like metal or wood, but don't overlook galvanized steel for extremely aggressive roots. The 30-60 mil thickness specified in Step 2 is perfect for most situations—thinner barriers may bend under pressure, while thicker ones can be overkill for smaller trees. For large mature trees, consider 40-60 mil for maximum durability.
Trench Preparation: The 1-2 inches wider and deeper requirement in Step 2 isn't just about fit—it creates space for proper compaction. I've seen barriers fail when installed too tightly, so use a level to ensure consistent depth. For clay-heavy soils, add a 1-inch sand layer at the bottom of the trench to improve drainage and prevent water pooling against the barrier.
Monitoring Strategy: Those 3-4 month checks during growing seasons are crucial, but don't wait until you see visible damage. I recommend marking the barrier location with stakes every 6 feet to create reference points for future inspections. This helps you track root growth patterns over time and identify exactly where new pressure is building.
Long-Term Maintenance: The 10+ year lifespan mentioned in Step 4 assumes proper installation, but high-traffic areas need extra attention. After heavy foot traffic or vehicle movement, I top off the barrier zone with 1-2 inches of fresh mulch to maintain soil integrity. This simple step prevents soil settling that could create gaps around the barrier edges.
Pro Tips for Stop Neighbor'S Tree Roots
- These practical insights will help you get the most out of your root barrier installation—and avoid common pitfalls t...
- Material Selection: HDPE plastic is my go-to because it's flexible and won't degrade like metal or wood, but don't ov...
- Trench Preparation: The 1-2 inches wider and deeper requirement in Step 2 isn't just about fit—it creates space for p...
Frequently asked questions
Got questions about stopping neighbor tree roots without causing harm?
Here are answers to the most common concerns—so you can act with confidence and care.
Can I stop tree roots from damaging my property without harming the tree?
Physical barriers like root barriers (made of plastic, metal, or concrete) redirect roots away from foundations, sidewalks, or septic systems. Just ensure the barrier is at least 2 feet deep and installed before roots spread aggressively. Avoid cutting roots—it stresses the tree and can lead to long-term decline.
What’s the best time of year to install a root barrier?
The ideal window is late fall or early spring, when trees are dormant. This minimizes stress on the tree and allows roots to adjust gradually. Avoid installing during extreme heat or frost, as it can damage the barrier or harm the tree’s root system.
How much does a professional root barrier installation cost?
Costs vary by material and project size, but here’s a rough estimate:
Material
Cost Range (per linear foot)
Plastic (HDPE)
$5–$15
Metal (galvanized steel)
$10–$25
Concrete
$15–$30+
DIY kits start around $2–$5 per foot, but professional installation ensures proper depth and placement. Always check local regulations—some areas require permits for barriers near property lines.
What if the roots keep coming back after I install a barrier?
If roots persist, they may have grown under the barrier or found a weak spot. Check for gaps or improper sealing, and consider:
- Extending the barrier deeper or wider.
- Adding a chemical root inhibitor (use sparingly—only as a last resort).
- Consulting an arborist to assess tree health and adjust the barrier.
Pro Tip: Monitor the area for 6–12 months post-installation. Roots may take time to adjust their growth pattern!
Do I need my neighbor’s permission to install a root barrier?
It depends on your location! In most cases, you’ll need to:
- Notify your neighbor (polite communication goes a long way!).
- Check local laws—some areas require shared-cost agreements if the barrier affects their property.
- Document the issue (photos of damage) in case of disputes.
If the tree is on their property but encroaching on yours, a tree mediator or local ordinance can help clarify rights.
Wrapping up and next steps
Dealing with invasive neighbor tree roots doesn’t have to mean damage or conflict—physical barriers like root barriers, gravel trenches, or mulch rings offer practical, tree-friendly solutions! 🌳✨ By choosing the right method for your situation and following best practices, you can protect your property while keeping your neighbor’s tree healthy and happy.
The key is patience and precision, so don’t hesitate to start small and scale up as needed.
Ready to take action? Start by assessing your property’s needs—whether it’s a simple mulch ring or a deeper root barrier—and gather the right tools. With the right approach, you’ll enjoy peace of mind (and a root-free yard) in no time!