Trees
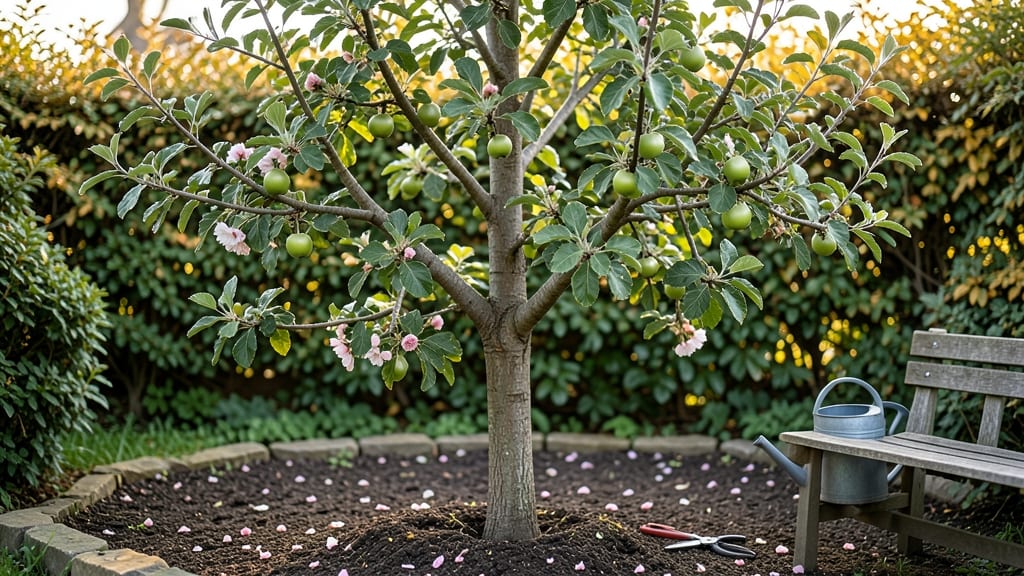
Understanding the stages of apple trees is the secret to growing a tree that produces fruit for decades—not just a few seasons. I’ve watched my own apple trees go from tiny saplings to heavy-branched giants, and the difference between neglect and intentional care shows up in the first five years.
The right pruning at the right time can turn a scraggly juvenile tree into a sturdy, fruit-bearing powerhouse.
Each stage demands different care: seedlings need gentle handling, juvenile trees benefit from structural pruning, and mature trees reward patience with harvests. You’ll learn to spot the subtle signs—like flower buds forming in late winter or leaves turning papery in autumn—that tell you exactly what your tree needs.
The biggest mistake? Assuming apple trees grow on their own. They don’t. They need your attention at every step.
By the time you reach the fruiting stage, you’ll be harvesting bushels of crisp, flavorful apples—if you’ve avoided the common pitfalls like over-pruning young trees or ignoring soil health. The payoff isn’t just the fruit, but the satisfaction of watching a tree you’ve nurtured from seedling to maturity.
Let’s break down each phase so you can do it right.
Whether you’re starting with a bare-root sapling or pruning a tree that’s already bearing fruit, this blueprint keeps your apple tree thriving for generations. The key is timing: water deeply in early summer, fertilize in late winter, and prune when the tree is dormant.
Small efforts now mean decades of harvests later.
📚 In This Guide
- What you need
- Instructions
- Tips and common mistakes
- Wrapping up and next steps
What you need
- ● Apple Tree: 1 bare-root sapling (dwarf, semi-dwarf, or standard size) or 1 container-grown tree (3–5 gallons, depending on variety)
- ● Planting Supplies: 1 shovel (for digging holes, 12–18" deep)
- ● 1 garden fork (for loosening soil)
- ● 1 wheelbarrow (for mixing soil amendments)
- ● 2–3 gallons of high-quality potting mix (for containers) or 1 50-pound bag of well-draining garden soil (for in-ground planting)
- ● 1 slow-release fertilizer (10-10-10 or organic options like composted manure)
- ● 1 mulch (3–4" of wood chips, straw, or pine needles)
- ● Pruning & Maintenance: 1 pair of pruning shears (for small branches, sharp and sterilized)
- ● 1 pruning saw (for thicker branches, 8–10" blade)
- ● 1 rubbing alcohol (70% or higher, for sterilizing tools)
- ● 1 tree tie or stretchy fabric strips (for supporting young trees)
- ● Watering & Protection: 1 hose with adjustable nozzle or drip irrigation system
- ● 1 watering can (for container trees, 1–2 gallons)
- ● 1 tree guard or wire cage (to protect from pests like deer or rabbits)
- ● Soil Test Kit: Check pH and nutrient levels (ideal range: 6.0–7.0).
- ● Mycorrhizal Fungi: Boosts root growth (available as powder or granules).
- ● Pollination Aids: If growing a single variety, hand-pollinate with a paintbrush in spring.
- ● Tree Stake & Guy Wires: Extra support for windy areas (use 3–4 stakes for mature trees).
- ● Organic Pest Control: Neem oil, insecticidal soap, or copper spray for aphids/mites.
Understanding the year-round life cycle of apple trees
Here's how apple trees grow through each season—what to expect and how to support them.
🌱 Step 1: Dormancy and Winter Preparation (Late Fall to Early Spring)
Apple trees enter dormancy as temperatures drop below 40°F, conserving energy until spring. You'll notice the leaves have already fallen, and the tree looks bare. This is normal—don't prune now, as winter wounds take longer to heal.
If you live in a region with harsh winters, apply 4-6 inches of mulch around the base (but not touching the trunk) to insulate roots. This protects against freezing temperatures and helps retain moisture when spring arrives. Avoid over-mulching, which can suffocate the tree.
Here's the thing—this dormant phase is when the tree sets buds for next year's fruit. Cold exposure (typically 200-1,000 hours below 45°F) is essential for proper flowering. If you're in a mild climate, you might need to chill potted trees artificially to ensure good fruit set.
☀️ Step 2: Bud Break and Early Spring Growth (March to April)
Watch for swollen buds in early spring—this signals the tree is waking up. Bud break occurs when daytime temperatures consistently reach 50-55°F. You'll see tiny green tips emerge, followed by clusters of pink or red blossoms within 2-4 weeks.
This is the time to prune—remove dead, crossing, or diseased branches before the tree puts energy into new growth. Thin out crowded branches to improve airflow, which reduces fungal diseases like apple scab. Prune on a dry day to minimize sap bleeding.
Real talk: Don't over-prune. Aim to remove no more than 25% of the tree's canopy in one season. You'll see new leaves unfurl within 7-10 days of pruning, signaling the tree is actively growing again.
🌿 Step 3: Flowering and Fruit Set (April to May)
Apple blossoms typically last 10-14 days, during which bees play a crucial role in pollination. You'll notice the tree covered in delicate white or pink flowers, followed by tiny green fruitlets forming within 4-6 weeks. Not all flowers will set fruit—this is normal.
Thin fruitlets when they're pea-sized to improve fruit quality. Leave 6-8 inches between remaining fruits to ensure proper size and reduce disease pressure. Remove any misshapen or damaged fruitlets immediately to redirect the tree's energy.
Here's where it gets fun—watch for signs of pests like codling moths or diseases like powdery mildew. Early intervention (like applying horticultural oil or fungicide) prevents small issues from becoming major problems later in the season.
✂️ Step 4: Summer Growth and Maintenance (June to August)
Summer is all about steady growth. You'll see fruit rapidly increase in size, and the tree may produce a second flush of leaves if pruned correctly. Water deeply once a week during dry spells, aiming for 1-1.5 inches of water per week. Drip irrigation is ideal to keep foliage dry and reduce disease risk.
Monitor for pests like aphids or mites, which thrive in hot, dry conditions. A strong spray of water can knock them off the tree, or use neem oil as a natural deterrent. Avoid chemical sprays during flowering or fruit development unless absolutely necessary.
This is also the time to fertilize if needed. Apply a balanced 10-10-10 fertilizer in early summer, following package instructions. Over-fertilizing now can lead to excessive vegetative growth at the expense of fruit quality.
🍎 Step 5: Harvest and Fall Preparation (September to November)
Harvest time arrives when apples reach their full color and firmness. You'll know they're ready when they separate easily from the tree with a slight twist. Taste a few—ripe apples will have developed their full flavor, while unripe ones may be tart or mealy.
After harvest, remove all fallen fruit and debris from the ground to prevent pests and diseases from overwintering. Rake up leaves and dispose of them in the trash (not compost) to reduce fungal pressure next year.
Apply a final round of mulch and consider spraying the tree with a copper fungicide to protect against winter diseases. This is also the time to plan next year's pruning strategy—sketch a rough outline of the tree's structure to guide your winter cuts.
Tips & tricks for perfect apple tree growth through the seasons
Mastering the year-round care of apple trees means understanding the subtle cues that guide each growth phase.
Cold Exposure Matters: The 200-1,000 hours below 45°F during dormancy are non-negotiable for proper flowering. In mild climates, place potted trees in an unheated garage during winter to accumulate necessary chilling hours. I learned this the hard way after years of poor fruit set with a tree that never got cold enough.
Pruning Precision: When you're thinning branches in Step 2, look for "water sprouts"—those vigorous vertical shoots growing from the trunk or limbs. These compete with fruit production and should be removed first. Use sharp pruners to make clean cuts at a 45-degree angle just above an outward-facing bud.
Fruit Thinning Strategy: During Step 3, when thinning pea-sized fruitlets, focus on spacing rather than quantity. Leave the largest, healthiest-looking fruitlets spaced 6-8 inches apart. This prevents overcrowding, which leads to smaller apples and increased disease risk. Think of it as giving each apple room to grow into its best self.
Seasonal Watering Wisdom: The 1-1.5 inches of water per week in Step 4 is a guideline, not a strict rule. In summer heat, you might need to water every 3-4 days, while fall typically requires less. Check soil moisture by pushing your finger 2 inches into the ground—if it's dry, that's your cue to water.
Pro Tips for Stages Of Apple Trees
- Mastering the year-round care of apple trees means understanding the subtle cues that guide each growth phase.
- Cold Exposure Matters: The 200-1,000 hours below 45°F during dormancy are non-negotiable for proper flowering. In mil...
- Pruning Precision: When you're thinning branches in Step 2, look for "water sprouts"—those vigorous vertical shoots g...
Frequently asked questions
Got questions about nurturing your apple tree through every stage? You’re not alone! Here are some of the most common queries—plus clear, actionable answers to keep your tree thriving from dormancy to harvest.
How long does it take for an apple tree to bear fruit after planting?
Apple trees typically take 3 to 5 years to bear fruit after planting, depending on the variety and growing conditions. Dwarf varieties may fruit sooner (2–3 years), while standard trees can take up to 7 years. Patience is key—focus on proper care during the early stages to speed up fruiting!
What should I do if my apple tree loses all its leaves in winter?
Don’t panic! Leaf drop in winter is normal—apple trees are deciduous and shed leaves to conserve energy. However, if leaves turn brown or fall before winter (early autumn), it could signal stress (e.g., pests, disease, or drought). Prune dead branches in late winter and monitor for signs of trouble in spring.
Can I grow an apple tree from a store-bought apple?
While it’s possible to sprout an apple from a seed, the tree likely won’t produce fruit true to the parent variety—it could take 10+ years to fruit, and the apples may be small or inedible. For reliable results, opt for grafted trees from nurseries, which guarantee variety and faster fruiting.
How do I know if my apple tree is getting enough sunlight?
Apple trees need 6–8 hours of full sun daily. Signs of insufficient light include:
- Slow growth or small leaves
- Fewer (or no) blossoms in spring
- Leggy, weak branches
Why are my apple tree’s leaves curling or spotted?
Curling or spotted leaves often signal pests (aphids, mites) or diseases (apple scab, powdery mildew). Act fast:
- Inspect the undersides of leaves for pests.
- Apply neem oil or horticultural soap for mild infestations.
- For fungal issues, use copper-based fungicides in early spring.
When is the best time to prune an apple tree?
The ideal time is late winter or early spring (just before buds swell), but you can also prune in summer to remove suckers or water sprouts. Avoid heavy pruning in fall—it can stimulate new growth that’s vulnerable to frost. Always use sterilized tools to prevent disease spread!
Wrapping up and next steps
Understanding the stages of apple trees empowers you to nurture a thriving orchard—from sapling to fruit-bearing giant! 🌱 Each phase, from dormancy to harvest, offers a chance to fine-tune care for bigger yields.
Now that you’re equipped with the year-round blueprint, it’s time to roll up your sleeves and watch your hard work bloom into crisp, juicy apples.
Ready to take the next step? Start small: plant a tree, track its progress, and adjust care based on its unique needs. Whether you’re a seasoned gardener or a curious beginner, every apple tree begins with a single seed—and your journey starts today! 🍏✨