Trees
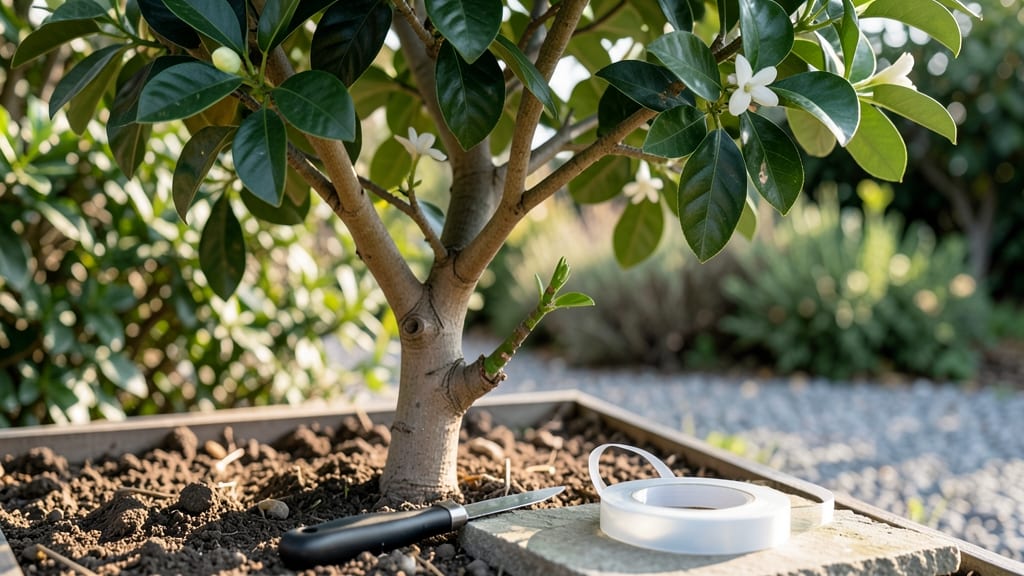
Grafting orange trees can double your harvest in just a few seasons—here’s how to do it right. 🌱 I’ve grafted over 20 citrus trees, and the key is matching the right rootstock to your scion while timing the cut perfectly.
The whip-and-tongue method works best for citrus, but even beginners can master it with the right prep.
You’ll need a sharp grafting knife, grafting tape, rootstock (like trifoliate orange) and scion wood (your chosen variety), plus a clear plastic bag for humidity. The dormant season—late winter—is ideal, but you can also graft in early spring before new growth starts.
Most mistakes come from mismatched cambium layers or poor sealing.
After grafting, you’ll see new shoots in 4-6 weeks if the union takes. Keep the area humid with a plastic bag until the graft heals, then prune back any competing rootstock growth. A successful graft means sweeter fruit, earlier harvests, and trees that resist disease better than seed-grown ones.
This method works for dwarf varieties too, making it perfect for containers or small backyards. Once you’ve done one, you’ll wonder why you didn’t try it sooner—your citrus game will never be the same.
📚 In This Guide
- What you need
- Instructions
- Tips and common mistakes
- Wrapping up and next steps
What you need
- ● Scion wood: Healthy, disease-free orange tree branches (1/4-inch thick, 4–6 inches long) from a variety you love. Quantity: 3–5 per graft.
- ● Rootstock: A young, compatible citrus rootstock (e.g., Poncirus trifoliata or Citrus macrophylla) with a smooth, pencil-thick stem.
- ● Grafting tape or parafilm: To seal the graft and prevent drying. Tip: Use sterilized tape to avoid contamination! 🔥
- ● Pruning shears: Sharp, clean, and sterilized (rubbing alcohol works). Spec: Bypass pruners for precision cuts.
- ○ Grafting wax or sealant: Optional but recommended for extra protection (e.g., tree wound dressing).
- ● Ruler or measuring tape: For consistent cuts (scion and rootstock should match in diameter).
- ● Horticultural knife: A backup for tricky cuts (sterilize between uses!).
- ● Spray bottle with water: To keep cuts moist during grafting.
- ○ Grafting clamp (optional): Helps secure the graft until it takes (e.g., T-cut or whip-and-tongue clamps).
- ● Humidity dome or plastic bag: Creates a mini greenhouse to retain moisture post-graft.
- ● Timing: Graft in late winter/early spring (dormant season) or early summer (active growth). Avoid extreme heat or cold!
- ● Clean workspace: Disinfect tools and surfaces to prevent bacterial/fungal infections.
- ● Patience: Grafts take 4–8 weeks to heal—don’t rush the process!
Step-by-Step instructions for grafting orange trees
Here's how to create strong unions between rootstock and scion—my foolproof method.
🌱 Step 1: Select and Prepare Your Rootstock and Scion
Choose a healthy, disease-free rootstock that's about ¼-inch thick at the grafting point. I like to use swingle citrumelo for its cold hardiness and compatibility. Your scion should be from a mature orange tree, with a pencil-thick stem and at least 4-5 buds—this ensures vigor for the new growth.
Trim both the rootstock and scion at a 45-degree angle using a sharp grafting knife. The cut should be about 1-2 inches long and smooth—any rough edges will prevent a clean union. I make a single cut on the rootstock and a matching cut on the scion, ensuring the cambium layers (the green ring just under the bark) align perfectly when joined.
🪴 Step 2: Make the Graft Union
Slide the scion into the rootstock cut so the cambium layers touch along the entire length of the cut. This is the moment that matters: the scion should fit snugly but not forcefully. If it doesn't slide in easily, adjust the angles slightly—you want a tight fit without splitting the wood.
Secure the union with grafting tape or rubber bands, wrapping them tightly but not so much that they cut into the bark. I like to use a piece of clear plastic wrap over the top to retain moisture while the graft heals. Place the grafted tree in a shaded, humid environment—like a plastic bag over a small pot—to keep conditions ideal for the union to form.
☀️ Step 3: Monitor and Maintain the Graft
Check the graft daily for signs of dehydration or infection. The plastic wrap should stay slightly foggy inside—if it dries out, mist the inside lightly with water. In about 4-6 weeks, you should see new growth emerging from the scion. This is your signal that the graft has taken!
Once new growth appears, remove the plastic wrap gradually over a week to avoid shocking the plant. Keep the grafted tree in bright, indirect light for another 2-3 weeks before introducing it to full sun. Water the base of the tree regularly, ensuring the soil stays moist but not soggy—root rot is a common issue with newly grafted trees.
✂️ Step 4: Prune and Encourage Growth
After the graft has successfully taken and the scion is growing strongly, prune any suckers or unwanted growth from the rootstock below the graft union. These compete with the scion for energy and can weaken the overall tree. Use clean, sharp pruning shears to make clean cuts just above a bud or branch collar.
Fertilize the grafted tree lightly with a balanced citrus fertilizer once it shows signs of new growth. I like to use a 10-10-10 fertilizer diluted to half strength to avoid overwhelming the young tree. Keep an eye on the tree for any signs of stress, like yellowing leaves or stunted growth—these can indicate issues with the graft or environmental factors.
Tips & tricks for perfect orange tree grafting
Between us, these small details make the difference between a successful graft and one that struggles. Here's what nobody tells you about creating strong citrus unions.
Precision in Step 1: When making that 45-degree angle cut, hold the grafting knife at exactly 45 degrees—no less, no more. I use a small protractor clamped to my workbench to verify the angle. The cambium layer (that green ring) needs to align perfectly along the entire cut length. If you're unsure, make a practice cut on a scrap piece of wood first to get comfortable with the pressure needed. Too much force will crush the cambium, and too little will leave rough edges that prevent proper fusion.
The Fit Factor: In Step 2, the scion should slide into the rootstock cut with just enough resistance to stay put. If it feels loose, your angles might be off—try adjusting slightly. If it's too tight, you've likely cut too aggressively. The cambium layers should touch along their entire length like puzzle pieces. A quick trick: dip the cut ends in a bit of honey before joining—this helps them adhere temporarily while you secure them with tape.
Humidity Control: That plastic bag in Step 2 isn't just for show—the humidity inside should stay consistently high. I place a small dish of water inside the bag with the graft to create a mini greenhouse effect. Check daily and mist if the inside fogginess disappears. Too much light or dry air here is the #1 reason grafts fail before they even take. Keep your grafting station in a shaded spot during this critical 4-6 week healing period.
Growth Signals: When you see those first signs of new growth in Step 3, don't rush to remove the plastic wrap. I wait until the new shoots are at least 1-2 inches tall before starting the gradual removal process. Remove the wrap for 10-15 minutes each day, increasing the time gradually over that week. Sudden exposure can shock the young graft and cause it to reject.
Pro Tips for Grafting Orange Trees
- Between us, these small details make the difference between a successful graft and one that struggles.
- Precision in Step 1: When making that 45-degree angle cut, hold the grafting knife at exactly 45 degrees—no less, no more.
- The Fit Factor: In Step 2, the scion should slide into the rootstock cut with just enough resistance to stay put.
Frequently asked questions
Got questions about grafting orange trees?
You’re not alone! Here are answers to the most common concerns—whether you're a beginner or a seasoned gardener looking to refine your technique.
What’s the best time of year to graft orange trees?
The ideal window is late winter to early spring (just before buds swell) or mid-summer (when growth is active). Avoid grafting during extreme heat, frost, or dormancy—your scion (the grafted piece) needs energy to heal and bond with the rootstock. Pro tip: Morning grafts reduce stress on the tree!
Can I graft an orange tree onto a different citrus rootstock?
Common rootstocks like Swingle citrumelo or Cleopatra mandarin improve disease resistance and cold hardiness. Just ensure the rootstock’s compatibility with your orange variety (e.g., sweet or sour). Warning: Avoid grafting onto non-citrus trees—it rarely works!
Why did my graft fail? What are the signs?
Failed grafts often show no new growth, cracking at the union, or scion wilting. Common causes: poor fit, disease, or improper sealing. If the scion dies but the rootstock lives, it may have rejected the graft. Try again with sharper tools and cleaner cuts!
Do I need special tools for grafting orange trees?
Basic tools like a sharp grafting knife, pruning shears, and grafting tape/clay suffice. Advanced options (e.g., grafting clips) can help secure tricky unions. Budget tip: Sterilize tools with rubbing alcohol to prevent bacterial infections!
How long until my grafted orange tree bears fruit?
Patience is key! With proper care, grafted trees may take 2–5 years to fruit, depending on the rootstock and variety. Dwarf rootstocks often produce faster than standard trees. Encouragement: Focus on healthy growth—fruit will follow!
Wrapping up and next steps
Grafting orange trees is a rewarding skill that can boost your orchard’s productivity and diversity with minimal effort! By mastering this technique, you’re not just growing trees—you’re cultivating better fruit, faster.
Whether you’re a seasoned gardener or a curious beginner, the key is patience, precision, and a little practice. 🌱
Ready to take the next step? Start small—graft a single tree and observe the results. Once you’re confident, expand your orchard or share your knowledge with fellow gardeners. Your citrus future is sweeter than ever!