Pruning
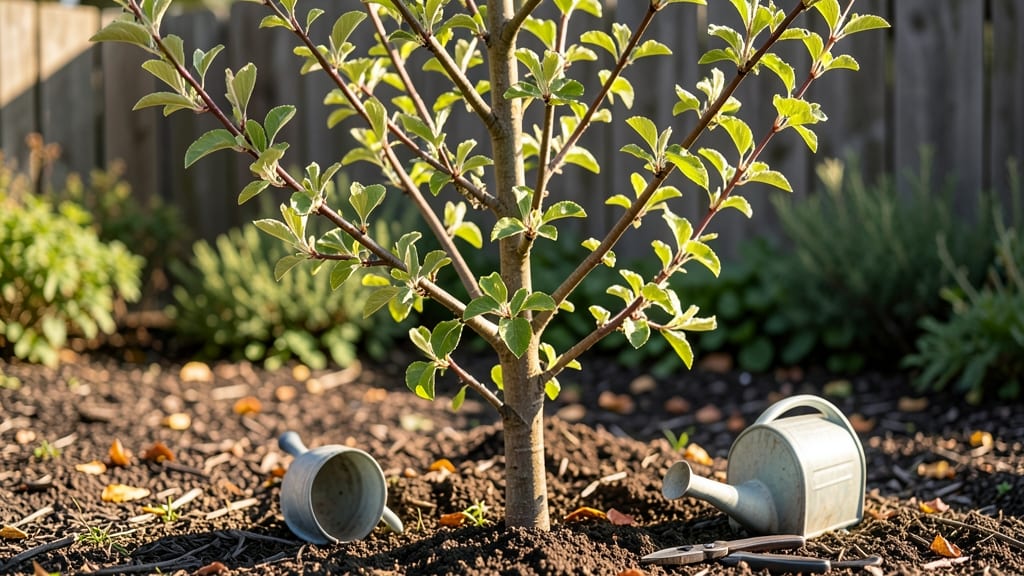
Apple tree new growth starts with a single cut—but the right timing and technique make all the difference. ✂️ I’ve watched my own trees go from leggy and weak to sturdy, fruit-bearing powerhouses after mastering this one spring ritual.
The key isn’t just pruning; it’s understanding how to coax the tree into putting energy where you want it.
Most gardeners prune too late or too aggressively, which stunts growth instead of encouraging it. You’ll want to time your cuts for just after the last frost but before buds swell—usually late March to early April in most zones.
A sharp pair of pruners and a clear day are all you need, plus a little patience to observe how the tree responds over weeks. The goal is to open up the canopy so sunlight reaches the center, which is where those juicy new shoots will appear.
What you’ll end up with is a tree that looks like it belongs in an orchard, not a backyard. Branches thicken, leaves turn a vibrant green, and within a season, you’ll see clusters of blossoms forming where there were none before.
The best part? You’ll notice fewer diseases and pests clinging to crowded branches, and the fruit that does develop will be larger and sweeter because the tree isn’t competing with itself for resources.
This method works for both young saplings and mature trees, though older varieties might need a gentler touch. The same principles apply whether you’re growing a dwarf variety in a container or a standard tree in the ground. Let’s get those branches growing strong!
📚 In This Guide
- What you need
- Instructions
- Tips and common mistakes
- Wrapping up and next steps
What you need
- ● Pruning shears: Bypass pruners (for cuts under ½ inch thick) – 1 pair (look for sharp, rust-resistant stainless steel blades).
- ● Loppers: Bypass or anvil type (for cuts ½ to 2 inches thick) – 1 pair (extendable handles help with taller branches!).
- ● Pruning saw: Curved-tooth or folding saw (for branches thicker than 2 inches) – 1 saw (choose a lightweight, durable model).
- ● Gloves: Heavy-duty, cut-resistant (to protect hands from thorns and rough bark) – 1 pair (gardening or pruning-specific gloves work best).
- ● Disinfectant: 70% rubbing alcohol or pruning sealant (to sterilize tools between cuts and prevent disease spread) – small bottle.
- ● Rope or twine: Nylon or natural fiber (for temporary support of heavy branches) – 1 roll (50+ feet).
- ● Tarp or drop cloth: (to collect fallen debris and protect the ground) – 1 medium-sized tarp.
- ● Weather check: Prune on a dry, calm day (avoid rainy or windy conditions to prevent sap splatter and tool rust).
- ● Tree inspection: Identify dead, diseased, or crossing branches before starting (mark them with flags or tape if needed).
- ○ Safety gear: Safety glasses (to shield eyes from debris) – optional but recommended.
- ○ Cleanup supplies: Garden bags or compost bin (for disposing of pruned branches) – optional.
- ● Ladder or step stool: (if your tree is taller than 6 feet) – 1 sturdy ladder (ensure it’s rated for your weight and height).
How to encourage vigorous apple tree new growth after pruning
Here’s how I transform dormant apple branches into lush, fruit-bearing growth—step by step.
🌱 Step 1: Time Your Pruning for Maximum Regrowth
Prune apple trees during late winter or early spring, just before buds swell but before leaves appear. This timing ensures you’re cutting back dead wood while stimulating new growth from healthy buds. I always check the buds first—they should look plump and firm, not shriveled.
If you prune too early, you risk exposing the tree to late frosts that can damage tender new shoots. If you wait too long, the tree wastes energy producing leaves instead of strong branches. Aim for 2-4 weeks before your last frost date for best results.
☀️ Step 2: Focus on Sun Exposure and Airflow
After pruning, thin out crossing branches and remove any that rub against each other. This opens the canopy to full sun exposure, which is critical for new growth. I like to visualize the tree’s “skeleton”—the main scaffold branches should be spaced 8-12 inches apart to allow sunlight to reach all sides.
New growth thrives in well-lit areas, so avoid thick clusters of branches. If your tree is in a shaded spot, consider moving it or pruning nearby structures to improve light penetration. You’ll see the difference within 4-6 weeks as fresh shoots emerge.
💧 Step 3: Water Deeply and Consistently
New growth demands moisture, especially in the first 6-8 weeks after pruning. Water the tree deeply once a week, soaking the soil to a depth of 12-18 inches. I use a garden hose with a slow setting or a drip irrigation system to avoid surface runoff.
Check soil moisture by sticking your finger 2 inches deep—if it feels dry, water again. Overwatering is just as harmful as underwatering, so let the top layer dry slightly between waterings. Mulch around the base with 2-3 inches of organic mulch (like wood chips) to retain moisture and regulate soil temperature.
✂️ Step 4: Monitor and Support New Shoots
Watch for new growth—it’ll appear as small, bright green shoots with soft, fuzzy tips. These are your priority. If you notice any shoots growing inward or downward, prune them back immediately to encourage upward growth. I also tie young, flexible branches to stakes if they’re heavy with leaves or fruit to prevent breakage.
Fertilize lightly in early spring with a balanced 10-10-10 fertilizer to support new growth, but avoid heavy applications. Too much nitrogen can lead to soft, weak shoots that are prone to disease. You’ll know you’re on the right track when you see strong, upright branches with multiple buds forming along their length.
🌿 Step 5: Protect Against Pests and Disease
New growth is tender and vulnerable to pests like aphids or fungal infections. Inspect the tree weekly for signs of trouble—sticky residue on leaves (aphids), black spots (fungus), or chewed edges (insects). If you spot issues early, treat with neem oil or an organic insecticidal soap for a gentle but effective solution.
Preventative care is key. Prune during dry weather to avoid spreading fungal spores, and avoid wetting the leaves when watering. A healthy tree with strong new growth will naturally resist most pests, so focus on keeping the canopy open and the soil moist but not soggy.
Tips & tricks for encouraging apple tree new growth
Here's what nobody tells you about transforming bare branches into vibrant growth—these insights come from years of trial and error.
Bud Inspection is Non-Negotiable: Before you make a single cut, examine the buds closely. Healthy buds should feel firm and plump, like tiny marbles, not shriveled or hollow. I learned this the hard way after pruning too early and watching buds fail to open. In Step 1, when you're checking those buds, gently press them—if they dent easily, they're not ready for pruning yet.
Canopy Architecture Matters More Than You Think: When spacing those scaffold branches 8-12 inches apart in Step 2, think of it like opening a window for sunlight. I've seen trees with perfect spacing produce weak growth because they were still in shade from nearby structures. If your tree is in partial shade, consider pruning nearby trees or structures to improve light penetration before expecting vigorous new growth.
Watering Technique Makes All the Difference: That 12-18 inch deep watering in Step 3 isn't just about quantity—it's about placement. I use a soil probe to check moisture depth after watering, and I've found that watering at the tree's drip line (not just the trunk) encourages deeper root growth. The key is to water slowly to avoid runoff, which is why I recommend using a hose with a slow setting or drip irrigation.
Pest Prevention Starts Before You See Problems: The weekly inspections in Step 5 are your best defense against pests. I keep a small bottle of neem oil in my gardening toolkit and apply it preventatively every two weeks during the growing season. The secret is to treat the undersides of leaves where pests often hide—this is where you'll catch problems before they spread. Early intervention is everything with new growth.
Pro Tips for Apple Tree New Growth
- Here's what nobody tells you about transforming bare branches into vibrant growth—these insights come from years of trial and error.
- Bud Inspection is Non-Negotiable: Before you make a single cut, examine the buds closely.
- Canopy Architecture Matters More Than You Think: When spacing those scaffold branches 8-12 inches apart in Step 2, think of it like opening a window for sunlight.
Frequently asked questions
Got questions about encouraging apple tree new growth? You’re not alone! Here are answers to the most common concerns—from timing tricks to troubleshooting tips—so you can prune like a pro.
When is the best time to prune for new growth?
Prune your apple tree in late winter or early spring (just before buds swell) for the best results. This timing ensures you remove dead wood while stimulating vigorous new growth as temperatures rise. Avoid pruning in fall—it can leave wounds vulnerable to disease.
How much should I cut back for healthy new branches?
Aim to remove 20-30% of the tree’s total canopy during pruning. For young trees, cut back 1/3 of the height to encourage a sturdy framework. Older trees benefit from selective cuts—target water sprouts, crossing branches, or deadwood to redirect energy to fruit-bearing limbs.
Why isn’t my apple tree growing new branches after pruning?
If new growth stalls, check these fixes:
- Nutrient deficiency: Add balanced fertilizer (10-10-10) in early spring.
- Poor timing: Prune too late? New buds may not form until next year.
- Disease/pests: Inspect for fire blight or borers—treat with copper fungicide or insecticide.
- Over-pruning: Never remove more than 30% of the canopy in one season.
Can I prune apple trees in summer for new growth?
Yes! Summer pruning (June–July) is great for shaping and removing water sprouts (fast-growing vertical shoots). However, avoid heavy cuts—focus on light trimming to prevent stress. Summer pruning also helps reduce disease risk by allowing wounds to heal faster in warm weather.
What’s the difference between new growth and suckers?
New growth = Healthy, outward-facing branches from buds (ideal for fruit production). Suckers = Fast-growing, vertical shoots from the base or roots (weaker, compete with the tree). Remove suckers immediately—they drain energy from your apple tree’s main structure.
Wrapping up and next steps
Nurturing apple tree new growth through smart spring pruning isn’t just about aesthetics—it’s about setting the stage for a bountiful harvest and a healthier tree for years to come. 🌱 By removing dead wood, thinning crowded branches, and encouraging strong, outward-facing limbs, you’re investing in your tree’s long-term vitality.
Now that you’re armed with the right techniques and tools, there’s no better time to roll up your sleeves and give your apple tree the care it deserves.
Ready to take action? Pick a sunny day, gather your supplies, and start pruning—your tree (and future apple pies!) will thank you. 🍏💛