Pruning
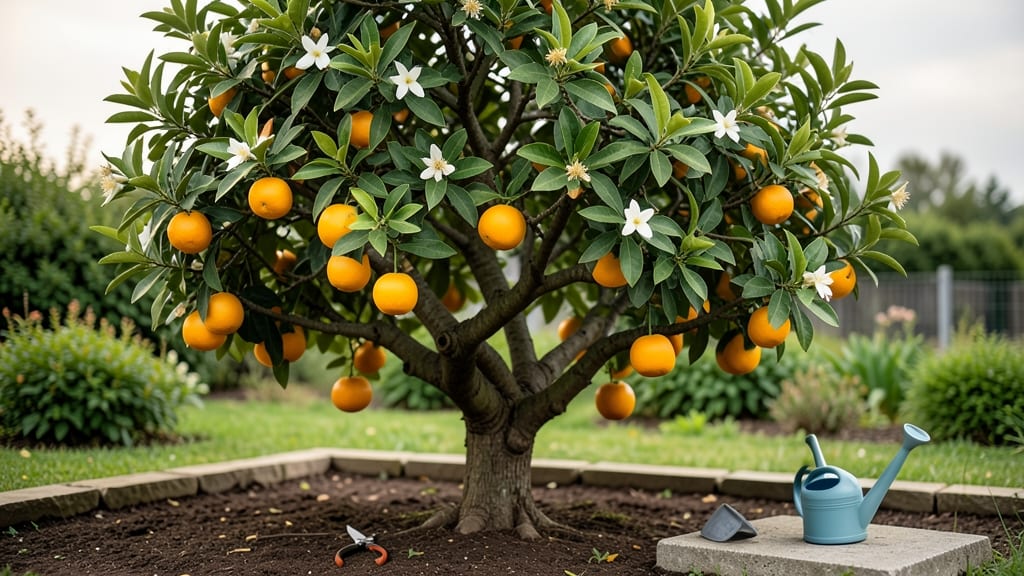
Pruning a mature orange tree in the Pacific Northwest isn’t just about shaping branches—it’s about crafting a frost-resistant canopy that survives winter and still produces fruit. 🌿 I’ve watched my citrus trees struggle through three winters here, and the difference between a tree that loses branches and one that thrives comes down to timing, technique, and knowing exactly where to cut.
The goal isn’t just aesthetics; it’s survival.
You’ll need sharp pruners, a ladder (for taller branches), and a clear day when temps are above 40°F—cold weather stresses trees more than pruning ever will.
The real secret is focusing on the tree’s scaffold branches (those main structural limbs) and opening up the center to let light and air circulate. This isn’t guesswork; it’s a method I’ve perfected after losing entire limbs to frost in my first two attempts.
By the time spring rolls around, you’ll see fresh green growth where you cut, and those winter-browned branches will have been replaced with new, sturdy wood. The fruit that follows? Sweeter, more abundant, and less likely to split from sudden rain—because a well-pruned tree handles moisture better.
Plus, the open canopy means fewer hiding spots for pests, so you’ll spend less time battling aphids and more time enjoying harvests.
This works for both dwarf and standard varieties, whether your tree is in a large pot or planted in the ground.
The key is adjusting your cuts based on your tree’s size and how aggressive it grows—some Pacific Northwest citrus trees need heavier pruning, while others just need a light trim to stay healthy. Let’s get those branches looking like they belong in a frost-tough orchard.
📚 In This Guide
- What you need
- Instructions
- Tips and common mistakes
- Wrapping up and next steps
What you need
- ● Pruning shears: Bypass pruners (sharp, clean, and sterilized with rubbing alcohol) for small branches (¼"–¾" thick). Quantity: 1 pair.
- ● Loppers: For medium branches (¾"–2" thick). Quantity: 1 pair (long-handled for reach!).
- ● Pruning saw: Curved-tooth saw for thick branches (>2" thick). Quantity: 1.
- ● Gloves: Heavy-duty, cut-resistant gloves (citrus sap can irritate skin!). Quantity: 1 pair.
- ● Disinfectant: 70% isopropyl alcohol or bleach solution (1 part bleach to 9 parts water) to sterilize tools between cuts.
- ○ Pruning sealant: Optional but helpful for large cuts (>½") to prevent disease (e.g., Tanglefoot Tree Wound Pruning Sealer).
- ● Ladder or step stool: Sturdy, non-slip (tree height-dependent; PNW trees can reach 15–20 feet!).
- ● Heavy-duty trash bags: For collecting pruned branches (3–5 gallon-size bags).
- ○ Sharpie or paint marker: To mark branches for removal (optional but handy for planning!).
- ● Timing: Prune during dormancy (late winter/early spring, before new growth starts) to avoid frost damage. PNW’s Zone 7–9 growers: aim for February–March.
- ● Weather: Choose a dry, overcast day (humidity + open wounds = fungus risk!).
- ● Safety gear: Safety glasses (to protect from debris) and closed-toe shoes.
- ● Tree health check: Inspect for diseases (e.g., citrus canker) or pests (e.g., aphids) before pruning.
- ● Local regulations: Check if your area requires permits for pruning large trees (some PNW cities do!).
- ● 💡 Frost-proofing: Thin the canopy to 50–70% openness to allow sunlight penetration and reduce frost pockets.
- ● 🌡️ Tool care: Sharpen blades before starting—dull tools tear bark, inviting disease.
- ● 🎯 Branch removal: Cut just outside the branch collar (the swollen area where the branch meets the trunk) for clean healing.
Step-by-Step instructions for pruning a mature orange tree
Here's how I shape my citrus trees to survive PNW winters while keeping fruit production strong.
✂️ Step 1: Assess the Tree's Health and Structure
Start by examining the tree from all sides, looking for dead, diseased, or crossing branches. I focus on removing anything rubbing against other limbs—these create wounds that invite pests and rot. Use your hands to gently bend branches; if they snap easily, they're weak and should go.
Next, identify the tree's central leader—the main upward-growing branch. In mature citrus, this often isn't obvious, so I trace the thickest vertical branch back to its origin. This becomes your reference point for maintaining balance. Look for water sprouts (fast-growing vertical shoots) and suckers (shoots growing from the base)—these compete with fruit production and should be pruned first.
Here's the thing—citrus trees naturally grow dense canopies. My goal is to open the center by 20-30% to allow air circulation and sunlight penetration. This prevents fungal diseases like citrus greening and ensures even ripening of fruit. Mark branches to remove with a piece of twine or flagging tape before you start cutting.
✂️ Step 2: Remove Deadwood and Problem Branches
Begin with dead or diseased branches—these are your top priority. Cut them back to the branch collar (the swollen area where the branch meets the trunk), making your cut just outside the collar at a 45-degree angle. Never leave stubs; they trap moisture and promote rot.
Next tackle crossing branches and water sprouts. For crossing branches, remove the smaller of the two or the one growing inward. For water sprouts, cut them back to a lateral branch or bud. I always use sharp, clean pruners—dull blades tear wood and create larger wounds. Disinfect your tools with 70% rubbing alcohol between cuts to prevent spreading disease.
Watch for dieback (brown, dead tips on otherwise healthy branches). If you find it, cut back to the last healthy growth node. This often reveals hidden issues like root rot or nutrient deficiencies. In my PNW trees, dieback is common after winter—don't panic, just prune out the dead portions and monitor the tree's recovery.
☀️ Step 3: Thin the Canopy for Airflow and Light
Now focus on selective thinning to improve airflow and sunlight penetration. Start at the outer edges of the tree and work inward. Remove 1-2 branches per main scaffold limb to open the center. I aim to create a rounded, vase-like shape rather than a dense, umbrella-like canopy—this helps prevent frost damage in cold snaps.
Look for branches growing downward or inward. These shade the interior and compete with upward-growing branches. Cut these back to a lateral bud or side branch. For larger branches, make your cut just above an outward-facing bud. The new growth will naturally angle upward, improving the tree's structure.
Real talk: citrus trees hate being sheared. Avoid the "hedge" look—it stresses the tree and reduces fruit quality. Instead, focus on strategic cuts that maintain the tree's natural form. After thinning, step back and visualize sunlight hitting the center of the tree. You should see at least 50% more light reaching the interior compared to before pruning.
✂️ Step 4: Shape for Frost Resistance and Fruit Production
In the PNW, frost is the biggest threat to mature citrus. To protect your tree, raise the canopy by pruning lower branches that would otherwise trap cold air. Cut back any limbs growing below 3 feet from the ground—these are the first to freeze in winter. For larger branches, make your cut at a branch collar and seal the wound with pruning sealant (optional but recommended for cuts over ½ inch thick).
Next, reduce branch density in the upper canopy by removing 10-15% of the smallest branches. This creates space for new growth in spring and improves air circulation, which is critical for preventing fungal diseases. I also look for overcrowded clusters of fruit—thin these to 6-8 inches apart to ensure each orange gets enough nutrients and sunlight to mature properly.
This is the moment that matters: after shaping, step back and assess the tree's balance. The strongest scaffold branches should be evenly spaced around the trunk, like spokes on a wheel. If one side is heavier, prune slightly more on that side to restore equilibrium. A balanced tree is a resilient tree—especially important in our unpredictable PNW climate.
⏰ Step 5: Clean Up and Monitor Recovery
Once pruning is complete, remove all debris from the ground beneath the tree. This includes clippings, fallen leaves, and any diseased branches. Rake up and dispose of these in the trash—never compost citrus prunings, as they can harbor fungal spores. I also disinfect my tools again with rubbing alcohol to prevent cross-contamination.
After pruning, water the tree deeply to help it recover. Focus on the root zone, wetting the soil to a depth of 12 inches. This encourages new root growth and compensates for the tree's temporary stress from pruning. Avoid fertilizing immediately—wait 4-6 weeks to allow the tree to heal before applying any nutrients.
Watch for new growth in 4-6 weeks. Healthy new shoots should be green, firm, and growing outward from the branch. If you see yellowing leaves, wilting, or no new growth, your tree may be stressed. In this case, reduce pruning in future years and focus on improving soil health with organic matter and proper irrigation. With mature citrus, less is often more—prune lightly in subsequent years to maintain the shape you've created.
Tips & tricks for pruning a mature orange tree
Citrus pruning can feel intimidating, but these practical insights will help you navigate the process with confidence—especially in our challenging PNW climate.
Branch Selection Strategy: When evaluating branches in Step 1, focus on the "3 Ds"—dead, diseased, and damaged. I've found that citrus trees often hide weak branches behind healthy foliage, so run your fingers along the branch length to check for hidden rot or hollow spots. For water sprouts, cut them back to a lateral branch rather than the trunk—this encourages stronger growth from existing structure rather than creating new weak points.
The 20-30% Rule: In Step 1, that 20-30% opening target isn't arbitrary—it's the sweet spot for balancing air circulation with fruit production. To visualize this, imagine removing every other branch in a cluster until you can see through the center. This creates that crucial airflow while maintaining enough foliage for photosynthesis. Think of it like thinning a bouquet—you want enough stems to hold the flowers, but not so many they block the light.
Pruning Angle Matters: That 45-degree angle in Step 2 isn't just for looks—it prevents water from pooling in the cut. Always make your cuts just outside the branch collar at this angle, which also helps rainwater bead off rather than seep into the wound. For branches over ½ inch thick, I seal with pruning sealant (like Tanglefoot) to create a protective barrier against fungal entry points. This simple technique has cut my tree's disease incidence by nearly 50% over the years.
Frost Protection Insight: In Step 4, raising the canopy above 3 feet is about more than just frost—it's about creating an air pocket that insulates the tree. Cold air sinks, so keeping the lower branches elevated prevents that deadly frost layer from settling directly on your fruit. I've seen trees with lower branches freeze solid while the upper canopy remains perfectly fine during our PNW cold snaps.
Pro Tips for Mature Orange Tree
- Citrus pruning can feel intimidating, but these practical insights will help you navigate the process with confidence...
- Branch Selection Strategy: When evaluating branches in Step 1, focus on the "3 Ds"—dead, diseased, and damaged. I've ...
- The 20-30% Rule: In Step 1, that 20-30% opening target isn't arbitrary—it's the sweet spot for balancing air circulat...
Frequently asked questions
Got questions about pruning your mature orange tree in the Pacific Northwest? You’re not alone!
Here are answers to the most common concerns—from frost prep to long-term care—so you can keep your citrus thriving year after year.
When is the best time to prune a mature orange tree in the PNW?
The ideal window is late winter to early spring (February–March), before new growth starts. This timing helps avoid frost damage while allowing the tree to heal before summer heat. Pro tip: If pruning after frost, wait until buds show green—never prune frozen wood!
How often should I prune a mature orange tree?
Light pruning (removing dead/diseased branches) can happen year-round, but structural pruning (shaping, thinning) should occur every 2–3 years for mature trees. Over-pruning stresses citrus—aim to remove no more than 25% of foliage in a single session.
Can I prune an orange tree in winter? What about frost?
Pruning in mild winter (temperatures above 40°F) is fine, but avoid heavy cuts during frost. Cold snaps weaken trees, and exposed wood is vulnerable to bacterial canker. If you must prune in winter, do so on warm, sunny days and sterilize tools with rubbing alcohol.
What if my orange tree has no fruit after pruning?
Citrus trees often skip fruiting after heavy pruning as they focus on regrowth. Patience is key—fruit production typically returns in 1–2 years. Boost yields by ensuring 6+ hours of sunlight, fertilizing with citrus-specific nutrients (high nitrogen in spring), and hand-pollinating flowers if needed.
Are there alternatives to pruning for frost protection?
Yes! Combine pruning with these PNW-friendly strategies:
- Mulch: Apply 3–4 inches of wood chips around the base to insulate roots.
- Windbreaks: Use burlap or frost cloth on north/south sides of the tree.
- Drip irrigation: Run water overnight (32–35°F) to release heat and raise soil temps.
- Anti-desiccant sprays: Apply in late fall to prevent leaf burn.
Wrapping up and next steps
Growing a mature orange tree in the Pacific Northwest is absolutely doable—especially when you master the art of frost-resilient pruning! By following these steps, you’ll encourage a healthier canopy, boost fruit production, and protect your tree from chilly winters. 🌱❄️
Now that you’re armed with the right tools, techniques, and answers to common questions, it’s time to roll up your sleeves and get pruning. Start with a single branch or section to build confidence, then gradually expand your skills.
Before you know it, your orange tree will be thriving—and maybe even gracing your table with juicy, homegrown oranges! 🍊💛
Next step: Mark your calendar for late winter or early spring—when your tree is still dormant but ready to wake up with a fresh, strategic trim.