
Pruning
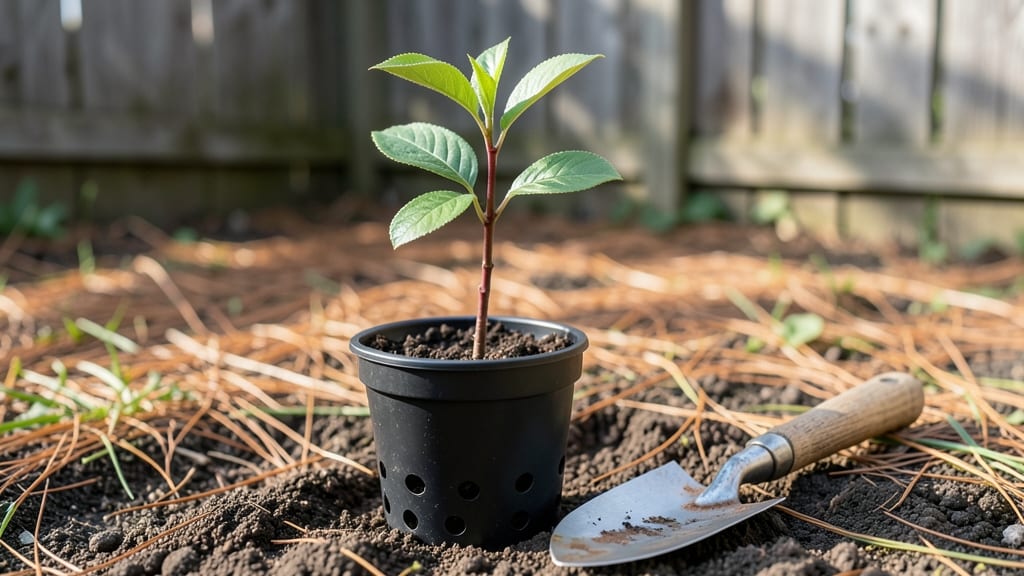
Growing a seedling cherry tree from scratch delivers the kind of satisfaction that comes from watching something you nurtured grow into a towering, fruit-bearing beauty.
The key to success lies in understanding how these young trees need gentle guidance—whether you're working with a dwarf variety for small spaces or a standard tree for full sun—because their first few years determine whether they'll thrive for decades.
I learned this the hard way when my first seedling struggled through its second winter, but now I know exactly how to give them the cold-hardy start they need.
Start with well-draining soil rich in organic matter, and plant your seedling at the right depth—too deep, and roots suffocate; too shallow, and they dry out. A southern exposure maximizes sunlight, while consistent moisture (but never soggy soil) keeps roots healthy.
Pruning in late winter removes dead wood and encourages strong branching, setting the stage for a sturdy framework. The first year is all about establishing roots, so resist the urge to harvest fruit—let the tree focus on growing.
By the time your cherry tree reaches its third year, you’ll see vibrant new growth and the first signs of blossoms, signaling that all your early efforts are paying off.
The tree’s cold-hardiness kicks in fully, and with proper care, it’ll reward you with sweet, juicy fruit for years to come. The real magic happens in how the tree matures—each season builds on the last, turning a fragile seedling into a resilient, productive centerpiece for your landscape.
Whether you’re growing a sweet cherry or a tart variety, the principles remain the same: patience, proper spacing, and seasonal adjustments. Dwarf trees need less room but still require the same care, while standard varieties benefit from wider planting zones.
The payoff is worth every season of preparation—imagine the shade, the flowers, and the harvests ahead. Let’s get those roots growing strong.
📚 In This Guide
- What you need
- Instructions
- Tips and common mistakes
- Wrapping up and next steps
What you need
- ● Seedling cherry tree (choose cold-hardy varieties like Prunus avium or Prunus cerasus from a reputable nursery).
- ● Well-draining soil (pH 6.0–7.0; mix garden soil with compost for optimal results).
- ● Container or planting hole: For containers: 5-gallon pot (minimum) with drainage holes.
- ● For in-ground: Hole twice as wide as the root ball.
- ● Organic mulch (2–3 inches of wood chips, straw, or pine needles).
- ● Watering can or hose with a gentle spray nozzle.
- ● Fertilizer (balanced 10-10-10 or slow-release cherry tree fertilizer).
- ● Hand trowel or spade (for digging).
- ● Garden gloves (to protect your hands).
- ● Pruning shears (sterilized, for shaping or removing dead branches).
- ● Soil pH test kit (to check acidity levels).
- ● Drip irrigation system (for consistent watering).
- ● Full-sun location (6+ hours of sunlight daily).
- ● Protection from strong winds (young trees are delicate!).
- ● Patience! Seedling cherries take 3–5 years to bear fruit.
Step-by-Step guide for growing a cold-hardy cherry tree seedling
Here's how to start your cherry tree on the right foot—simple, reliable, and built for resilience.
🌱 Step 1: Select and Prepare the Seedling
Choose a healthy, disease-free seedling with strong roots and no visible damage. I always look for a sturdy stem with a few small leaves—this signals a vigorous start. If your seedling has been in a pot, gently loosen the roots to encourage outward growth when planted. Avoid any that feel mushy or have yellowing leaves, as these signs point to stress or disease.
Before planting, soak the roots in a bucket of water for about 30 minutes to rehydrate them. This step is especially important if the seedling has been sitting in a dry environment. You'll know it's ready when the roots feel plump and the soil around them holds moisture without dripping. This hydration jumpstarts growth and helps the tree establish itself faster in cooler climates.
☀️ Step 2: Choose the Right Location and Soil
Cherry trees thrive in full sun, so pick a spot that gets at least 6-8 hours of direct sunlight daily. I’ve found that south-facing areas work best, but even a west-facing location can work if the tree gets enough light. Avoid low spots where cold air settles, as this can damage the roots in winter.
Prepare the soil by amending it with 2-3 inches of compost mixed into the top 12 inches of soil. Cherry trees prefer slightly acidic to neutral soil with a pH between 6.0 and 7.0. If your soil is heavy clay, add a mix of sand or perlite to improve drainage—waterlogged roots will stunt growth. Test the soil a week before planting to give yourself time to adjust if needed.
🪴 Step 3: Plant and Support the Seedling
Dig a hole twice as wide as the seedling’s root ball but only as deep as the container it came in. This prevents burying the trunk too deeply, which can suffocate the tree. Place the seedling in the hole so the top of the root ball sits 1-2 inches above ground level. This slight elevation helps with drainage and reduces the risk of rot.
Backfill the hole with soil, tamping it down gently to remove air pockets. Water deeply to settle the soil and encourage roots to spread outward. Install a stake or support if the seedling is tall or top-heavy—cherry trees can get leggy early on. Secure the tree loosely to the stake with soft ties, leaving room for growth. Avoid tying it too tight, as the stem can grow around the ties and cause damage later.
💧 Step 4: Water and Mulch for Cold Hardiness
Water the seedling deeply once a week during the first growing season, aiming for 1-1.5 gallons per watering. Let the soil dry out slightly between waterings—this encourages deep root growth. Overwatering can lead to shallow roots, which struggle in cold winters. You’ll know the watering is right when the top 2 inches of soil feel dry to the touch.
Apply a 3-inch layer of mulch around the base of the tree, keeping it 3-4 inches away from the trunk to prevent rot. Use organic mulch like wood chips or straw, which breaks down over time and adds nutrients to the soil. Replenish the mulch annually to maintain its insulating properties. This layer helps regulate soil temperature, protecting roots from extreme cold and heat fluctuations—critical for cold-hardy varieties.
Tips & tricks for perfect seedling cherry tree growth
Starting a cold-hardy cherry tree seedling doesn't have to be complicated—these simple tricks will help you avoid common pitfalls and set your tree up for long-term success.
Seedling Selection: Pay special attention to the root system when selecting your seedling. Healthy roots should be white or light tan, not dark or mushy. If you're buying from a nursery, ask when the seedling was potted—recently transplanted ones establish faster. I've found that seedlings with a few small leaves (rather than large ones) are less stressed and adapt better to new environments.
Pre-Planting Hydration: The 30-minute root soak in Step 1 is crucial, but don't skip checking the moisture level afterward. Roots should feel plump but not saturated—think of a well-wrung sponge. If they're dripping, pat them gently with paper towels before planting. This prevents waterlogging, which can cause root rot in cold climates where drainage is already a concern.
Soil Preparation Insight: When amending your soil with 2-3 inches of compost, mix it thoroughly into the top 12 inches. I like to use a garden fork to create vertical channels that encourage roots to grow downward. For heavy clay soils, consider adding coarse sand or perlite—this improves drainage without altering the soil's natural structure too much. A simple pH test kit (available at garden centers) makes this adjustment easy.
Winter Protection: While not mentioned in the steps, adding an extra 2-inch layer of mulch in late fall provides critical insulation against winter temperature swings. I've seen cherry seedlings survive harsh winters with this simple adjustment, especially in zones with sudden cold snaps. Just remember to pull back the mulch in early spring to prevent overheating as temperatures rise.
Pro Tips for Seedling Cherry Tree
- Starting a cold-hardy cherry tree seedling doesn't have to be complicated—these simple tricks will help you avoid common pitfalls and set your tree up for long-term success.
- Seedling Selection: Pay special attention to the root system when selecting your seedling.
- Pre-Planting Hydration: The 30-minute root soak in Step 1 is crucial, but don't skip checking the moisture level afterward.
Frequently asked questions
Got questions about growing a seedling cherry tree?
You’re not alone! Here are answers to the most common queries to help you nurture a thriving tree from the start.
How long does it take for a seedling cherry tree to bear fruit?
A seedling cherry tree typically takes 4–7 years to bear fruit, depending on the variety and growing conditions. Patience is key—focus on establishing a strong root system and healthy growth first. Grafted trees may fruit sooner (2–4 years), but seed-grown trees often take longer.
Can seedling cherry trees survive harsh winters?
Yes! Many seedling cherry varieties are cold-hardy (USDA Zones 4–7), but young trees need extra protection. Mulch the base with 3–4 inches of organic matter, wrap the trunk with burlap, and avoid late pruning. Ever-bearing types like Prunus avium handle frost better than delicate hybrids.
What’s the best soil mix for a seedling cherry tree?
Seedling cherries thrive in well-draining, slightly acidic soil (pH 6.0–6.5). Mix equal parts garden soil, compost, and coarse sand or perlite for optimal aeration. Avoid heavy clay—amend with peat moss if needed. A raised bed can help if your yard has poor drainage.
How do I protect my seedling cherry tree from pests?
Common pests include aphids, borers, and Japanese beetles. Spray neem oil early in the season, use row covers for young trees, and encourage beneficial insects like ladybugs. Prune infected branches immediately and dispose of them in sealed bags to prevent spread.
Can I grow a seedling cherry tree in a container?
Seedling cherries can grow in containers for 2–3 years (until they’re 3–4 feet tall), but they need large pots (15+ gallons) with drainage holes. Use a fast-draining potting mix and repot annually. Note: They’re not ideal for long-term container life—they’ll need transplanting to the ground eventually.
Wrapping up and next steps
Growing a seedling cherry tree from scratch is a rewarding journey that combines patience, care, and a touch of green-thumb magic! 🌱 With the right tools, cold-hardy varieties, and a few simple steps, you can nurture a thriving tree that will grace your garden for years to come.
Whether you're a beginner or a seasoned gardener, the key is consistency—watering, pruning, and protecting your sapling through the seasons.
Now that you’re armed with knowledge, it’s time to take action! Start by selecting your seedling, preparing the soil, and giving it the love it deserves.
Before you know it, you’ll be harvesting sweet, juicy cherries (or admiring its beauty) while basking in the pride of a job well done. Happy planting! 🌳✨