
Blooming
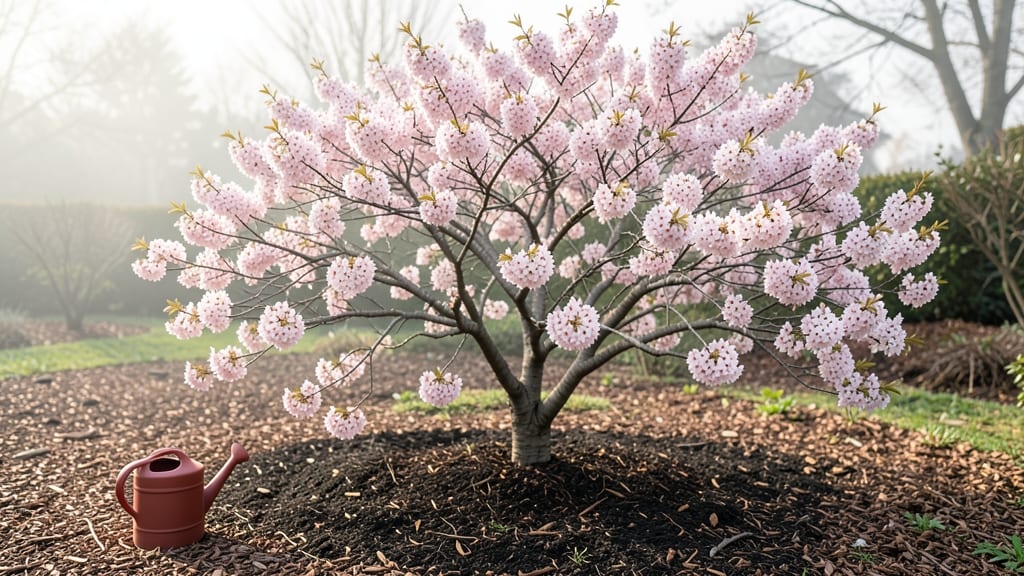
Caring for a cherry blossom tree starts with understanding its delicate balance—too much water, and you risk root rot; too little, and those iconic pink blooms won’t return.
I’ve watched my own tree transform from a bare-branched sapling into a canopy of spring color, and the secret lies in timing everything right, especially pruning. The first year, I nearly gave up after seeing buds drop, but adjusting my approach made all the difference.
You’ll need basic tools—a sharp pruning saw, clean shears, and thick gloves—to protect your hands from thorns. Mature trees thrive in full sun with well-draining soil, while young saplings need consistent moisture but hate soggy roots.
The real magic happens in late winter before buds swell: prune then to encourage strong branches and abundant blooms. I’ve learned that patience pays off—cherry blossoms reward careful care with years of stunning displays.
By summer’s end, you’ll notice new growth where you pruned, and next spring, those branches will burst with blossoms. The key is observing your tree’s signals: wilting leaves mean adjust watering, bare spots mean prune strategically.
Even experienced gardeners make mistakes—like I did with over-pruning—but each season teaches you more. With the right rhythm, your cherry blossom will become the standout feature of your landscape.
This care routine works for both backyard trees and urban plantings, though container-grown saplings need extra attention. The goal isn’t perfection—it’s creating a thriving tree that brings joy for decades. Start small, learn from each season, and soon you’ll have a blossom-filled masterpiece that neighbors will envy.
📚 In This Guide
- What you need
- Instructions
- Tips and common mistakes
- Wrapping up and next steps
What you need
- ● Cherry Blossom Tree: Choose a healthy sapling or mature tree (species like Prunus serrulata or Prunus yedoensis are popular).
- ● Well-draining soil: Mix 60% native soil with 30% compost and 10% perlite or sand (for aeration).
- ● Organic mulch: 2–3 inches of wood chips or shredded bark (keep mulch 6 inches away from the trunk).
- ● Fertilizer: Slow-release, balanced fertilizer (10-10-10 or 20-20-20) or organic options like composted manure.
- ● Watering can or hose: With a gentle spray nozzle (1–2 gallons per watering for young trees).
- ● Bypass pruners: Sharp, clean pair for cutting branches up to ½ inch thick.
- ● Loppers: For branches ½–2 inches thick (look for ergonomic handles).
- ● Pruning saw: For thicker branches (2+ inches).
- ● Disinfectant: 70% isopropyl alcohol or bleach solution (1 part bleach to 9 parts water) to sterilize tools between cuts.
- ○ Sealing wax or pruning paint: Optional, for cuts larger than ½ inch (helps prevent disease).
- ● Tree stakes & ties: For young trees in windy areas (2–3 stakes, 6 feet long).
- ● Soil moisture meter: To monitor watering needs (especially in drought-prone areas).
- ● Pest control: Neem oil or horticultural oil for aphids/scale (apply sparingly!).
- ● Tree guard: Plastic or metal collar to protect the trunk from rodents.
Step-by-step guide for pruning and maintaining a healthy cherry blossom tree
Here’s how to keep your tree blooming beautifully for decades—no guesswork involved.
✂️ Step 1: Prune in Late Winter Before Bud Break
Start your pruning between mid-February and early March, just as the tree begins to stir but before buds swell. This timing prevents stressing the tree when it’s most vulnerable. Use clean, sharp pruners to make cuts at a 45-degree angle about ¼ inch above a bud facing the direction you want growth to go.
Remove any dead, diseased, or crossing branches first—they’re the easiest to spot. Thin out crowded branches to improve airflow, which reduces fungal diseases. I always start at the top and work my way down, so I don’t miss any hidden branches. Aim to remove no more than 25% of the tree’s canopy in a single session to avoid shocking it.
☀️ Step 2: Monitor Growth and Light Exposure Through Spring
Once buds open in late March or April, step back and assess your tree’s shape. Cherry blossoms need full sun (6+ hours daily) to produce abundant flowers. If you notice branches growing toward shaded areas, they’ll produce fewer blooms. Prune again lightly in early spring to open up the center and encourage outward growth.
Watch for water sprouts—those fast-growing, vertical shoots that steal energy from flowering. Snip them off at the base as soon as they appear. Mulch the base with 2-3 inches of organic mulch (like shredded bark) to retain moisture and regulate soil temperature. Keep the mulch 6 inches away from the trunk to prevent rot.
🌿 Step 3: Summer Maintenance to Preserve Flower Buds
Summer is all about observation and minimal intervention. Cherry blossoms set next year’s flower buds in late summer (August), so avoid heavy pruning now. Instead, remove any suckers (shoots growing from the base) and deadheading spent blooms to redirect energy into bud formation.
Water deeply once a week if rainfall is light, focusing on the root zone (not the leaves). Let the top 6 inches of soil dry out between waterings—overwatering in summer can lead to root rot. If you see yellowing leaves, it’s often a sign of overwatering or poor drainage. Adjust your watering schedule accordingly.
⏰ Step 4: Fall Cleanup to Prepare for Winter
In October or November, rake up any fallen leaves or debris around the tree. This prevents pests and diseases from overwintering near the roots. Prune out any weak or damaged branches one last time, but avoid heavy cuts—save major shaping for late winter.
Apply a 2-3 inch layer of mulch (like the shredded bark you used in spring) to insulate roots against freezing temperatures. Avoid piling mulch against the trunk—keep it 6 inches away to prevent moisture buildup. If your tree is young (under 5 years old), consider wrapping the trunk with tree guard to protect it from rodents and frost cracks.
✂️ Step 5: Winter Inspection and Early Planning
During dormant months (December–February), inspect your tree for signs of stress, like peeling bark or large cracks. If you spot any, mark the areas for repair in late winter. Plan your late-winter pruning (Step 1) by reviewing last year’s growth—note where branches grew too close together or where sunlight was blocked.
This is also the time to fertilize lightly if needed. Use a balanced, slow-release fertilizer (like 10-10-10) in early spring before buds break. Avoid heavy applications in winter—they can encourage tender new growth that won’t survive cold snaps. A little preparation now means showstopping blooms next spring.
Tips & tricks for perfect cherry blossom tree care
Here's how to avoid common mistakes and get the most out of your tree's seasonal needs.
Pruning Precision: When making those 45-degree cuts in late winter, always look for the outward-facing bud. This ensures new growth follows the shape you want. I learned this the hard way—skipping this detail led to awkward growth patterns. Also, make sure your pruners are sharp; dull blades crush stems, inviting disease. Disinfect them with rubbing alcohol between cuts to prevent spreading any potential infections.
Seasonal Timing Matters: The late winter pruning window between mid-February and early March is critical because it allows the tree to heal before spring growth. If you prune too early, cold damage can occur, while pruning too late stresses the tree when it's preparing to bloom. For the second spring pruning in early spring, wait until after buds open but before leaves fully unfurl—this balances flower production with new growth.
Mulching Technique: That 2-3 inch layer of organic mulch (like shredded bark) should be applied carefully. Spread it evenly but keep it 6 inches away from the trunk to prevent moisture buildup that can cause rot. I've seen many gardeners make the mistake of piling mulch directly against the trunk, which is a common cause of trunk diseases. Also, refresh the mulch layer every fall to maintain its insulating properties through winter.
Watering Wisdom: The once-a-week deep watering in summer is essential, but timing matters just as much as quantity. Water in the early morning so leaves have time to dry before evening, reducing fungal risks. And when you see those yellowing leaves, it's often a sign of overwatering—let the top 6 inches of soil dry out between waterings. I've seen cherry blossoms suffer from both underwatering and overwatering, so finding that balance is key.
Pro Tips for Caring For A Cherry Blossom Tree
- Here's how to avoid common mistakes and get the most out of your tree's seasonal needs.
- Pruning Precision: When making those 45-degree cuts in late winter, always look for the outward-facing bud.
- Seasonal Timing Matters: The late winter pruning window between mid-February and early March is critical because it allows the tree to heal before spring growth.
Frequently asked questions
Got questions about keeping your cherry blossom tree thriving?
Here are answers to the most common ones—from pruning puzzles to seasonal surprises!
When is the best time to prune a cherry blossom tree?
Prune your cherry blossom tree right after it blooms (late spring) to avoid cutting off next year’s flowers. Avoid pruning in late summer or fall, as this can stimulate weak growth vulnerable to winter damage. For young trees, light shaping in early spring (before buds swell) is also safe.
Can I prune a cherry blossom tree in winter?
No—never prune in winter (especially during dormancy). Cold stress weakens the tree, and open wounds attract pests or diseases. If you spot dead branches in winter, mark them for removal in late spring. Patience pays off for these delicate beauties!
What if I accidentally prune too much?
Don’t panic! If you’ve removed more than 20-25% of the canopy in one go, the tree may struggle. Focus on small, strategic cuts next time. Water deeply, avoid fertilizing for 4-6 weeks, and monitor for stress signs (yellowing leaves, stunted growth). Over-pruning is reversible with proper care!
Can I grow a cherry blossom tree in a pot?
Yes, but only dwarf varieties (like ‘Kwanzan Compact’). Use a large pot (15+ gallons) with drainage holes and well-draining soil. Repot every 2-3 years in early spring, and move containers indoors or to a sheltered spot if temps drop below 10°F (-12°C). Potted trees need more frequent watering than in-ground ones.
Why are my cherry blossom leaves turning yellow?
Yellow leaves often signal overwatering, nutrient deficiency, or pests. Check soil moisture (it should be damp, not soggy), and fertilize lightly in early spring with a balanced 10-10-10 formula. Inspect for aphids or spider mites—spray with water or neem oil if needed. Mature trees may yellow naturally as leaves age (fall).
Wrapping up and next steps
Caring for a cherry blossom tree is a rewarding journey that brings beauty and tranquility to your space—and you’ve got all the tools to make it thrive! 🌸 From seasonal pruning to nurturing its roots, every step ensures stunning blooms year after year.
Now that you’re equipped with the know-how, take that first step—whether it’s scheduling your next pruning session or simply admiring its blossoms with newfound appreciation.
Remember: patience and consistency are your allies. Happy gardening, and may your cherry blossom tree flourish as vibrantly as your passion for it! 🌱✨