
Pruning
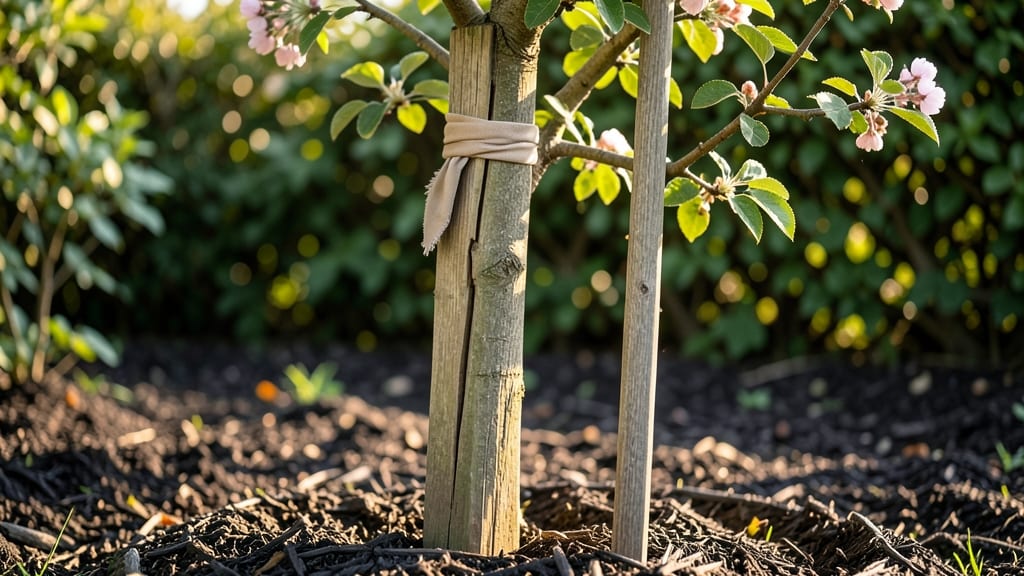
Staking a single tree isn't just about hammering in stakes—it's about giving young trees the confidence to stand tall in windy conditions. 🌳 I learned this the hard way when a 2-foot sapling snapped in half during a spring storm, and now I stake every tree in my yard's exposed areas.
The right technique prevents permanent damage and lets roots grow strong without bending.
You'll need just three things: a sturdy 2-inch diameter stake (longer than the tree is tall), soft tree ties or wide fabric strips, and a mallet.
Most people overlook the ties, but cheap plastic ones can girdle the trunk—so opt for stretchy, breathable options that won't cut into bark as the tree grows. A single diagonal stake on the windward side works best for most young trees.
What you'll end up with is a tree that sways just enough to strengthen its trunk naturally, while staying upright during storms. The stakes should stay in place for 1-2 years or until the root system can support itself, with ties checked monthly to prevent rubbing.
My oak saplings now stand like veterans after just one season of proper staking.
Not every tree needs staking—wind-resistant species like willows or mature trees can skip this step—but in storm-prone areas, it's the difference between a thriving tree and a broken one. Here's how to do it right the first time.
📚 In This Guide
- What you need
- Instructions
- Tips and common mistakes
- Wrapping up and next steps
What you need
- ● Stakes: 3–4 wooden or metal stakes per tree (1.5–2 inches in diameter, 4–6 feet long). Pro tip: Use tapered stakes for easier removal later! 🌲
- ● Tree ties: 3–4 soft, stretchable ties (e.g., tree straps or rubberized fabric strips) per stake.
- ● Garden twine or burlap: For securing stakes to the tree (avoid wire—it can damage bark!).
- ● Mulch: 2–3 inches of organic mulch (wood chips, straw) to protect the tree base.
- ● Shovel or trowel (for adjusting mulch or stakes).
- ● Measuring tape (to ensure stakes are not too tight!).
- ● Hammer or mallet (for driving stakes into the ground).
- ○ Pruners (optional, for trimming excess ties if needed).
- ● A young tree (1–3 years old) with a leaning trunk or in a windy/high-risk area.
- ● Well-drained soil (amend with compost if needed—stakes won’t work in soggy ground!).
- ● Sunny day (avoid staking in wet soil—it compacts and weakens support).
- ● Stake caps (to prevent stakes from sinking deeper over time).
- ● Tree guards (to protect the trunk from gnawing pests).
- ● Watering can (to hydrate the tree post-staking).
How to stake a single tree for maximum stability
Here’s the foolproof method I’ve used for young trees in windy areas—no guesswork, just steady support.
🪴 Step 1: Choose the Right Stakes and Ties
Use two 6-foot wooden stakes (not metal—they conduct heat and can damage bark) and 3/8-inch wide tree ties (not wire or plastic strips). Drive the stakes 6-8 inches deep into the soil, about 12-18 inches apart, on opposite sides of the tree trunk. Angle them slightly outward to create a tripod effect with the tree—this prevents the stakes from pulling out when wind pushes.
I always check for soil firmness first. If the ground feels loose, add a shovel of gravel around the stake holes before driving them in. The stakes should be 1/3 taller than the tree—this keeps the tree upright while allowing flexibility as it grows.
🌱 Step 2: Position the Tree and Secure the First Tie
Gently push the tree straight (not leaning) and hold it in place while you loop the first tie 4-6 inches above the soil line. This is the critical anchor point—if it slips, the whole setup fails. I use a figure-eight pattern for the tie, crossing it twice over the trunk to distribute pressure evenly. Leave a little slack so the tie doesn’t strangle the tree as it thickens.
Here’s the thing—I’ve seen people tie too high or too low, and both are bad. Too high and the tree topples like a sail. Too low and the trunk gets girdled as it grows. The 4-6 inch rule is non-negotiable for young trees.
💧 Step 3: Add the Second Tie for Wind Resistance
Install the second tie 12-18 inches higher than the first, again using the figure-eight method. This creates a V-shaped support that mimics natural wind resistance. The ties should be snug but adjustable—you’ll need to loosen them as the tree grows. I check mine every 3-4 months and replace ties if they fray or lose elasticity.
Don’t skip the second tie. I learned this the hard way when a summer storm snapped a single-staked tree at the tie line. Two ties distribute the force of wind like a guy wire on a telephone pole.
⏰ Step 4: Monitor and Adjust Over Time
Remove the stakes and ties after 1-2 years, or when the tree’s trunk is half the height of the stakes. This prevents the tree from growing dependent on artificial support. I mark the tie removal date on my calendar so I don’t forget—growing season is the best time to do it.
Watch for signs of stress: yellowing leaves or bark damage at the tie line means the tree is struggling. If you see this, loosen the ties immediately and consider adding a third tie temporarily. Real talk: some trees need support longer, especially in high-wind areas.
Tips & tricks for perfect single tree staking
A few simple adjustments can turn a good staking job into a sturdy, long-lasting support system that actually helps your tree grow stronger.
Stake Placement Precision: When driving your two 6-foot wooden stakes 6-8 inches deep, use a small level to ensure they're perfectly vertical. I've seen stakes lean inward, which creates a weak triangle that can't handle wind pressure. Angle them outward slightly—this mimics the natural spread of a tree's roots and prevents the stakes from pulling out during storms.
Tie Technique Matters: The figure-eight pattern in Step 2 is non-negotiable, but here's what nobody tells you—the ties should be tight enough to prevent movement but loose enough to allow the tree to sway slightly in the wind. Think of it like a hammock: it needs to give a little. I test this by gently pushing the tree—if it moves more than an inch, the ties need tightening. Too tight, and you'll see those yellowing leaves in Step 4.
Soil Preparation Secret: Before driving your stakes, loosen the soil with a shovel to create a firm base. I've found that adding a handful of gravel at the bottom of each hole prevents sinking over time. This is especially important in clay soil where stakes can get stuck and become ineffective. The stakes should feel solid when you push down—if they wobble, add more gravel.
Long-Term Maintenance: The 3-4 month check mentioned in Step 3 is crucial, but I've learned to look for specific signs of tie failure. Check for frayed edges, cracks in the plastic, or any sign the tie has stretched. I keep a small roll of replacement ties in my gardening toolbox—it's a small investment that prevents costly tree damage. Remember, a broken tie doesn't just fail—it can snap the tree at the tie line during a storm.
Pro Tips for Single Tree Staking
- A few simple adjustments can turn a good staking job into a sturdy, long-lasting support system that actually helps your tree grow stronger.
- Stake Placement Precision: When driving your two 6-foot wooden stakes 6-8 inches deep, use a small level to ensure they're perfectly vertical.
- Think of it like a hammock: it needs to give a little.
Frequently asked questions
Got questions about single tree staking? You’re not alone! Here are answers to the most common concerns—whether you're prepping for a storm or just curious about best practices.
When is the best time to stake a single tree?
Stake young trees immediately after planting to prevent wind rock and root disturbance. For bare-root trees, stake before backfilling soil. Avoid staking in late fall or winter, as roots need time to establish before cold sets in. If transplanting mature trees, stake only if the root ball is unstable.
How long should I leave a stake in place?
Most trees need staking for 1–2 growing seasons (or until roots stabilize). Check annually: if the tree sways gently in the wind (like a willow), it’s ready for stake removal. Over-staking can weaken trunk strength—don’t leave stakes past 2 years unless the tree is in a high-wind zone.
Are there alternatives to single tree staking?
Yes! For multiple trees, consider group staking (a central post with guy wires). For flexible species (like birch or willow), skip staking—they bend with wind. Use tree ties (not wire!) for extra support. Mulch mounds (3–4” of wood chips) also reduce sway by stabilizing soil.
What if my staked tree leans even with support?
Leaning may signal root girdling (roots circling the trunk) or poor planting depth. Loosen soil around the base and check for roots above the soil line—trim any that strangle the trunk. If the lean is severe, re-stake at an angle (not straight) to guide gradual upright growth. Avoid forcing the tree back—this can snap weak wood.
Can single staking protect trees in hurricane-prone areas?
Single stakes help but aren’t foolproof—they’re best for trees <5” in diameter. For storm-prone zones, combine staking with deep planting (root flare exposed) and soil anchors (like buried rebar). Prune to reduce wind resistance, and avoid heavy mulch (it retains too much moisture, weakening roots).
Wrapping up and next steps
Single tree staking is a simple yet powerful way to give your young trees the strong foundation they need—especially in stormy climates.
By following the right techniques and using quality materials, you’ll protect your investment while promoting natural growth. Now’s the time to take action! Grab your tools, assess your trees, and give them the sturdy support they deserve. Your future forest starts with one well-supported sapling today. 🌱✨
Next step: Pick a calm day, gather your supplies, and get staking! Need a refresher? Revisit our FAQs or materials guide before you begin.