Trees
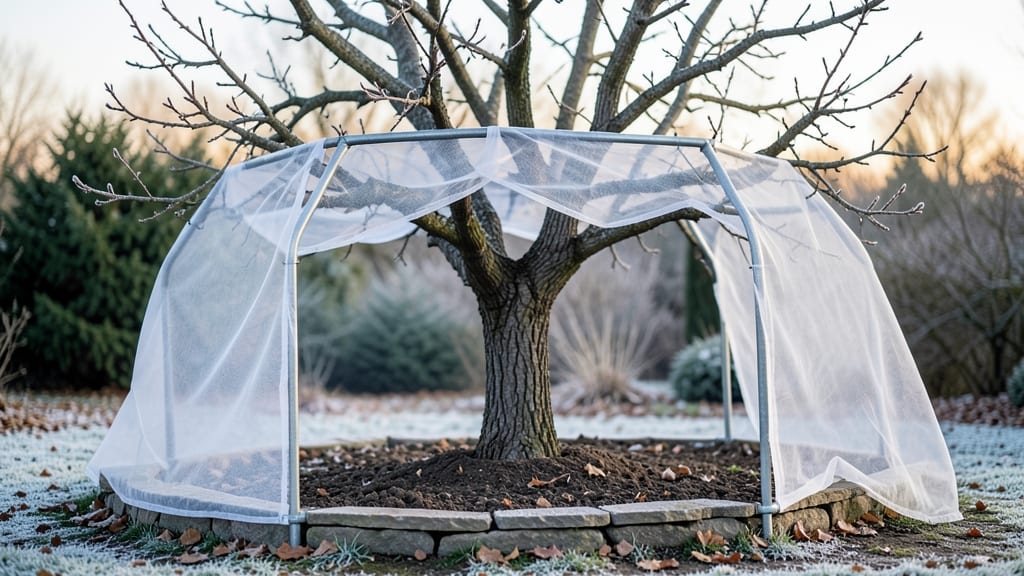
When frost threatens your trees, the right cover can mean the difference between a thriving canopy and winter damage. 🌳 I learned this the hard way after my young cherry tree developed unsightly frost cracks—until I started using frost covers every November.
The trick isn’t just wrapping them up; it’s choosing the right material, timing the application, and knowing when to remove them.
Most gardeners reach for burlap or frost cloth, both lightweight yet sturdy enough to shield branches from ice and wind. You’ll want something breathable—plastic traps moisture and invites rot—so opt for natural fibers or specialized frost fabric.
For young trees or species like fruit trees, peach, or apricot, this protection is non-negotiable; a single hard freeze can set back growth for years.
By late fall, once nighttime temperatures dip below 25°F, it’s time to cover. Wrap loosely around the trunk and lower branches, securing with clips or stakes to prevent tearing. In spring, remove covers gradually as daytime warmth returns—too early, and you’ll trap heat, encouraging premature bud break.
The payoff? Trees that push out fresh growth come spring, free of frost cracks and winter dieback.
Works for any climate where winter temps drop below freezing, but pay extra attention to young trees or newly planted varieties. Here’s how to do it right the first time—no more sad, split bark come March.
📚 In This Guide
- What you need
- Instructions
- Tips and common mistakes
- Wrapping up and next steps
What you need
- ● Frost cover fabric: Breathable, frost-resistant fabric (e.g., frost cloth, agricultural row cover, or burlap). Quantity: Enough to cover the tree’s canopy + 1–2 feet of extra length (account for overlap). Weight: 30–50 gsm (grams per square meter) for most trees; lighter for small shrubs, heavier for large canopies.
- ○ Support structures: PVC pipes or wooden stakes (1–2 inches in diameter, 4–6 feet tall). Quantity: 4–6 stakes per tree (placed evenly around the perimeter). Optional: Metal hoops (for arched covers) or tree-specific frost domes.
- ● Fasteners & accessories: Clips or staple guns (for securing fabric to stakes). Twist ties or binder clips (to gather excess fabric at the base). Brackets or zip ties (for attaching hoops/stakes to the tree trunk).
- ● Measuring tools: Tape measure (to calculate canopy size). Ruler or yardstick (for precise fabric cuts).
- ● Insulation boosters: Straw or pine needles (mounded around the base to retain heat). Reflective bubble wrap (wrapped around the trunk to deflect cold).
- ● Ventilation aids: Brass fasteners or plastic vents (to prevent condensation buildup). Small weights (e.g., rocks) to anchor covers in windy areas.
- ● Weatherproofing: Waterproof sealant (for wooden stakes). UV-resistant fabric (if covers will be reused year-round).
Step-by-Step guide to protecting trees with frost covers
Here's how I shield tender canopies from winter's harshest chill—without damaging branches.
🪴 Step 1: Select the Right Frost Cover Material
Choose breathable frost cloth (rated for 20-30°F protection) or lightweight burlap for established trees. Avoid plastic sheets—trapped moisture causes rot. I prefer 50% shade cloth for young trees because it lets sunlight filter through while blocking frost. Measure your tree's canopy width and height to determine how much material you'll need.
For small trees, a single 6x8-foot sheet often suffices. For larger specimens, you may need two overlapping sections to ensure full coverage. If using burlap, select undyed, natural fiber to prevent chemical leaching onto leaves. Always check the material's permeability rating—lower numbers (like 30%) block more cold air but may suffocate roots if left too long.
☀️ Step 2: Install Covers Before Frost Hits
Timing is everything. Cover trees 2-3 days before the first hard freeze (when temperatures drop to 28°F or lower). You'll know it's time when the weather forecast shows a rapid overnight temperature plunge—no gradual cooling. I set up my covers in the late afternoon to give branches time to settle before evening frost.
Secure the cover with soft clips or stakes—never nails or tight ropes, which can damage bark. Drape the material loosely over the canopy, allowing 6-12 inches of clearance at the base. This prevents moisture buildup at the trunk. For trees with sensitive blossoms (like cherry or peach), add a second layer of lighter cloth on top to diffuse sunlight while blocking frost.
💧 Step 3: Monitor and Adjust for Safety
Check covers daily at dawn during frost events. If the material collects ice or heavy dew, gently brush it off with a soft broom—never shake the tree. Condensation inside the cover can create a micro-climate that encourages fungal growth. You'll want to see even moisture distribution on the cloth, not pooling water.
Remove covers within 2-3 hours of sunrise once temperatures rise above 32°F. Prolonged coverage (beyond sunrise to mid-morning) can trap heat and stress the tree as it adjusts to warmer conditions. I use weather alerts on my phone to time removals perfectly—overdoing it can be as harmful as underprotecting.
✂️ Step 4: Post-Frost Care and Storage
After removing frost covers, inspect branches for ice damage or broken buds. Gently shake off any remaining frost to prevent canker formation at injury points. Water the base of the tree lightly (about 1 gallon per inch of trunk diameter) to help it recover from stress. Avoid deep watering—soggy soil in winter can smother roots under frozen ground.
Store frost covers in a dry, shaded area between uses. Fold them neatly and place desiccant packets inside to prevent mildew. I label each cover with the tree type and last-use date—this helps me match protection levels to specific needs next season. Clean covers with mild soap and water before storage to remove any residual sap or mold spores.
Tips & tricks for perfect tree frost protection
These practical insights will help you shield your trees like a seasoned arborist—without the common pitfalls that leave branches vulnerable.
Material Selection Matters: When choosing between frost cloth and burlap, consider your tree's specific needs. For newly planted trees or those with delicate foliage like magnolias, opt for the 50% shade cloth mentioned in Step 1—it provides that perfect balance of frost protection and light penetration. For established fruit trees, the 30% permeability burlap offers better breathability while still blocking cold air. I've seen plastic sheets trap moisture and cause rot, so never use those—trust me, your tree will thank you later.
Timing is Critical: The 2-3 days before a hard freeze is your window, but don't wait until the last minute. I learned this the hard way after ruining three batches of frost covers by installing them too late. Set a reminder in your phone for when temperatures drop to 28°F—that's when you need to act. Also, late afternoon installation gives branches time to settle before evening frost sets in. Pro tip: Check the weather forecast for "rapid overnight temperature plunge" warnings—those are your triggers.
Secure Without Damaging: In Step 2, those soft clips or stakes are non-negotiable. I once used zip ties and ended up with gashes in the bark that took months to heal. Always use the 6-12 inch clearance at the base to prevent moisture buildup—this is what keeps roots from suffocating. For trees with sensitive blossoms like cherry or peach, that second layer of lighter cloth is worth the extra effort. It diffuses sunlight while maintaining frost protection, preventing sunburn on tender new growth.
Monitoring Prevents Disasters: The daily dawn checks in Step 3 are where most people slip up. If you see ice accumulation, brush it off gently with a soft broom—never shake the tree. That even moisture distribution on the cloth is your goal; pooling water creates the perfect conditions for fungal growth. And when temperatures rise above 32°F, remove covers within those critical 2-3 hours. I've seen trees stressed by prolonged coverage, so set that weather alert reminder to avoid overdoing it.
Pro Tips for Frost Covers For Trees
- These practical insights will help you shield your trees like a seasoned arborist—without the common pitfalls that le...
- Material Selection Matters: When choosing between frost cloth and burlap, consider your tree's specific needs. For ne...
- Timing is Critical: The 2-3 days before a hard freeze is your window, but don't wait until the last minute. I learned...
Frequently asked questions
Got questions about frost covers for trees?
You’re not alone! Here are some of the most common concerns—and straightforward answers—to help you protect your trees like a pro this winter.
When is the best time to apply frost covers?
Apply frost covers before the first hard frost hits your area—typically late fall (October–November in most regions). Check your local frost date and cover young, tender, or newly planted trees 2–4 weeks ahead of expected freezing temps. If a sudden cold snap sneaks up, you can still cover trees after frost, but remove covers during the day to prevent overheating.
How do I know if my tree needs a frost cover?
Use covers for delicate, broadleaf, or newly planted trees (especially those under 3 years old). Signs your tree needs protection include:
- Thin bark or smooth stems (like fruit trees, azaleas, or magnolias).
- Leaves that stay green late into fall (a sign of slow hardening-off).
- Trees in microclimates (e.g., near bodies of water or urban heat islands).
Can I reuse frost covers year after year?
High-quality frost covers (like frost cloth or burlap) can last 3–5 years if stored properly. Clean them after use to remove mold or debris, fold them flat, and store in a dry, shaded spot. Avoid plastic sheets—they trap too much moisture and can damage bark. Pro tip: Label your covers by tree type to streamline setup next season!
What should I do if my tree looks damaged after using a frost cover?
If you spot blackened leaves, mold, or soggy bark after removing covers, act fast:
- Inspect for pests or disease (like powdery mildew) and treat if needed.
- Loosen the cover if it’s too tight—trees need airflow to breathe.
- Water deeply but lightly if the soil feels dry (overwatering weakens roots).
Are there alternatives to frost covers for small gardens?
Yes! For small trees or shrubs, try these low-cost options:
- Straw mulch: Pile 4–6 inches around the base (but avoid piling against the trunk).
- Burlap wraps: Secure loosely around the trunk and branches for wind + frost protection.
- DIY row covers: Use old bedsheets or lightweight tarps (avoid plastic—it burns leaves in sunlight!).
- Grouping plants: Cluster trees together to create a microclimate that traps heat.
Wrapping up and next steps
Protecting your trees from winter’s harsh chill doesn’t have to be a guessing game—frost covers are your secret weapon for keeping delicate canopies thriving! 🌿 Whether you’re wrapping young saplings or safeguarding prized plants, the right materials and techniques make all the difference.
With a little prep, you’ll give your trees the cozy shield they need to breeze through the cold season.
Ready to take action? Start small: Pick one tree this year, gather your supplies, and try a cover before winter hits. Your future garden—and your trees—will thank you! 🌟