Orchid Care
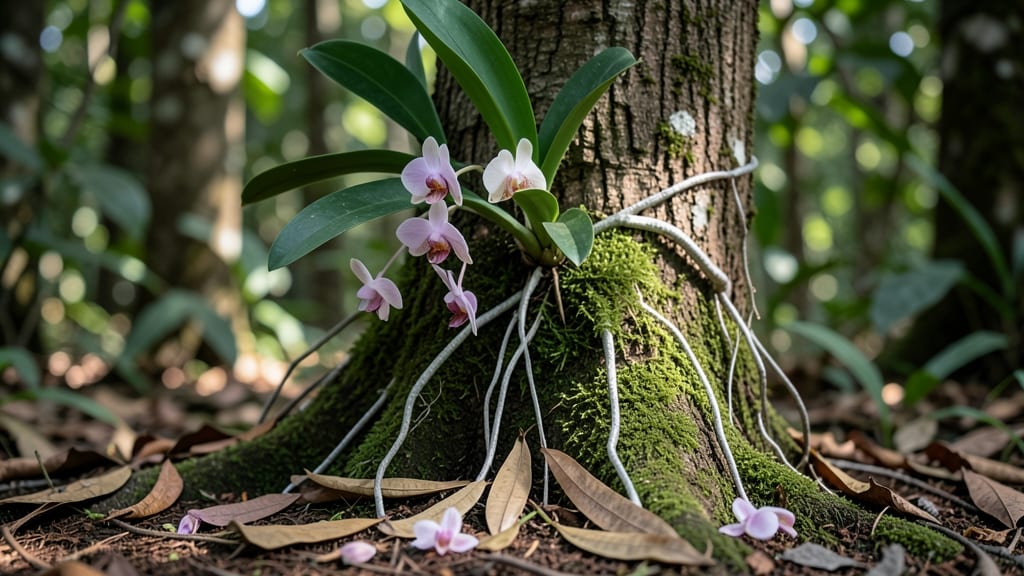
Growing orchids on trees isn't just possible—it's how they thrive in the wild. 🌿 Phalaenopsis, Cattleya, and Vanda orchids naturally cling to tree bark in tropical forests, and we can recreate that magic in our own spaces.
The key is mimicking their epiphytic lifestyle: no soil, just air, light, and a home that lets roots breathe.
You'll need just a few simple supplies: tree fern slabs, cork bark, or even a sturdy branch, plus some sphagnum moss for moisture. These orchids don't need rich soil—they grow on surfaces, so their roots absorb nutrients from the air and rain.
Once mounted, they'll reward you with vibrant blooms that last for months, just like in their natural habitat.
Sunlight becomes your best friend here—bright, indirect light keeps them thriving, while proper watering (soaking and drying cycles) prevents rot. You'll notice new growth within weeks, and those delicate blooms will make your space feel like a tropical paradise.
The best part? This method works for any skill level, even if you've struggled with orchids before.
Whether you're mounting on a tree in your yard or creating a vertical display indoors, the principles stay the same. Start small with one orchid, and soon you'll be collecting varieties that bring the jungle to your doorstep. Let's get those roots climbing!
📚 In This Guide
- What you need
- Instructions
- Tips and common mistakes
- Wrapping up and next steps
What you need
- ● Healthy orchid plant: Choose an epiphytic orchid (e.g., Phalaenopsis, Cattleya, or Vanda) with at least 3-5 mature pseudobulbs and visible aerial roots.
- ● Sharp, sterile pruning shears: 1 pair (sterilize with rubbing alcohol before use to prevent infection).
- ● Sphagnum moss: 1 small bag (1-2 lbs) (retains moisture while allowing airflow—never use peat moss).
- ● Plastic wrap or clear plastic bag: 1 large sheet or 2-3 small bags (6-12 inches wide, depending on plant size).
- ● Twist ties or rubber bands: 3-5 pieces (to secure the wrap tightly).
- ● Misting bottle: 1 (with room-temperature water to keep the moss damp).
- ○ Optional but helpful: Horticultural tape or parafilm (for a snug, airtight seal).
- ● Fertilizer (balanced 10-10-10 or orchid-specific, diluted to ¼ strength) for post-layering care.
- ● Spray bottle with hydrogen peroxide (3%) (to sterilize cuts if needed).
- ● Patience: Air-layering takes 4-12 weeks—roots need time to form before separation!
- ● Warm, humid environment: Ideal temps: 70-85°F (21-29°C). Avoid drafts or direct sunlight on the layer.
- ● Consistent moisture: Keep the moss damp but not soggy (overwatering = rot!).
- ● Gentle hands: Handle your orchid with care—no crushing the pseudobulbs or roots!
Step-by-Step guide to air-layering orchids on trees
Here's how to coax orchids into thriving on tree bark—just like in their wild habitats.
🌿 Step 1: Select the Right Tree and Orchid
Choose a healthy tree with rough, textured bark—think oak, maple, or pine. Avoid smooth-barked trees like birch or willow. The orchid should be mature enough to handle the stress of air-layering, with at least three to five pseudobulbs and healthy roots.
I always pick orchids that show new growth, as they're better equipped to handle the transition. Look for plants with firm, plump pseudobulbs and no signs of rot or pests. If the orchid has been dormant, wait until it starts sending up new shoots before attempting air-layering.
🪴 Step 2: Prepare the Orchid and Tree Surface
Clean the orchid's roots gently with a soft brush to remove old potting mix, but don't damage the rhizomes. Trim any dead or mushy roots with sterilized pruners, leaving only healthy, firm growth. This ensures your orchid starts with a clean slate.
On the tree, select a spot that gets bright, indirect light for most of the day—avoid deep shade or full sun. Scrape a small patch of bark clean with a wire brush, removing loose debris but not harming the tree. This creates a rough surface where the orchid can anchor itself.
💧 Step 3: Secure the Orchid to the Tree
Wrap the orchid's base around the tree trunk, positioning it where the roots can dangle naturally. Use orchid clips or plastic tree ties to secure it lightly—tight enough to hold but not so tight it restricts growth. I like to start with the orchid's oldest pseudobulb closest to the tree and work outward.
Cover the junction where the orchid meets the tree with sphagnum moss, keeping it moist but not soggy. This moss mimics the natural environment orchids grow in, trapping humidity and encouraging root growth. Mist the moss every 2-3 days to maintain moisture, but avoid soaking it.
☀️ Step 4: Monitor and Encourage Root Growth
Check the orchid every 2-3 weeks for new root growth. You'll see tiny white or green roots emerging from the base where it meets the tree—this is your signal that the air-layering is working. If the moss dries out, mist it again immediately.
After 3-4 months, gently tug on the orchid. If it resists and you feel slight resistance from new roots, it's ready to separate. If it pulls away easily, give it another month. Real talk: patience here is key—rushing can damage both the orchid and the tree.
✂️ Step 5: Separate and Transplant the Orchid
Once the orchid has established roots on the tree, carefully cut it away with sterilized pruners, leaving a small stub of the original plant attached. Remove the moss and gently brush away any loose bark or debris from the new roots.
Plant the orchid in a tree-fern or bark mix in a pot with drainage holes. Water lightly to settle the mix around the roots, then place it in bright, indirect light for a week to recover. You'll know it's thriving when new growth appears within 4-6 weeks.
Tips & tricks for perfect air-layered orchids
Here's what nobody tells you about making orchids thrive on trees—lessons from years of trial and error.
Selection Matters: In Step 1, don't overlook the orchid's growth stage. Plants with three to five pseudobulbs and visible new shoots have the best success rates. I've seen orchids with fewer bulbs fail completely, while those with more established growth take beautifully. Look for firm, plump pseudobulbs—anything soft or shriveled signals stress or disease. Confession: I skipped this check once and lost two orchids to rot.
Tree Surface Prep: When preparing your tree in Step 2, focus on creating texture rather than removing bark. The rough surface helps the orchid anchor itself naturally. I use a wire brush to gently roughen the bark where we'll place the moss—this mimics how epiphytes cling to tree trunks in their native habitats. Avoid scraping too deeply, as this can damage the tree and make the orchid less stable.
Moss Maintenance: The 2-3 day misting schedule in Step 3 is crucial for keeping the sphagnum moss consistently moist. I've found that using a spray bottle with a fine mist setting works best—soaking the moss can lead to rot. Check moisture by squeezing a small amount: it should feel damp like a wrung-out sponge, not dripping wet. Real talk: Overwatering is the #1 reason air-layering fails, so resist the urge to keep it soggy.
Patience Pays Off: In Step 4, the 3-4 month timeline isn't just arbitrary—it reflects how long it typically takes for orchid roots to establish. I've seen some take as little as 2 months in ideal conditions, while others need 5 months. The key is that gentle tug test: if it resists slightly, roots are forming. If it pulls away easily, give it another month. Between us, I've cut orchids too early and lost them both times.
Pro Tips for Orchids Growing On Trees
- Here's what nobody tells you about making orchids thrive on trees—lessons from years of trial and error.
- Selection Matters: In Step 1, don't overlook the orchid's growth stage. Plants with three to five pseudobulbs and vis...
- Tree Surface Prep: When preparing your tree in Step 2, focus on creating texture rather than removing bark. The rough...
Frequently asked questions
Got questions about orchids thriving on trees?
You’re not alone! Here are some of the most common queries—plus clear, actionable answers to help you master air-layering and keep your epiphytes happy.
Can I air-layer any orchid species on a tree?
Most epiphytic orchids (like Phalaenopsis, Vanda, or Cattleya) thrive with air-layering, but some terrestrial types (e.g., Paphiopedilum) aren’t suited for this method. Always check your orchid’s natural habitat—tree-dwellers make the best candidates!
How long does it take for roots to form during air-layering?
Root development varies, but you’ll typically see new roots in 4–12 weeks, depending on humidity, temperature, and orchid type. Keep the moss damp (but not soggy) and monitor progress—patience pays off!
What if my orchid’s leaves turn yellow after air-layering?
Yellowing leaves often signal stress from overwatering or poor airflow. Adjust by loosening the moss wrap slightly, reducing watering frequency, or improving ventilation. If only older leaves yellow, it’s usually natural senescence—no panic!
Can I reuse the moss from a failed air-layering attempt?
Yes! If the moss is still moist and mold-free, sterilize it with a 10% hydrogen peroxide solution (1 part peroxide to 9 parts water) to kill bacteria. Rinse thoroughly before reusing—just avoid over-saturating it next time.
What’s an alternative if I don’t have a tree for air-layering?
No tree? No problem! Use a sturdy branch (like a potted ficus or rubber plant), a tree-like support structure (e.g., cork bark slabs), or even a hanging basket with a moss-covered slat. Mimic the orchid’s natural perch for best results.
Still stumped? Drop your question in the comments—we’re happy to help your orchids climb to new heights!
Wrapping up and next steps
Growing orchids on trees through air-layering is a rewarding journey that blends patience with stunning results! 🌿✨ By mastering this technique, you’re not just cultivating plants—you’re creating living art that thrives in harmony with nature.
Whether you’re a beginner or a seasoned grower, the key is consistency, the right tools, and a little creativity.
Ready to take the next step? Start by experimenting with a single orchid—watch it flourish, and soon, your trees will become vibrant canvases of epiphytic beauty. Share your progress, ask questions, and join the community of orchid lovers! Your green thumb is about to shine brighter than ever.