Pruning
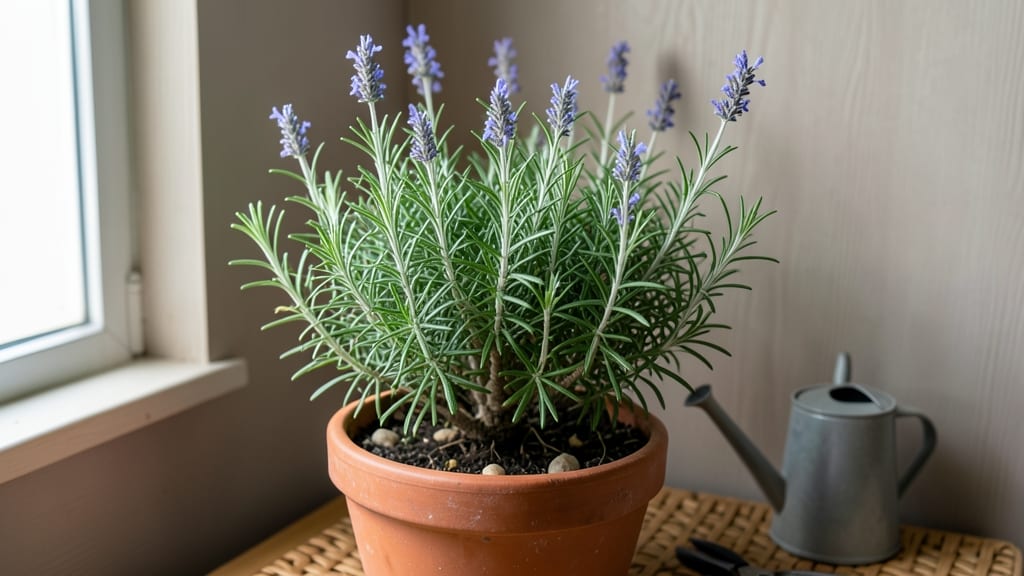
Growing a thriving indoor rosemary tree starts with the right light and a little patience—this fragrant evergreen can stay lush for years with just a sunny windowsill and occasional trimming. I’ve kept mine alive for over three years by treating it like a low-maintenance houseplant rather than a finicky herb.
The key is mimicking its Mediterranean roots: bright light, infrequent watering, and a well-draining pot.
Most people overwater rosemary, which leads to root rot and yellowing leaves. Let the top inch of soil dry out completely between waterings, and use a pot with drainage holes to prevent soggy roots.
A south- or west-facing window gives it the 6+ hours of sunlight it craves, but a grow light works in dimmer spaces. With the right setup, you’ll get that classic piney aroma and tender stems perfect for cooking.
Pruning isn’t just about shaping—it’s about encouraging bushier growth. Snip back leggy stems in early spring to promote new shoots, and harvest sprigs from the sides to keep the plant compact.
My rosemary now produces more flavorful sprigs than the grocery store, and it’s never needed more than a trim every few months. The secret? Less is more.
Watch for pests like spider mites (tiny webs on leaves) and treat them with a spray of water or insecticidal soap. If the soil stays too wet, switch to a cactus/succulent mix for better drainage. With these simple adjustments, your rosemary will thrive indoors for years—no greenhouse required.
📚 In This Guide
- What you need
- Instructions
- Tips and common mistakes
- Wrapping up and next steps
What you need
- ● Rosemary plant: A healthy, potted rosemary (preferably Rosmarinus officinalis) from a nursery or garden center. Look for one with woody stems and lush green needles.
- ● Well-draining potting mix: 2–3 gallons of a cactus/succulent blend or a mix of 50% potting soil + 50% perlite or coarse sand to prevent root rot.
- ● Pot with drainage holes: A 10–12-inch diameter container (terracotta or ceramic works best) with at least 3–4 drainage holes.
- ● Pruning shears: Sharp, clean bypass pruners (sterilize with rubbing alcohol between cuts).
- ● Watering can or spray bottle: A 1-gallon watering can with a narrow spout or a spray bottle for gentle hydration.
- ○ Grow lights (optional but recommended): A full-spectrum LED grow light (12–16 inches above the plant) for 6–8 hours daily if natural light is <10 hours/day.
- ● Humidity tray: A shallow tray with pebbles and water to boost moisture levels in dry indoor air.
- ● Slow-release fertilizer: A balanced, organic fertilizer (e.g., 10-10-10) or a rosemary-specific granular fertilizer for a nutrient boost.
- ● Plant saucer: A decorative saucer to catch excess water and protect surfaces.
- ● Support stake: A bamboo or metal stake if your rosemary grows tall (6+ feet) and needs structural support.
- ● Air purifier or fan: To improve airflow and prevent fungal issues.
How to cultivate a thriving indoor rosemary tree
This method transforms woody rosemary stems into a lush, aromatic tree with just a few strategic cuts.
Select and Prepare Your Rosemary Stem
Choose a healthy, non-flowering rosemary stem with at least 3-4 sets of leaves—these are your growth nodes. Cut just below a leaf node at a 45-degree angle using clean, sharp pruning shears. The angled cut increases surface area for root development, which is critical for propagation success.
Remove the lower leaves, leaving only the top 2-3 sets intact. This prevents them from rotting underwater while the stem develops roots. Place the cut end in a glass of room-temperature water, ensuring at least 1 inch of the stem is submerged. Change the water every 3-4 days to prevent bacterial growth, which can rot the stem before roots form.
Encourage Root Growth in Water
Position your glass near a bright, indirect light source, like an east-facing window. Direct sunlight can overheat the water and stress the stem. You'll notice tiny white root hairs emerging from the cut end in about 2-3 weeks. Once roots reach 1-2 inches in length, your rosemary is ready for planting.
Here's the thing—rosemary roots are delicate at first. Avoid disturbing the glass or moving it frequently. If the water evaporates completely, the stem will dry out before roots establish. Keep an eye on the water level and replenish as needed, using a small funnel if necessary to avoid spills.
Transition to Soil for Permanent Growth
Fill a 6-inch diameter pot with well-draining potting mix—rosemary hates soggy roots. Mix in a handful of perlite or coarse sand to improve aeration. Gently remove the rooted stem from the water and plant it so the root ball sits just below the soil surface. Press the soil lightly around the stem to secure it without compacting.
Water thoroughly until moisture seeps from the drainage hole, then let the top ½ inch of soil dry out before watering again. Overwatering is the fastest way to kill rosemary—it’s a Mediterranean plant adapted to drought, not dampness. Place the pot in a location with 6-8 hours of sunlight daily, either near a south-facing window or under a grow light.
Prune and Shape for a Tree Form
Once your rosemary reaches 6-8 inches tall, it’s time to shape it into a tree. Use clean pruning shears to trim just above a leaf node where you want the main trunk to end. This encourages lateral branching. For a fuller tree, pinch back the tips of new growth to promote bushier growth rather than elongated stems.
Every 4-6 weeks, rotate the pot a quarter turn to ensure even light exposure. This prevents the plant from leaning toward the light source. Prune again in late winter to remove any leggy growth and encourage fresh, vibrant shoots. Rosemary responds well to pruning—it’s how you keep it compact and encourage lush foliage.
Maintain Year-Round Health
Reduce watering in winter months when growth slows—let the top 1 inch of soil dry out completely between waterings. Overwatering in winter leads to root rot, which can be fatal. Fertilize lightly every 2-3 months with a balanced, water-soluble fertilizer diluted to half strength. Too much fertilizer burns rosemary’s delicate roots.
Watch for signs of stress: yellowing leaves often mean overwatering, while brown, crispy edges signal underwatering or low humidity. If your rosemary starts to look leggy, it’s craving more light. Move it closer to a brighter spot or supplement with a grow light for 12-14 hours daily. With consistent care, your indoor rosemary tree will stay lush and fragrant year-round.
Tips & tricks for perfect indoor rosemary tree
Transforming a woody rosemary stem into a thriving indoor tree takes patience—and these small but critical details make all the difference.
Cutting Technique: The 45-degree angle cut in Step 1 isn't just decorative—it's about maximizing root surface area. Use a sharp knife or pruning shears to make clean cuts just below a leaf node. If your cut is too shallow, roots won't develop properly; too steep, and the stem may rot before establishing. I've found that holding the stem firmly against a cutting board while making the angle prevents accidental slippage, which can create jagged edges that slow root growth.
Root Development Watch: In Step 2, those 2-3 weeks until root hairs appear can feel like an eternity, but resist the urge to check constantly. I've ruined stems by disturbing them too early—once I moved mine three times before roots formed, and it took another full week to recover. Place your glass in a stable location where you won't accidentally bump it, and consider using a small, clear container so you can see root progress without handling the stem.
Soil Transition Strategy: When moving your rooted stem to soil in Step 3, the key is gentleness. I've seen stems snap when pulled too forcefully from water. Grip the base firmly while tilting the glass to loosen the roots, then slide the stem out rather than lifting. The root ball should stay intact—if it breaks apart, you'll delay establishment by a full week as new roots form. This is where that 1-2 inch root length becomes crucial; shorter roots struggle to anchor in soil.
Light Exposure Secret: The 6-8 hours of sunlight in Step 3 is non-negotiable, but here's what nobody tells you: rosemary actually benefits from gradual light acclimation. If your plant starts yellowing after moving to a sunny window, it's getting too much direct sun too quickly. I've had success placing new plants under a sheer curtain for the first week, then gradually removing it over 3-4 days. This mimics how rosemary would adapt in nature, preventing sunburn while still encouraging strong growth.
Pro Tips for Indoor Rosemary Tree
- Transforming a woody rosemary stem into a thriving indoor tree takes patience—and these small but critical details make all the difference.
- Cutting Technique: The 45-degree angle cut in Step 1 isn't just decorative—it's about maximizing root surface area.
- Root Development Watch: In Step 2, those 2-3 weeks until root hairs appear can feel like an eternity, but resist the urge to check constantly.
Frequently asked questions
Got questions about keeping your indoor rosemary tree thriving? You’re not alone—growing this fragrant herb indoors can raise a few curiosities! Here are answers to the most common queries to help you cultivate lush, aromatic greenery year-round.
Can I grow rosemary indoors without sunlight?
Rosemary thrives on bright light, but if your space is dim, place it near a south-facing window or under a grow light (12–16 hours/day). Without enough light, stems grow leggy, and leaves turn pale. A sunny windowsill is ideal—just rotate the pot weekly for even growth!
How often should I water my indoor rosemary tree?
Water when the top 1–2 inches of soil are dry—usually every 1–2 weeks, depending on humidity and pot size. Overwatering is the #1 killer! Ensure the pot has drainage holes and use a well-draining soil mix (like cactus/succulent blend). Yellow leaves? You’re likely overdoing it!
Do I need to prune my indoor rosemary tree often?
Prune lightly but regularly—trim back leggy stems or woody growth to encourage bushiness. Use clean scissors to snip just above a leaf node. Harvest sprigs for cooking to promote new growth! Avoid heavy pruning unless reviving a neglected plant. Pro tip: Prune after watering to reduce stress.
What’s the best soil mix for an indoor rosemary tree?
A fast-draining mix is key—combine potting soil (50%) with perlite or coarse sand (30%) and orchid bark or coconut coir (20%). Avoid heavy garden soil, which traps moisture and causes root rot. Repot every 2–3 years or when roots circle the pot.
Why are my rosemary leaves turning yellow or dropping?
Yellow leaves often signal overwatering or poor drainage. Brown edges? It’s likely low humidity or fluoride in tap water (use filtered water). Dropping leaves can mean root stress—check for soggy soil or pests (like spider mites). Adjust care and monitor for improvement!
Can I grow rosemary from a grocery store bunch?
Yes! Place the stems in water (change weekly) until roots form (~2–3 weeks). Then transplant into well-draining soil. Pro tip: Trim the stems just below a leaf node before rooting to encourage branching. Not all store-bought rosemary will thrive indoors—choose fresh, woody stems for best results.
Wrapping up and next steps
Growing an indoor rosemary tree is a rewarding way to enjoy fresh herbs year-round with just a little care! 🌿 With the right tools, a few pruning tricks, and consistent attention, your aromatic plant will thrive—adding beauty, fragrance, and culinary potential to your home.
Whether you're a seasoned gardener or a beginner, this low-maintenance green friend is ready to flourish.
Ready to take the next step? Start small—pick a healthy branch, grab your pruners, and give it a try! Soon, you’ll be harvesting fresh rosemary for your favorite dishes or sharing tips with fellow plant lovers. Happy pruning! ✂️