
Pruning
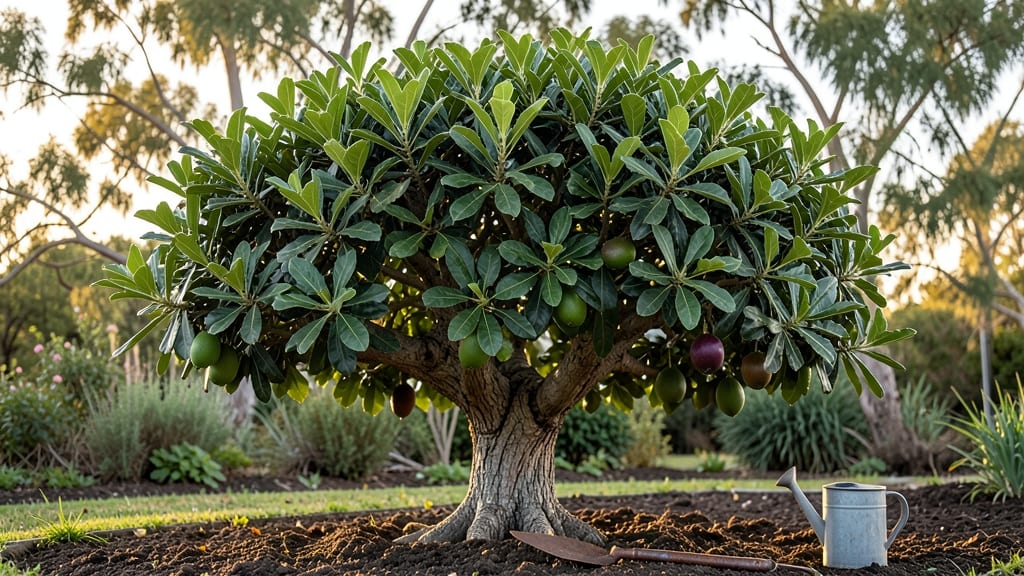
Your established avocado tree is about to enter its most productive season—if you prune it right this late winter. ✂️ I’ve seen trees go from sparse harvests to heavy fruit loads just by timing cuts correctly, and the secret isn’t complicated: focus on removing dead wood, thinning crowded branches, and shaping for airflow.
This isn’t about drastic cuts—it’s about strategic shaping to set up a harvest that’ll make your neighbors jealous.
The tools you’ll need are simple: sharp pruning shears, rubbing alcohol for sterilizing cuts, and a ladder if your tree’s over six feet tall. Work on a dry day when the tree’s dormant, and avoid pruning if frost is forecasted.
Most importantly, don’t rush—take your time to assess each branch. A little precision now means fewer problems later, like disease or weak growth.
What you’re really after is a tree that balances beauty with productivity. After pruning, you’ll see stronger new growth by spring, and those fruit clusters will form thicker and more abundant.
The air circulating through the canopy reduces humidity, cutting down on fungal issues that plague avocado trees. Plus, the tree’s energy goes into fruit production instead of maintaining weak branches.
This method works for both Hass and Fuerte varieties, though Hass trees benefit most from late-winter pruning. If you’re in a frost-prone area, hold off until after the last frost date—your tree will thank you with a harvest that’ll last well into fall.
Ready to get started? Let’s make that tree work harder for you.
📚 In This Guide
- What you need
- Instructions
- Tips and common mistakes
- Wrapping up and next steps
What you need
- ● Pruning shears: Bypass pruners (for cuts up to ½ inch thick) – 1 pair (sterilized with rubbing alcohol).
- ● Loppers: For thicker branches (½ to 1½ inches) – 1 pair (sharp and clean).
- ● Pruning saw: For stubborn, larger branches (1½+ inches) – 1 saw (with a fine-tooth blade).
- ● Disinfectant: 70% isopropyl alcohol or 10% bleach solution (to sterilize tools between cuts).
- ● Heavy-duty gloves: Cut-resistant (to protect from thorns and sap).
- ○ 5-gallon bucket: For collecting pruned branches (optional but handy!).
- ● Permanent marker: To label cuts if grafting or training new branches.
- ● Pruning sealant: (e.g., tree wound dressing) for large cuts over 2 inches in diameter.
- ● Ladder: Sturdy, extendable (if tree exceeds 6 feet tall).
- ● Tarp or drop cloth: To protect the ground beneath the tree.
- ● Notebook & pen: To sketch your tree’s structure before/after pruning.
- ● Compost bin access: For repurposing pruned branches into mulch.
Step-by-Step guide for late-winter avocado tree pruning
Here's how I transform my avocado tree each winter—clean cuts mean bigger fruit later.
✂️ Step 1: Remove Dead or Diseased Branches First
Start by scanning your tree for any branches that are completely brown, brittle, or oozing sap. These are your top priority—they're dead weight and potential infection points. Use sharp pruning shears to make clean cuts at the branch collar, the swollen area where the branch meets the trunk. Avoid leaving stubs; they invite rot and pests.
I always work from the bottom up. This keeps me from accidentally dropping tools on lower branches. If a branch is larger than ½ inch thick, use a pruning saw for a smooth cut. You'll know you're doing it right when the cut surface looks fresh and white, not jagged or torn.
✂️ Step 2: Thin the Canopy for Better Airflow
Avocados need good airflow to prevent fungal diseases like root rot. Look for branches that cross each other or grow inward—they'll rub and create wounds. Remove about 20-30% of the canopy by cutting these back to their point of origin. This isn't about drastic reduction; it's about strategic thinning to let light reach the center.
Here's the thing—I never remove more than ¼ of the tree's foliage in one session**. Over-pruning stresses the tree and can reduce next year's fruit set. You'll see the difference immediately: sunlight will start filtering through to the inner branches where new growth will sprout.
✂️ Step 3: Shape for Fruit Production
Avocados produce fruit on new wood, so you want to encourage vigorous growth. Focus on removing branches that grow straight up—they're called "water sprouts" and they steal energy from fruit production. Cut these back to a side branch or the main trunk. For horizontal branches, trim the tips to encourage branching outward.
I like to maintain a slightly open center. This prevents the tree from becoming too dense, which can lead to fruit rot. If your tree has a natural vase shape, preserve that—it's already optimized for sunlight exposure. You'll notice new buds forming at the cut points within 2-4 weeks if you've pruned correctly.
💧 Step 4: Clean Up and Protect the Tree
After pruning, rake up all the debris from the ground. Leaving cuttings around can harbor pests and diseases. Sterilize your pruning tools with rubbing alcohol between cuts to prevent spreading any potential infections. Now's also the time to apply a fresh layer of 2-3 inches of mulch around the base, keeping it 6 inches away from the trunk.
Real talk: I've seen avocado trees decline after pruning because people forget to water deeply afterward. Give your tree a thorough soaking right after pruning to help it recover. You'll know it's happy when new leaves start emerging in 4-6 weeks, signaling the tree is putting energy into growth instead of repair.
Tips & tricks for perfect late-winter avocado tree pruning
Clean cuts and strategic shaping make all the difference in your avocado tree's fruit production—here's how to avoid common mistakes.
Precision Cuts in Step 1: When removing dead branches in Step 1, use a sharp pruning saw for branches over ½ inch thick—dull tools crush the branch collar, leaving wounds that heal poorly. I learned this the hard way after seeing my tree develop rot from jagged cuts. Always cut just outside the branch collar at a slight angle to allow water to bead off, not pool.
Canopy Thinning Strategy: In Step 2, aim to remove only 20-30% of the canopy—this might sound counterintuitive, but avocados need sunlight to reach the inner branches where fruit develops. I've seen trees stressed by over-pruning (removing more than ¼) produce fewer flowers the following spring. Focus on removing branches that cross or rub against each other first—they create wounds that invite disease.
Water Sprout Identification: Step 3's water sprouts are the vertical branches growing straight up from the trunk or main limbs. These energy vampires can reduce fruit production by up to 30%. Cut them back to a side branch or the main trunk, but never leave a stub—this creates a perfect entry point for pests. You'll know you've done it right when you see new lateral branches forming within 2-4 weeks at the cut points.
Post-Pruning Recovery: After completing all steps, don't forget the deep watering mentioned in Step 4—this is when most trees show stress. I've seen avocado trees decline after pruning because people skip this crucial step. Water deeply to help the tree recover, and you'll notice new leaves emerging in 4-6 weeks as a sign of successful pruning. Keep mulch 6 inches away from the trunk to prevent rot while retaining moisture.
Pro Tips for Established Avocado Tree
- Clean cuts and strategic shaping make all the difference in your avocado tree's fruit production—here's how to avoid common mistakes.
- Precision Cuts in Step 1: When removing dead branches in Step 1, use a sharp pruning saw for branches over ½ inch thick—dull tools crush the branch collar, leaving wounds that heal poorly.
- Canopy Thinning Strategy: In Step 2, aim to remove only 20-30% of the canopy—this might sound counterintuitive, but avocados need sunlight to reach the inner branches where fruit develops.
Frequently asked questions
Got questions about pruning your established avocado tree?
Here are some of the most common concerns—and practical answers—to help you prepare for a thriving harvest.
When is the exact best time to prune an established avocado tree?
Late winter (just before spring growth begins) is ideal—typically February to early March in most U.S. growing zones (8–11). Avoid pruning during hot, dry spells or heavy fruit production (like summer), as it stresses the tree. Pro tip: Check local frost dates—prune after the last frost to prevent cold damage to fresh cuts.
How much can I safely prune an established avocado tree?
Limit pruning to 15–25% of the canopy per year for healthy growth. Over-pruning (beyond 30%) risks sunburn or reduced flowering. Focus on:
- Removing dead, diseased, or crossing branches (prioritize air circulation).
- Thinning suckers (shoots from the trunk/base) to redirect energy to fruit.
- Opening the center for light penetration (avocados need 6+ hours of sun!).
Will pruning now affect my avocado harvest this year?
Pruning in late winter won’t reduce this year’s crop—avocado trees set fruit on current-year wood. However, heavy pruning now may delay harvest timing by 2–4 weeks (as the tree focuses on regrowth). For consistent yields, spread pruning over 2–3 years and avoid drastic cuts before flowering season (spring).
What if my avocado tree has no leaves after pruning?
Don’t panic! Avocados are evergreen, so leaf drop is normal if you pruned too aggressively. If most leaves remain, the tree is fine—just water deeply and monitor for new growth in 4–6 weeks. If bare branches persist, check for:
- Underwatering (avocados need 1–1.5 inches/week in dry climates).
- Root rot (yellowing leaves + mushy stems = act fast with fungicide).
- Nutrient deficiency (apply citrus-specific fertilizer in spring).
Can I prune an avocado tree in a pot the same way?
Yes, but with key adjustments:
- Prune 10–15% less than in-ground trees (root space is limited).
- Use sterilized shears to avoid soil-borne diseases.
- Repot every 2–3 years if roots circle the container (avocados hate root-bound stress!).
Container trees also benefit from annual root pruning—gently trim outer roots when repotting to encourage bushier growth.
Wrapping up and next steps
Growing an established avocado tree with late-winter pruning is a rewarding way to boost fruit production and tree health! By removing dead branches, shaping the canopy, and encouraging airflow, you’re setting your tree up for a bountiful harvest—all while keeping it strong and pest-resistant. 🌿
Now that you’re armed with the right tools and techniques, roll up your sleeves and get pruning! Start small if you’re new, and soon, your avocado tree will thank you with delicious, homegrown fruit. Ready to take the next step? Check out our seasonal care guide for ongoing tips to keep your tree thriving year-round.