Pruning
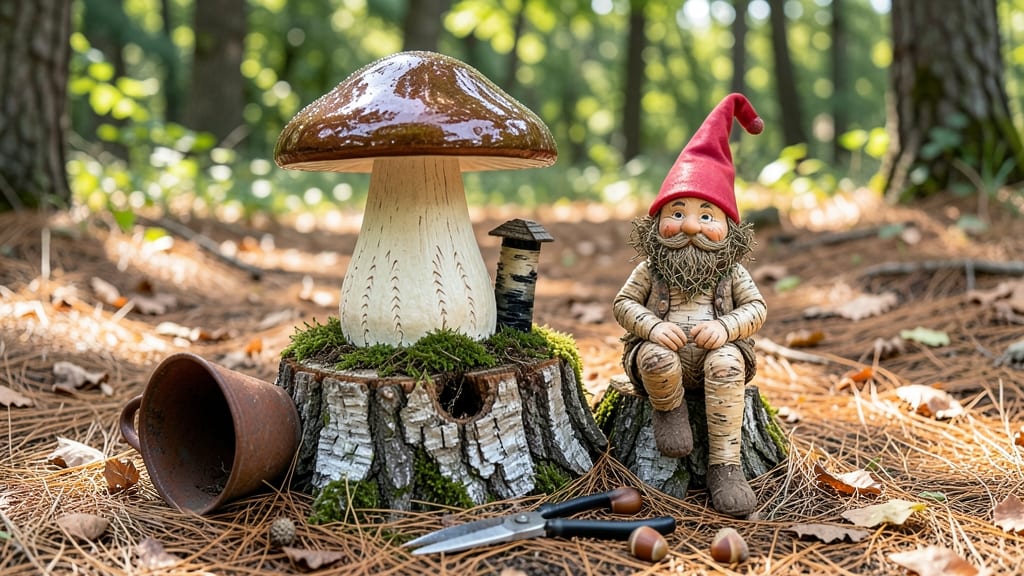
Transform that old tree stump into a charming house for gnomes with these enchanting tree stump gnome house kits—your garden will never look the same. 🌿 I’ve watched ordinary stumps turn into tiny fairy dwellings that spark joy every time I walk past, and they’re easier to assemble than you’d think.
The kits come with everything you need: pre-cut shingles, a door, windows, and even moss for that authentic forest feel.
What makes these kits special is how they blend into your garden while adding personality. Place one near your fairy garden, nestled in ferns or under a toadstool mushroom. Or tuck it into a corner of your patio, surrounded by wildflowers and tiny pebbles.
The best part? You can paint the wood to match your garden’s color scheme or leave it natural for a rustic look.
Once assembled, these little houses become instant conversation starters and a fun project for kids or garden clubs. They’re weather-resistant, so they’ll last through seasons, and you can even add tiny garden accessories like a bridge or a winding path to complete the scene.
The results? A garden that feels like a storybook come to life.
Whether you’re building a full fairy village or just adding a touch of whimsy, these kits make it simple. Grab one this weekend and watch your garden transform into a magical hideaway—no green thumb required!
📚 In This Guide
- What you need
- Instructions
- Tips and common mistakes
- Wrapping up and next steps
What you need
- ● Tree stump gnome house kit (includes pre-cut stump base, roof pieces, and decorative elements—check for compatibility with your stump size).
- ● Natural tree stump (4–6 inches in diameter, 6–12 inches tall; ensure it’s dry and stable).
- ● Wood glue (waterproof, outdoor-rated, like Titebond III).
- ● Wood screws or nails (1–1.5 inches long, rust-resistant, e.g., galvanized or stainless steel).
- ○ Sawdust or wood filler (to seal gaps, optional but recommended for a polished look).
- ● Outdoor paint or wood stain (non-toxic, weather-resistant; colors like moss green, bark brown, or pastel hues work best).
- ● Paintbrushes (fine-tip for details, wider brush for base coats).
- ● Decorative elements (kit may include moss, pebbles, or tiny doors—supplement with fake ivy, twigs, or mini furniture if desired).
- ● Drill or screwdriver (cordless for ease, with Phillips/flathead bits).
- ● Safety goggles (for sanding or cutting, if modifying the stump).
- ● Sandpaper (medium-grit, 120–150, for smoothing rough edges).
- ● Measuring tape (to ensure kit pieces fit your stump).
- ● Ruler or stencil (for marking paint designs or cuts).
- ○ Hot glue gun (optional, for attaching lightweight decor like moss or tiny flags).
- ● LED tea lights (battery-operated, for a magical glow at night).
- ● Miniature garden tools (tiny rake, shovel, or watering can for the gnome’s workshop).
- ● Weatherproof sealant (spray-on, like Minwax Helmsman, to extend longevity).
- ● Custom signs (hand-painted or printed, e.g., “Gnome Lodge” or “Fairy Post Office”).
- ● Live succulents or air plants (for a low-maintenance, whimsical touch).
Step-by-Step instructions for building your fairy garden gnome house
Turn that stump into a magical gnome home with these simple, creative steps.
🪴 Step 1: Prepare the Stump Base
Start by cleaning your stump thoroughly with a stiff brush and mild soap to remove dirt, moss, or debris. Let it dry completely—this prevents mold and ensures your gnome house stays sturdy. If the stump has sharp edges, sand them down lightly for safety, especially if kids or pets will be around.
Look for natural crevices or hollows in the stump—these will become the perfect spots for doors, windows, or even a tiny chimney. Mark these areas with a pencil if needed, but try to work with the stump’s natural shape. The goal is to blend your gnome house into the stump seamlessly, making it look like it’s always been there.
🌿 Step 2: Assemble the Gnome House Kit
Unpack your kit and sort the pieces by size and function—walls, roof, door, and any decorative elements like shutters or a tiny fence. Most kits include pre-cut wood or lightweight materials designed to fit snugly around your stump. Follow the included diagram or instructions to identify which pieces go where.
If your kit includes adhesive or small nails, use them sparingly. You’re not building a fortress—just a whimsical home. Press each piece firmly into place, letting gravity and the stump’s natural contours help guide you. For extra stability, add a dab of wood glue at the seams before securing with nails or screws.
☀️ Step 3: Paint and Decorate for Magic
Now comes the fun part—personalizing your gnome house! Use the acrylic paints from your kit to bring your vision to life. Start with a base coat, then add details like shutters, a chimney, or tiny flower boxes. Let each layer dry completely before adding the next—rushing here will make your colors blend unevenly.
Here’s the thing—gnome houses don’t need to be perfect. A little uneven paint or a crooked door adds charm. Once the paint is dry, seal everything with the provided varnish or outdoor sealant. This protects your creation from rain, sun, and curious critters. Let it cure for at least 24 hours before adding any final touches.
💧 Step 4: Add Fairy Garden Touches
Now it’s time to bring your gnome house to life with the surrounding garden. Use the moss, pebbles, and small plants from your kit to create a tiny world around the stump. Press moss into the base of the stump to mimic a natural forest floor, and arrange pebbles to form paths or garden beds.
Plant any included succulents or flowers near the base of the stump, tucking them into the soil gently. Water lightly after planting—just enough to settle the soil, but not so much that it washes away your hard work. Place a tiny gnome figurine or two near the door to complete the scene. Watch as your fairy garden transforms over time with new growth!
Tips & tricks for perfect tree stump gnome house kits
Between us, the secret to a gnome house that looks like it's been there forever starts with embracing the stump's natural quirks. Here's what I've learned the hard way after trying to force perfection.
Work with the stump's natural features: Those crevices and hollows in Step 1 aren't flaws—they're your design opportunities! Use them as doorways, windows, or even a chimney. I once tried to force a perfectly square door on a smooth stump and ended up with a house that looked like it was built by giants, not gnomes. The most magical houses blend seamlessly with their surroundings.
Glue is your best friend in Step 2: That dab of wood glue at the seams makes all the difference for stability. I learned this after my first attempt came apart when my dog bumped into it. Apply glue sparingly—you don't want it oozing out and making a mess—but it gives you that extra security so your gnome home stays put, especially if you have curious pets or kids around.
Embrace the 24-hour sealant cure: I know it's tempting to rush to the final touches, but that full 24 hours lets the sealant really set up properly. This protects your gnome house from rain, sun, and even curious squirrels that might try to claim it as their own. Trust me on this—skipping this step means your paint might chip after the first heavy rain.
Add charm with imperfect details: In Step 3, remember that gnome houses don't need to be perfect. That slightly crooked door or uneven paint stroke actually adds character! I once spent an hour trying to make everything symmetrical, and it ended up looking like a dollhouse rather than a magical forest home. The most enchanting gnome houses have a little bit of whimsy and imperfection.
Pro Tips for Tree Stump Gnome House Kits
- Between us, the secret to a gnome house that looks like it's been there forever starts with embracing the stump's natural quirks.
- Work with the stump's natural features: Those crevices and hollows in Step 1 aren't flaws—they're your design opportunities!
- Glue is your best friend in Step 2: That dab of wood glue at the seams makes all the difference for stability.
Frequently asked questions
about tree stump gnome house kits—because every fairy gardener deserves a little clarity!What’s the best time of year to assemble a gnome house kit?
Spring or early fall is ideal! Mild weather makes assembly easier, and your gnome home will thrive with consistent rainfall. Avoid extreme heat (risk of warping) or frost (delicate materials may crack). If you’re in a dry climate, water the stump regularly for the first few weeks.
Can I customize the kit if it doesn’t match my garden’s vibe?
Most kits include paint, moss, and decorative elements to personalize. Swap out colors for your theme (e.g., pastels for a cottage feel, bold hues for a fantasy look). Pro tip: Use natural materials like acorns or pebbles from your yard for a seamless blend.
How do I protect the gnome house from pests or rot?
Prevent rot by sealing the stump with outdoor wood sealant before assembly. Keep moss moist but not soggy—pests love damp wood. Elevate the base slightly with gravel or stones to improve airflow. For extra defense, add a tiny "gnome guard" (like a plastic spider or ladybug) to deter critters!
Will the kit survive heavy rain or snow?
Most kits are designed for light rain, but heavy downpours can damage paint or warp wood. For snow: Gently brush off accumulation to avoid weight stress. Store the kit indoors during harsh winters if possible. A clear umbrella or small roof addition (like a mini mushroom cap) can help in snowy climates.
Are there budget-friendly alternatives to pre-made kits?
Yes! DIY with a hollowed-out stump, twigs, pinecones, and acrylic paint. Use a drill to carve doors/windows, then seal with Mod Podge for durability. Check dollar stores for mini furniture (like gnome chairs) or repurpose thrifted figurines. Pinterest is a goldmine for upcycled ideas!
Wrapping up and next steps
Transforming a tree stump into a charming gnome home is more than just a fun project—it’s a creative way to breathe new life into your garden while adding a touch of whimsy!
With tree stump gnome house kits, you’ve got everything you need to craft a one-of-a-kind fairy garden centerpiece, perfect for sparking joy in both kids and adults alike.
Whether you’re a DIY beginner or a seasoned crafter, this project is a fantastic way to connect with nature and unleash your imagination.
Ready to get started? Grab your kit, gather your tools, and let your creativity grow! 🌿✨