Pruning
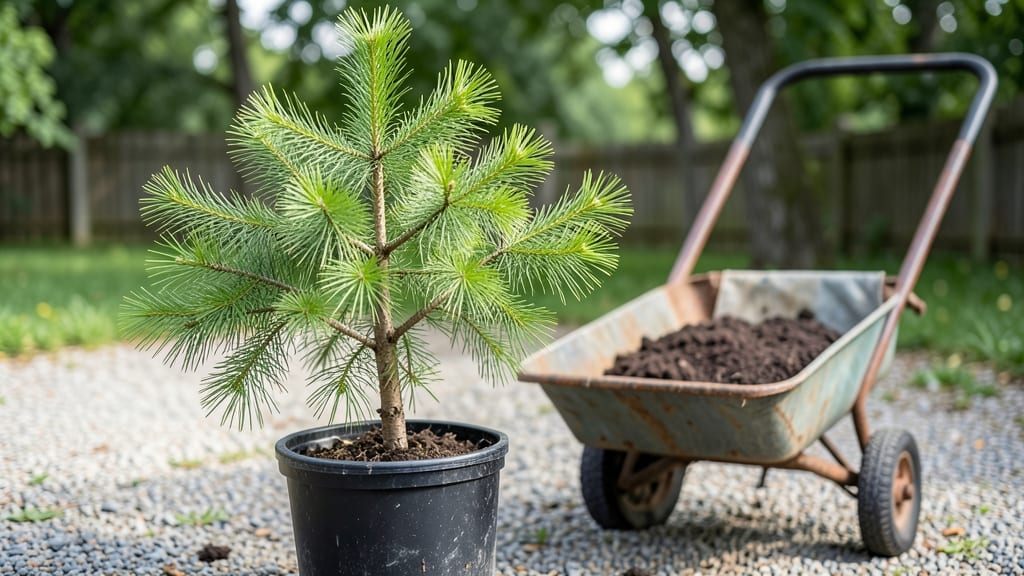
Transforming your Pacific Northwest garden with rolling tree planters means mobility meets beauty—no more permanent planting limits. 🌿 These versatile planters let you adjust sunlight, protect roots from winter chill, and even move struggling trees to better spots before frost hits.
I’ve used them to revive a struggling Japanese maple in my Seattle yard by giving it afternoon shade during summer’s hottest weeks.
The right rolling planter depends on your tree’s size and your space. For small urban gardens, lightweight plastic or fabric options work best—they’re easy to maneuver and won’t damage patios. Larger trees need sturdy metal or reinforced plastic with built-in wheels for stability.
Maintenance is simple: just check drainage holes occasionally and refresh the soil every few years to keep roots thriving.
You’ll love how these planters extend your growing season—even in PNW’s rainy winters. Place them on gravel or pavers to prevent soil erosion, and use them to create temporary display areas for seasonal interest.
A well-chosen planter can turn a dull corner into a focal point with minimal effort. Let’s explore how to pick and prep yours for maximum impact.
Whether you’re reviving a neglected tree or designing a flexible garden layout, rolling planters offer solutions for every challenge. They’re especially useful for renters, small spaces, or anyone who wants to experiment with different garden designs without permanent changes.
Start with the right size, and you’ll see results in just a few weeks.
📚 In This Guide
- What you need
- Instructions
- Tips and common mistakes
- Wrapping up and next steps
What you need
- ● 1-2 large wooden barrels or whiskey casks (or repurposed rolling planters, 18–24" diameter, 30–36" tall)
- ● 1–2 high-quality rolling casters (4"–6" diameter, heavy-duty, 2–4 per planter)
- ● Waterproof liner (e.g., PVC pond liner or heavy-duty plastic sheeting, 6' x 8' to cover the interior)
- ● Drainage layer: 2–3" of gravel (½"–¾" size)
- ○ 1–2" of perlite or pumice (optional, for aeration)
- ● High-quality potting soil (6–8 cubic feet, well-draining mix with compost)
- ● 1–2 young trees or shrubs (Pacific Northwest natives like Dogwood, Rhododendron, or Oregon Grape; 3–5 gallons in size)
- ● Mulch (2–3 cubic feet, cedar bark or wood chips)
- ● Drill with metal bit (for caster holes, if modifying barrels)
- ● Screwdriver or wrench (for securing casters)
- ● Utility knife or scissors (for cutting liner)
- ● Tape measure (to ensure proper drainage and soil depth)
- ● Gloves (to keep hands clean while handling soil and gravel)
- ● Wheelbarrow or bucket (for transporting soil and mulch)
- ● Drip irrigation kit (for easy watering on the go)
- ● Decorative paint or stain (to match your garden aesthetic)
- ● Tree ties or stakes (for supporting young trees)
- ● Lightweight trellis (if planting climbing varieties like Clematis)
Step-by-Step instructions for building a rolling tree planter
Here's how I create a sturdy, mobile planter that keeps your Pacific Northwest trees thriving year-round.
🪴 Step 1: Build the Base Frame
Start by constructing a rectangular frame using 4 heavy-duty wooden planks (2x6s, 36 inches long) for the base. I use wood screws (1.5 inches long) to connect them into a square, ensuring each corner forms a 90-degree angle for stability. The base should measure roughly 30 inches by 30 inches to accommodate mature root systems.
Add two 24-inch wooden dowels as cross supports, screwing them into the center of each long side. These will later hold the rolling mechanism. For extra durability, I reinforce the corners with wooden corner braces—this prevents wobbling when you move the planter. Sand all edges smooth to avoid splinters.
🌱 Step 2: Attach Rolling Casters
Install four heavy-duty casters (2 locking, 2 swivel) into the frame. I position the locking casters at the front corners to control movement, while the swivel casters at the back allow smooth turns. Use 1-inch wood screws to secure them through pre-drilled holes in the base planks—this prevents cracking.
Test the movement before adding weight. The planters should roll effortlessly but stop when the locks engage. If they feel stiff, apply a light coat of silicone lubricant to the caster wheels. Here's the thing—you want smooth gliding, but not so loose that the planter tips when you push it.
☀️ Step 3: Line the Interior with Root-Friendly Materials
Line the bottom of the frame with landscape fabric to prevent soil from falling out while allowing roots to spread. Next, add a 2-inch layer of gravel for drainage—this is critical in the Pacific Northwest's rainy climate. I use sharp-edged gravel because it creates air pockets that prevent waterlogging.
On top of the gravel, layer 4 inches of high-quality potting mix mixed with compost (I use a 70/30 ratio). This blend drains well but retains enough moisture for root growth. Tap the frame gently to settle the layers evenly. The goal is a stable base that won’t compact under a tree’s weight.
🌿 Step 4: Plant and Secure the Tree
Dig a hole in the center of the planter twice as wide as the tree’s root ball and just as deep. Gently loosen the roots of your tree (if it’s in a nursery pot) and place it in the hole. Fill around the roots with the remaining potting mix, pressing lightly to remove air pockets. Water deeply until it drains from the bottom.
To keep the tree stable, I use two wooden stakes inserted at opposite corners of the planter. Secure the tree trunk to the stakes with soft tree ties, leaving room for growth. This prevents the tree from toppling when you move the planter—especially important in windy Pacific Northwest weather.
⏰ Step 5: Maintain and Rotate for Sunlight
Water the tree once a week during dry spells, but check the soil first—it should be dry 1-2 inches down before watering again. In the Pacific Northwest’s mild climate, you’ll rarely need more than this. I also add a slow-release fertilizer in early spring to support growth.
Rotate the planter every 2-3 weeks so all sides of the tree get even sunlight. You’ll notice new growth on the previously shaded side within a month—that’s your signal it’s working. Keep the locking casters engaged when stationary to prevent accidental movement, especially during storms.
Tips & tricks for perfect rolling tree planters
Building a rolling tree planter that actually works takes a few key tricks—here's what I learned after testing designs in my own garden.
Stability is Everything: When attaching the 24-inch wooden dowels in Step 1, make sure they're centered exactly on the long sides. I use a speed square to verify they're perfectly parallel to the base planks—this prevents the planter from wobbling when you add weight. If you notice any rocking after assembly, add a small shim of wood under the base at the high points.
Caster Placement Matters: In Step 2, don't just install the casters randomly—position them so the center of each wheel aligns with the center of each base plank. This creates a stable four-point contact when moving. I also recommend using threaded inserts in the base planks before screwing in the casters; they make adjustments easier if you need to fine-tune the wheel alignment later.
Drainage Layer Trick: The 2-inch gravel layer in Step 3 should be slightly larger than the planter's base dimensions. I cut the landscape fabric an inch larger than the frame on all sides, then fold the excess up the inside walls. This creates a small drainage channel along the edges that prevents water from pooling against the frame when you water from above.
Tree Securing Hack: For Step 4, instead of using just two stakes, I add a third stake at the front of the planter when moving it. This creates a triangular support system that prevents the tree from leaning forward. The soft tree ties should be snug but not cutting into the bark—wrap them in a strip of old garden hose to protect the trunk during growth.
Pro Tips for Rolling Tree Planter
- Building a rolling tree planter that actually works takes a few key tricks—here's what I learned after testing designs in my own garden.
- Stability is Everything: When attaching the 24-inch wooden dowels in Step 1, make sure they're centered exactly on the long sides.
- Caster Placement Matters: In Step 2, don't just install the casters randomly—position them so the center of each wheel aligns with the center of each base plank.
Frequently asked questions
Got questions about using a rolling tree planter to create stunning layered landscapes? You’re not alone! Here are some of the most common queries—and their answers—to help you get started with confidence.
What’s the best time of year to use a rolling tree planter in the Pacific Northwest?
The ideal window is early spring (March–April) or fall (September–October), when temperatures are mild and rain keeps soil moist. Avoid planting during summer heatwaves or winter frosts—roots need time to establish without stress. Pro tip: Check your local frost dates to time it perfectly!
How do I know if my rolling tree planter is the right size for my trees?
Size matters! For small trees (under 6 ft), a 12–18" diameter planter works best. Larger trees (6–15 ft) need a 24–36" planter to accommodate root balls. Measure your tree’s root flare (where roots meet the trunk) and add 2–3 inches of extra space for growth. Overcrowding = stunted roots!
Can I use a rolling tree planter in heavy clay soil common to the PNW?
Clay soil can be tricky, but a rolling planter’s drainage holes and amended soil mix (50% native soil + 50% compost) improve aeration. Add a 2-inch layer of gravel at the bottom to prevent waterlogging. For extra insurance, mulch heavily after planting to retain moisture.
Are there cheaper alternatives to a rolling tree planter?
Yes! DIY options include:
- Repurposed buckets (cut drainage holes, line with burlap).
- Fabric grow bags (breathable, portable, and budget-friendly).
- Wooden crates (untreated, with drainage—great for temporary support!).
My tree looks wobbly after planting—what went wrong?
Wobbliness usually means the root ball wasn’t secured or the soil wasn’t compacted enough. Fix it by:
- Backfilling with native soil mixed with compost (tamp down gently).
- Staking only if necessary (use 2–3 stakes at 45° angles).
- Watering deeply to settle the soil (1–2 gallons per foot of tree height).
Wrapping up and next steps
Transforming your Pacific Northwest landscape with a rolling tree planter isn’t just about aesthetics—it’s a year-round investment in resilience and beauty. By mastering layered root systems and smart planting techniques, you’re setting the stage for thriving greenery that withstands the region’s unique climate. 🌿
Ready to take the next step? Start small—pick one tree or shrub and experiment with the rolling planter method. Before you know it, your garden will be the envy of the neighborhood, and you’ll be the go-to green thumb for PNW landscapes! 🌱