Pruning
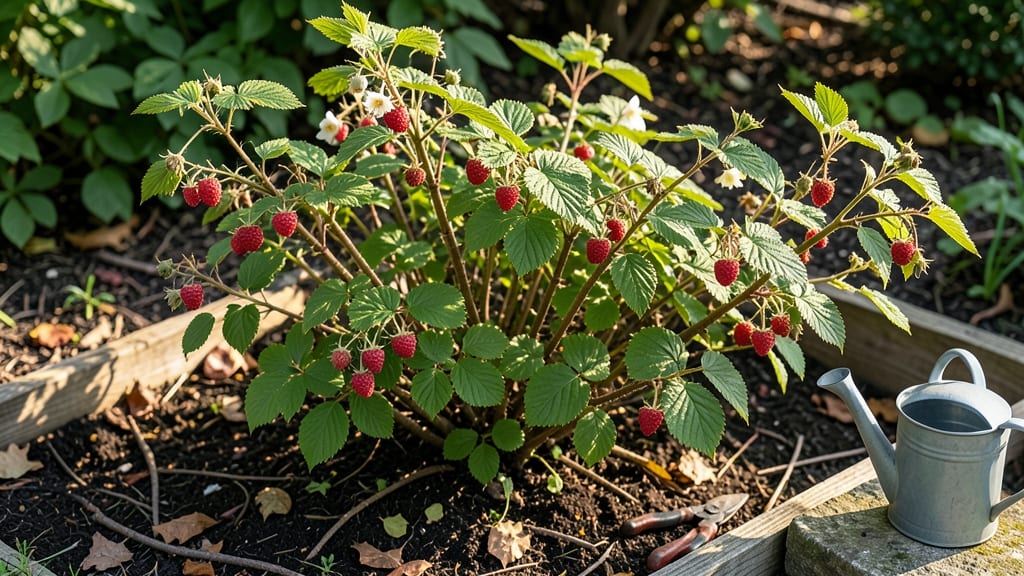
Growing raspberries on a tree isn’t just a quirky gardening experiment—it’s a space-saving game-changer that turns a single plant into a living piece of art. 🌿 I’ve trained raspberry canes vertically for years, and the difference in harvests, airflow, and winter survival is night and day, especially in the Pacific Northwest’s frosty winters.
The secret lies in late-winter pruning—when the ground is still frozen but the canes are dormant. You’ll cut back last year’s growth to just a few strong buds, shape the remaining canes along your support structure, and let the new growth fill in like a natural trellis.
No fancy tools needed, just sharp pruners and a clear vision for your plant’s shape.
By summer, you’ll have a densely packed, fruit-laden "tree" that ripens berries earlier and produces heavier yields than traditional bushes. The vertical growth also keeps fruits off the ground, reducing rot and pests while making harvests easier.
Plus, the aesthetic? Pure cottage-core magic—imagine a raspberry "tree" in your backyard, laden with fruit.
Whether you’re working with heritage varieties like ‘Heritage’ or ‘Boyne’—both cold-hardy and perfect for espaliering—or experimenting with dwarfing techniques, this method adapts to any space. The key is patience: it takes two growing seasons to establish the structure, but the payoff is worth every cut.
📚 In This Guide
- What you need
- Instructions
- Tips and common mistakes
- Wrapping up and next steps
What you need
- ● Pruning shears: Bypass pruners (sharp, 6–8" blades) for clean cuts—1 pair (invest in Felco F-2 or Gonicc for durability).
- ● Loppers: Bypass loppers (18–24" handles) for thicker stems—1 pair (e.g., Felco 202).
- ● Pruning saw: Curved-tooth saw for stubborn wood—1 (e.g., Fiskars).
- ● Gloves: Heavy-duty, cut-resistant (e.g., Wolverine or Penn State)—1 pair.
- ● Disinfectant: 70% isopropyl alcohol or bleach solution (1:9)—small bottle (to prevent disease spread).
- ● Markers/tags: Plastic plant ties or flagging tape—50+ pieces (for labeling canes).
- ● Trash bags: Heavy-duty, 30+ gallon—2–3 bags (for debris disposal).
- ● Extension pole: 3–4 ft telescoping saw (for hard-to-reach canes).
- ● Knee pads: Garden kneelers (if you’ll be working low to the ground).
- ● Wheelbarrow: Medium-sized (for hauling pruned canes).
- ● Sunscreen & hat: Broad-spectrum SPF 30+ (PNW winters can be sunny!).
- ● Compost bin: Nearby (for recycling healthy prunings).
Step-by-Step guide for late-winter raspberry tree pruning in the PNW
Here's how to prepare your tree-fruiting raspberries for Northwest winters—clean cuts now mean stronger harvests later.
✂️ Step 1: Identify and Remove Dead or Diseased Canes
Start by examining each cane carefully—look for those that are completely brown, hollow, or showing signs of fungal spots. These are your first targets. I always work from the center outward, making it easier to spot hidden damage in the middle of the plant. Use sharp pruning shears to cut these canes at the base, about ¼ inch above the soil line.
Don't skip this step, even if it seems drastic. Dead canes harbor pests and diseases that will spread to healthy growth. If you're unsure whether a cane is dead, scratch the bark with your fingernail—if it's dark underneath, it's beyond saving. Remove any canes with visible cane blight or rust spots immediately, as these are highly contagious.
✂️ Step 2: Prune Last Year's Fruit Canes to the Ground
Tree-fruiting raspberries produce fruit on second-year canes, which are the ones that grew last summer. These are the thick, woody stems you'll see standing tall. Cut these all the way down to the ground using your pruners. I like to make a clean cut just above a bud or lateral branch if one exists, but for most tree varieties, ground level is perfect.
This might feel counterintuitive—after all, you're removing the canes that just bore fruit. But these canes are now exhausted and won't produce again. Removing them opens up space for this year's new growth and prevents the plant from becoming overcrowded. You'll see fresh, green canes emerging from the base in spring—these are your future fruit producers.
☀️ Step 3: Thin Remaining Canes for Air Circulation
Now focus on the remaining healthy canes—the ones that grew last year but didn't produce fruit. Your goal is to leave about 6-8 of the strongest, most vigorous canes per plant. Remove any that are thin, weak, or crossing each other. I space these evenly around the plant to ensure good airflow and sunlight penetration.
This thinning step is crucial for Pacific Northwest winters. Dense growth holds moisture longer, increasing the risk of fungal diseases when frost arrives. Cut canes at a 45-degree angle just above an outward-facing bud. This encourages new growth to spread outward rather than inward, creating a more open plant structure that dries faster after rain.
⏰ Step 4: Apply Protective Measures Before First Frost
Once pruning is complete, give your raspberry tree a final inspection for any remaining weak spots. Wrap the base of the plant with tree wrap or burlap to protect it from late winter sunscald, which can damage the bark when temperatures fluctuate. I also apply a 2-3 inch layer of mulch around the base, keeping it 6 inches away from the trunk to prevent rot.
For extra protection in particularly cold microclimates, consider installing a small frost cloth or row cover over the entire plant. This isn't always necessary, but if your area gets below 15°F regularly, it can make a big difference. Water the base thoroughly before the first hard frost—this helps the roots withstand freezing temperatures by maintaining moisture in the soil.
Tips & tricks for perfect late-winter raspberry tree pruning
These game-changing techniques will help you master PNW raspberry care—and avoid the most common pruning pitfalls.
Pruning Tool Precision: Invest in high-quality pruning shears with bypass blades—they make cleaner cuts than anvil-style shears, which can crush stems. I also keep a small pair of sharp pruners for trimming small branches during Step 3. Sterilize your tools with rubbing alcohol between cuts to prevent spreading disease from infected canes to healthy ones. This is especially important in Step 1 when dealing with diseased material.
The 45-Degree Angle Secret: When thinning canes in Step 3, that 45-degree angle isn't just decorative—it creates a larger wound surface that heals faster. Make sure your cut slopes away from the main stem to prevent water pooling. I like to visualize cutting toward the outside of the plant, which helps new growth spread outward rather than inward where it would create shade and crowding.
Winter Protection Layering: For the mulch in Step 4, I recommend using a mix of straw and wood chips—the straw insulates while the wood chips help retain moisture. Apply the mulch after watering thoroughly, as this creates a moisture barrier that protects roots during freeze-thaw cycles. Remember to keep it 6 inches away from the trunk to prevent rot, which is particularly critical in our damp PNW winters.
Frost Protection Strategy: If your area regularly dips below 15°F, consider using a lightweight frost cloth instead of heavy row covers. The cloth allows sunlight while trapping heat—perfect for our variable PNW winters. I've found that wrapping the base with tree wrap before applying frost cloth creates an extra insulating layer that can make the difference between survival and damage during extreme cold snaps.
Pro Tips for Raspberry On Tree
- These game-changing techniques will help you master PNW raspberry care—and avoid the most common pruning pitfalls.
- Pruning Tool Precision: Invest in high-quality pruning shears with bypass blades—they make cleaner cuts than anvil-style shears, which can crush stems.
- The 45-Degree Angle Secret: When thinning canes in Step 3, that 45-degree angle isn't just decorative—it creates a larger wound surface that heals faster.
Frequently asked questions
Got questions about pruning raspberries on trees in the Pacific Northwest? You’re not alone! Here are some common concerns—and quick answers—to help you master late-winter cuts for frost survival.
When is the exact best time to prune raspberry trees in late winter?
Prune after the worst frosts have passed but before new growth starts—typically late February to early March in the PNW. Aim for a window when daytime temps hover above freezing (32°F/0°C) to minimize stress on the plant. Pro tip: Check your local frost dates for precision!
Should I cut back all the canes, or just some?
Yes! Prune floricanes (last year’s canes that bore fruit) to the ground after harvest, and primocanes (current year’s growth) to 5–6 feet tall in late winter. Leave 2–3 strong canes per plant to balance fruit production and vigor. Never remove more than 1/3 of the plant at once.
Will late-winter pruning protect raspberries from PNW frosts?
Pruning after frost risk has passed won’t directly shield berries, but it improves air circulation and sunlight penetration—key for frost resilience. Focus on removing dead/diseased canes first, then thin crowded growth. Bonus: Mulch heavily (4–6 inches) with straw or wood chips to insulate roots!
What if my raspberry tree looks sad after pruning?
Don’t panic! Pruning stress is normal, but yellowing leaves or no new growth by spring could signal over-pruning or disease. If canes are still green and buds are plump, your tree is likely fine. Fix: Fertilize lightly with compost or a balanced 10-10-10 formula in early spring.
Can I prune raspberry trees in summer instead?
Summer pruning is possible but riskier—it stresses plants and invites pests/diseases. If you must, only remove dead/diseased canes immediately after harvest (July–August). Late-winter pruning is far safer for PNW climates, where summer heat can exacerbate stress. Save heavy cuts for winter!
Wrapping up and next steps
Pruning your raspberry canes in late winter isn’t just about shaping your plants—it’s a game-changer for their survival and productivity in the Pacific Northwest’s frosty climate. 🌱 By removing old canes, thinning crowded growth, and protecting young shoots, you’re setting the stage for a bountiful harvest while keeping your berries resilient against frost. Now’s the time to roll up your sleeves and give your raspberries the care they deserve!
Ready to take action? Grab your pruners, mark your calendar for late winter, and start planning your pruning session. Whether you’re a seasoned gardener or just beginning, every cut brings you closer to a thriving raspberry patch. Happy pruning! 🌿✂️