
Pruning
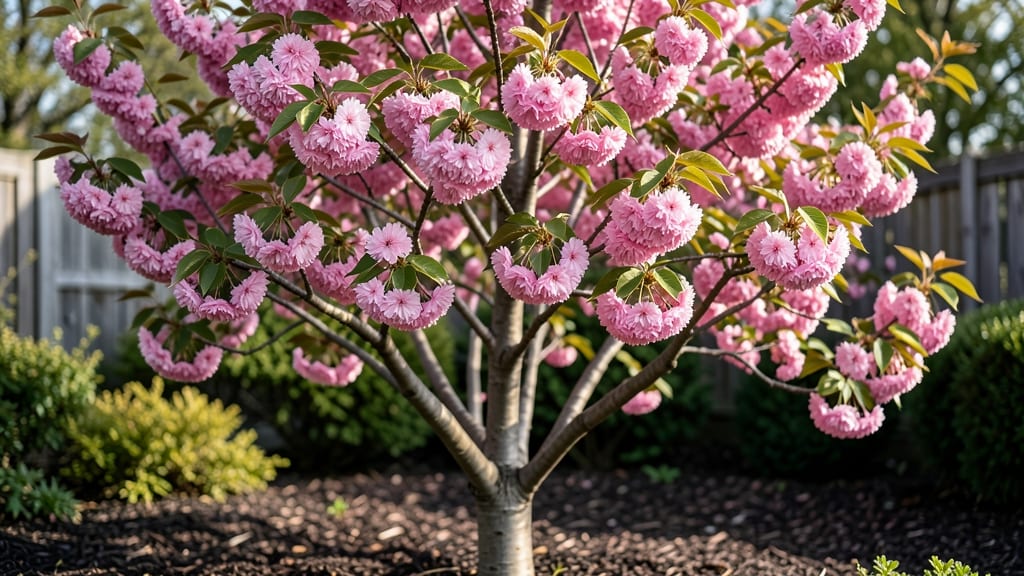
Your non-fruit bearing cherry tree isn’t just a springtime spectacle—it’s a frost-resistant year-round investment that transforms any landscape. 🌸 These ornamental varieties like Yoshino or Weeping cherry deliver snow-white blooms in April and fiery fall foliage, all without the mess of fruit cleanup.
The key to their longevity? Strategic pruning that strengthens branches before winter’s worst hits.
Start with the right spot: full sun and well-draining soil, spaced 20-30 feet apart for mature growth. In zones 5-8, plant in early spring when the ground thaws but before buds swell—this gives roots time to establish before summer heat.
Mulch heavily to protect roots from freeze-thaw cycles, and water deeply once a week once established (young trees need more frequent watering).
Pruning isn’t just for shape—it’s survival insurance. In late winter, remove dead, crossing, or weak branches before new growth starts. Summer pruning keeps the canopy open to prevent ice buildup, while light winter pruning after dormancy encourages dense spring blooms.
With proper care, your tree will stand tall for decades, its branches heavy with blossoms every spring.
These trees shine as statement shade trees, focal points in Japanese gardens, or along driveways where their graceful branches frame views. For best results, fertilize lightly in early spring with balanced 10-10-10, and watch for powdery mildew—prune for airflow to prevent it.
The payoff? A tree that’s as low-maintenance as it is stunning, year after year.
📚 In This Guide
- What you need
- Instructions
- Tips and common mistakes
- Wrapping up and next steps
What you need
- ● Pruning shears – Bypass pruners (sharp, 6–8" blades) for clean cuts on small branches.
- ● Loppers – 18–24" reach, for thicker branches (up to 2" diameter).
- ● Pruning saw – Curved blade for branches over 2" thick (avoid tearing bark!).
- ● Garden gloves – Cut-resistant, breathable fabric (e.g., leather or synthetic blend).
- ● Disinfectant – 70% isopropyl alcohol or bleach solution (1:9 ratio) to sterilize tools between cuts.
- ○ Tree wound dressing – Optional but helpful for large cuts (e.g., Tanglefoot Tree Wound Pruning Seal).
- ● Ladder or step stool – Sturdy, extendable (ensure it’s rated for your height/weight).
- ● Heavy-duty trash bags – For collecting pruned branches (aim for 10–20 gallons depending on tree size).
- ● Sharpie or marking pen – Waterproof for labeling cuts (if needed for future reference).
- ● Weather check – Prune on a dry, calm day (avoid wind or rain). Ideal temps: 40–75°F.
- ● Safety glasses – Protect your eyes from debris (especially when using a saw!).
- ● Long sleeves & pants – Lightweight, breathable fabric to avoid scratches or thorns.
- ● First-aid kit – Bandages, antiseptic wipes, tweezers (for minor cuts or splinters).
- ● Tree health assessment – Check for diseased or dead branches (brown, brittle, or oozing sap) before pruning.
- ● Bring a bucket of water – Dip tools in it between cuts to prevent spreading disease. 💦
- ● Use a tarp – Lay one under the tree to catch debris and make cleanup easier. 🏷️
- ● Test tool sharpness – A dull blade crushes branches instead of cutting cleanly—sharpen before you start! ⚡
- ● Work in layers – Remove 25% or less of the canopy per session to avoid stressing the tree. 🌿
How to prune a non-fruit bearing cherry tree for year-round strength
Here's the pruning system I've refined over years of working with ornamental cherry trees—focused on shaping a resilient canopy that thrives through winter freezes.
✂️ Step 1: Late Winter Cleanup (Dormant Season)
Start pruning when the tree is fully dormant but before buds swell—typically in late February to early March in most climates. This timing prevents disease spread and lets you see the tree's structure clearly. I always begin by removing dead, diseased, or crossing branches first, cutting back to the branch collar where the branch meets the trunk.
Use sharp, clean bypass pruners to make cuts at a 45-degree angle just outside the branch collar. Avoid leaving stubs—these invite rot and weaken the tree. For larger branches over ½ inch thick, I switch to a pruning saw for clean cuts. Look for branches that rub against each other or grow inward—they'll compete for sunlight and create weak spots in the canopy.
☀️ Step 2: Summer Light Penetration Pruning (Mid-Season)
In late June to early July, focus on improving air circulation and sunlight exposure within the canopy. This is when I make thinning cuts to open up the tree's interior. Remove about 20% of the canopy by selectively pruning branches that block light from reaching the center. Aim to maintain an open, vase-like shape that allows sunlight to reach all branches.
I target branches that grow straight up or too close together—these create dense clusters where moisture lingers. Make your cuts just above an outward-facing bud or branch. You'll see new growth emerge within 4-6 weeks as the tree responds to the improved light conditions. This mid-season pruning also encourages stronger wood formation before winter.
✂️ Step 3: Light Structural Adjustments (Early Fall)
In early September, do a final light pruning to prepare the tree for winter. Focus on removing any water sprouts (rapidly growing vertical shoots) and branches that are growing in undesirable directions. These adjustments help maintain the tree's natural shape while preventing winter damage from heavy snow or ice.
I also check for any branches that may have died back during the summer and remove them completely. Avoid heavy pruning now—you want the tree to harden off properly before winter. Limit cuts to no more than 10% of the canopy at this stage. The goal is to leave the tree with a balanced structure that can withstand frost and snow loads.
⏰ Step 4: Winter Protection Maintenance (Optional)
If you're in a region with extreme winter temperatures below -10°F, consider wrapping the trunk with tree guard or burlap after pruning to protect it from sunscald and frost cracks. I also check for any branches that may have been damaged during winter storms and prune them out in early spring before new growth begins.
This final check ensures the tree enters its next growth cycle strong. You'll notice the tree's overall health improves year after year with this consistent pruning schedule. The key is to make clean cuts at the right time—never rush the process. A well-pruned ornamental cherry tree will reward you with stunning blossoms and a robust canopy that stands up to winter's harshest conditions.
Tips & tricks for perfect year-round cherry tree pruning
These key insights will help you transform your ornamental cherry tree into a winter-hardy powerhouse that thrives through the coldest months.
Timing is Everything: The late February to early March window for Step 1 is critical because it occurs during the tree's dormant period when it's less vulnerable to disease. I've seen trees develop fungal infections when pruned too early—wait until those buds stop swelling but haven't opened yet. For trees in warmer climates, shift this to late January to avoid spring growth flushes.
Cutting Technique Matters: That 45-degree angle in Step 1 isn't just aesthetic—it directs water runoff away from the branch collar, preventing rot. I always test my pruners first by making a clean cut through a pencil; if it crushes instead of slices, your blades need sharpening. For branches over ½ inch thick, make your cut just outside the branch collar but never into it—the collar contains healing tissues essential for recovery.
Summer Pruning Strategy: When you're making those thinning cuts in Step 2, focus on removing entire branches rather than just trimming ends. The goal is to create an open center that lets sunlight penetrate to the inner canopy. I mark branches with flagging tape before cutting to avoid over-pruning—you should never remove more than 20% of the canopy in one session, even if the tree looks dense.
Winter Protection Insight: The -10°F threshold for Step 4 isn't arbitrary—it's when most ornamental cherry trees start experiencing significant cold damage. I've found that wrapping the trunk with burlap creates a microclimate that can raise temperatures by 5-10 degrees at the bark surface. For trees in windy areas, add a windbreak on the north side to prevent desiccation from cold winds.
Pro Tips for Non Fruit Bearing Cherry Tree
- These key insights will help you transform your ornamental cherry tree into a winter-hardy powerhouse that thrives through the coldest months.
- Timing is Everything: The late February to early March window for Step 1 is critical because it occurs during the tree's dormant period when it's less vulnerable to disease.
- Cutting Technique Matters: That 45-degree angle in Step 1 isn't just aesthetic—it directs water runoff away from the branch collar, preventing rot.
Frequently asked questions
Got questions about non-fruit-bearing cherry trees? You’re not alone! Here are some of the most common concerns—plus clear, actionable answers to help you prune with confidence and keep your tree thriving year-round.
Why should I prune a non-fruit-bearing cherry tree at all if it doesn’t produce fruit?
Even ornamental cherry trees (like Prunus serrulata or Prunus avium cultivars) need pruning to maintain health, shape, and frost resilience. Regular pruning improves airflow, reduces disease risk, and encourages vibrant blooms in spring. Without it, branches can become dense, weak, or prone to winter damage. Think of it as a spa day for your tree—better structure, better performance!
When is the best time to prune a non-fruit-bearing cherry tree?
Prune during late winter or early spring (before buds swell) to avoid sap loss and pest attraction. A second light pruning in summer (after flowering) can help shape the tree and remove water sprouts. Never prune in fall or winter—this invites disease and weakens frost hardiness. Pro tip: Use sharp tools and seal larger cuts with pruning sealant to prevent decay.
How much can I trim off without harming the tree?
For mature trees, remove no more than 25% of the canopy in a single session to avoid stress. Focus on:
- Dead, diseased, or crossing branches ( these are priority cuts!)
- Suckers or water sprouts (fast-growing vertical shoots)
- Branches growing toward the center (thinning cuts improve airflow)
What if my cherry tree looks leggy or sparse after pruning?
Leggy growth often means the tree needs more light or nutrients. To fix it:
- Prune in early spring to encourage new, balanced growth.
- Fertilize with a balanced 10-10-10 or slow-release formula in early spring.
- Avoid heavy pruning in summer—it can stimulate late-season growth that’s vulnerable to frost.
Can I use the same pruning techniques for all non-fruit-bearing cherry trees?
Most ornamental cherries (like Weeping Cherry or Double Flowering Cherry) share similar pruning needs, but avoid heavy heading cuts on varieties bred for specific shapes (e.g., columnar or weeping types). For example:
Tree Type
Key Pruning Focus
Weeping Cherry
Support branches to maintain drooping habit; avoid over-thinning.
Double Flowering Cherry
Prune lightly to preserve flower buds; remove only dead wood.
Columnar Cherry
Minimal pruning—focus on removing inward-growing branches only.
Wrapping up and next steps
Growing a non-fruit-bearing cherry tree is all about embracing its natural beauty and resilience—especially when it comes to pruning for frost resistance. By mastering the art of year-round maintenance, you’ll not only enhance its structure but also ensure it thrives in colder climates.
Whether you’re trimming for airflow, removing dead branches, or shaping its canopy, consistency is key to long-term success.
Ready to take the next step? Start small—pick one season to focus on (like late winter or early spring) and build your confidence.
Over time, you’ll develop an eye for what your tree needs, turning pruning into a rewarding ritual. Your frost-hardy cherry tree is waiting—grab those shears and get growing! ❄️🌿