
Pruning
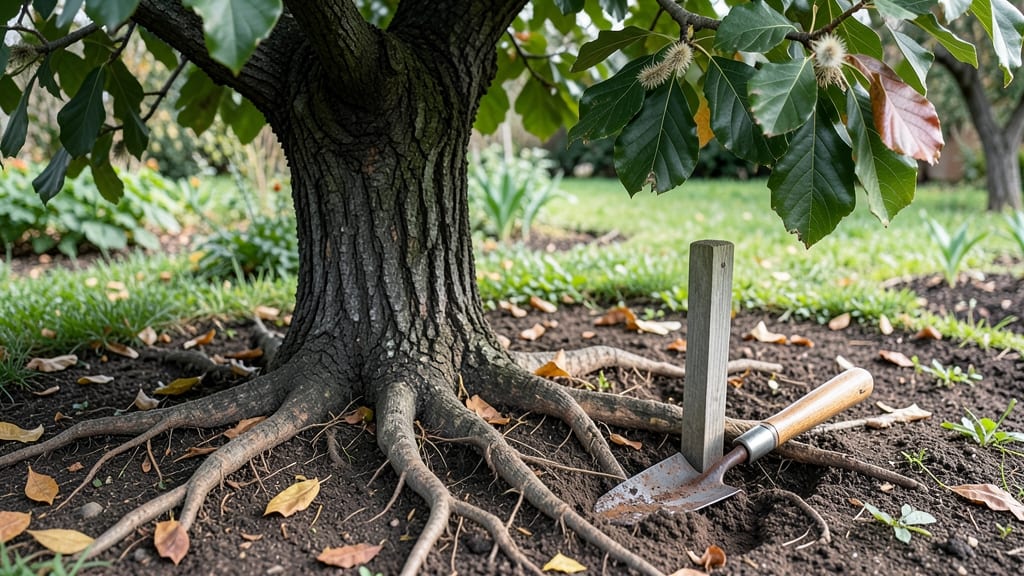
These mulberry tree roots pictures might shock you—what’s really happening beneath yours isn’t just sprawling, it’s strategic. 🌱 I’ve spent years watching them push through concrete, outcompete lawns, and even lift sidewalks, and I’m here to show you how to work with them instead of fighting them.
The key? Recognizing their growth patterns early so you can prune, contain, or redirect them before they become a headache.
Mulberry roots spread aggressively in their first decade, sending out thick lateral roots that can stretch 20-30 feet from the trunk while diving 6-8 feet deep for water.
Young trees develop a dense network of fine feeder roots, while mature ones send out aggressive suckers that pop up anywhere moisture lingers. The good news? With the right pruning techniques, you can keep them from dominating your yard—and even encourage stronger growth above ground.
What you’ll learn here is how to spot invasive roots before they cause damage, when to prune them for better tree health, and how to contain them without harming the tree. Think of it as giving your mulberry a root haircut—timing and technique make all the difference.
By the end, you’ll know exactly where to dig, what to cut, and how to redirect those roots so your tree thrives and your landscape stays intact.
Whether you’re dealing with a young sapling or a decades-old giant, these strategies work for any mulberry variety. The first step? Understanding the root system’s quirks—like why some roots grow horizontally while others dive deep. Let’s get started with what you’ll need to tackle this project like a pro.
📚 In This Guide
- What you need
- Instructions
- Tips and common mistakes
- Wrapping up and next steps
What you need
- ● Pruning shears or loppers: Sharp, bypass-style tools (for roots pruning saws (for thicker roots). Disinfect blades with rubbing alcohol before and after use to prevent disease spread.
- ● Garden gloves: Heavy-duty, nitrile-coated gloves (size medium/large) to protect hands from thorns, dirt, and sharp roots.
- ● Shovel or spade: A flat-edged digging spade (12–18 inches wide) for careful root exposure. Avoid serrated edges to minimize root damage.
- ● Watering can or hose: With a gentle spray nozzle to hydrate the tree before and after pruning (5 gallons minimum).
- ● Root stimulator or mycorrhizal fungi: Organic powder or gel (e.g., Mycorrhizal Blend) to promote root regrowth. Follow package instructions for application.
- ● Measuring tape: 10–25 feet for assessing root spread and pruning depth.
- ● Marking flags or spray paint: Biodegradable (e.g., flagging tape) to tag roots needing removal or areas to avoid.
- ● Root viewer or soil scope: A clear acrylic tube (12+ inches long) to inspect root health without digging.
- ● Knee pads or a small stool: For comfort during extended root work.
- ● Camera or smartphone: To capture before/after root pictures for tracking progress!
- ● Compost or mulch: Shredded bark or aged compost (3–4 inches deep) to replenish soil after pruning.
Step-by-Step guide to pruning mulberry tree roots for healthier growth
Here’s how to identify and prune invasive mulberry roots—without harming your tree.
🌱 Step 1: Locate the Root System and Identify Healthy vs. Problem Roots
Mulberry roots spread aggressively, so start by mapping the area. Use a shovel to gently expose roots within 12-18 inches of the tree trunk—this is where the primary root system lives. Healthy roots are thick, white, and firm, while invasive roots (those spreading beyond the drip line) are often thinner and fibrous. Look for roots growing into sidewalks, driveways, or neighboring plants—these are your targets.
I like to mark problem roots with flags or spray paint before digging deeper. This helps me visualize the full scope and avoid accidentally cutting healthy roots. If you see mushroom-like growths or dark, mushy spots, those roots are already compromised and should be removed entirely.
✂️ Step 2: Prune Invasive Roots Using the Right Tools and Technique
Use sharp bypass pruners or a root saw for thick roots over ½ inch in diameter. For finer roots, a hand trowel works best. Cut roots at a 45-degree angle to prevent tearing, and always make clean cuts 2-3 inches back from the tree trunk or desired boundary. This encourages new growth in the right direction.
Here’s the thing—never cut more than 25% of the root system at once. Mulberry trees are resilient, but over-pruning stresses them. If you’re dealing with a large root mass, space pruning over two seasons to give the tree time to recover. Water the tree deeply after pruning to help it bounce back faster.
💧 Step 3: Mulch and Monitor for New Growth
After pruning, apply a 3-inch layer of organic mulch (like wood chips or shredded bark) around the base of the tree, keeping it 6 inches away from the trunk. This suppresses weed competition and encourages healthy root development. Mulch also helps retain moisture, which is critical after root disturbance.
Check the pruned area every 4-6 weeks for new shoots. If you see sprouts emerging from cut roots, trim them immediately with pruners to redirect energy to the main root system. Over time, you’ll notice fewer invasive roots creeping into unwanted areas—this is your tree’s way of cooperating!
☀️ Step 4: Adjust Watering and Fertilizing for Recovery
For the first 30 days after pruning, water the tree deeply once a week (about 10-15 gallons, depending on the tree’s size). This encourages root regeneration. Avoid overwatering, though—soggy soil invites rot, and mulberry roots are already stressed from pruning.
If your tree looks weak (yellowing leaves, slow growth), apply a balanced fertilizer (like 10-10-10) in early spring. I’ve found that mulberry trees respond well to compost tea too—it boosts microbial activity in the soil without harsh chemicals. Just don’t fertilize right after pruning; wait until new growth appears.
Tips & tricks for pruning mulberry roots like a pro
Between us, I've spent years watching mulberry roots take over gardens—here's what nobody tells you about keeping your tree healthy while controlling its spread.
Visual Identification: In Step 1, when you're checking roots within 12-18 inches of the trunk, look for the "three W's" of healthy roots: white, wide, and wiggly. Thin, stringy roots beyond the drip line are your targets. I've found that roots growing toward sidewalks often have a slightly darker brown hue—this is your tree's way of adapting to low-light conditions under concrete.
Tool Selection: For Step 2, don't settle for just any pruners. A root saw is worth the investment—it cuts through thick roots cleanly without tearing. I keep one specifically for mulberry pruning, and it's paid for itself after just two major pruning sessions. For finer roots, a hand trowel works best, but make sure it's sharp enough to slice cleanly rather than crush.
Timing Strategy: The instructions mention spacing pruning over two seasons—here's the real secret: do your first major pruning in late winter or early spring when the tree is just starting to wake up. This gives it the entire growing season to recover before winter dormancy. I've seen trees recover much faster when pruned at this time because they can put all their energy into new root growth.
Mulch Application: When you're applying that 3-inch layer in Step 3, make sure it's not touching the trunk. I've seen too many gardeners accidentally smother the base, which leads to rot. Use a rake to create a slight mound around the trunk, then spread mulch outward from there. This creates a natural barrier while allowing air circulation at the base.
Pro Tips for Mulberry Tree Roots Pictures
- Between us, I've spent years watching mulberry roots take over gardens—here's what nobody tells you about keeping your tree healthy while controlling its spread.
- Visual Identification: In Step 1, when you're checking roots within 12-18 inches of the trunk, look for the "three W's" of healthy roots: white, wide, and wiggly.
- Tool Selection: For Step 2, don't settle for just any pruners.
Frequently asked questions
Got questions about mulberry tree roots?
You’re not alone! Here are answers to the most common concerns—from identification to pruning—so you can keep your tree thriving.
How deep do mulberry tree roots typically grow?
Mulberry tree roots usually spread wide (up to 3–5 feet from the trunk) but don’t grow extremely deep—typically 18–24 inches. However, they can extend deeper in dry or rocky soil. Shallow roots mean they’re sensitive to compaction; avoid heavy foot traffic near the base!
How can I tell if roots are invasive or healthy?
Healthy mulberry roots are thick, fibrous, and light brown with fine lateral branches. Invasive roots may look gnarled, blackened, or mushy (signs of rot) or push up through the soil/sidewalks. Check our pruning guide for safe removal tips!
When is the best time to prune mulberry tree roots?
Prune roots in late winter or early spring (before new growth starts) or fall (after leaf drop). Avoid summer—roots are most active then, and pruning can stress the tree. Pro tip: Water the area 24 hours before pruning for cleaner cuts!
What should I do if roots are damaging my foundation or driveway?
Start by trimming only the surface roots (no deeper than 6–12 inches) with a sharp spade or root saw. For severe damage, hire an arborist to avoid harming the tree’s health. Mulch heavily around the root zone to encourage deeper growth and reduce surface spread.
Can I grow mulberries in containers? How do roots behave?
Yes! Dwarf mulberry varieties (like Morus microphylla) thrive in containers (15+ gallon pots). Roots will stay compact but need drainage holes and regular pruning to prevent circling. Repot every 2–3 years and fertilize lightly in spring.
Wrapping up and next steps
Understanding your mulberry tree’s roots—through clear mulberry tree roots pictures and proper pruning techniques—is the key to fostering a healthier, more productive tree. 🌱 Whether you’re trimming invasive roots or nurturing new growth, your efforts will pay off with stronger branches and bountiful harvests.
Now that you’re armed with knowledge, grab your pruners and get ready to give your tree the care it deserves!
🌟 Next Steps:
- Schedule a pruning session during the dormant season (late winter/early spring).
- Monitor root health after pruning—watch for signs of stress or regrowth.
- Share your progress! Snap a picture of your pruned roots and tag us—we’d love to see your tree thrive! 📸