
Pruning
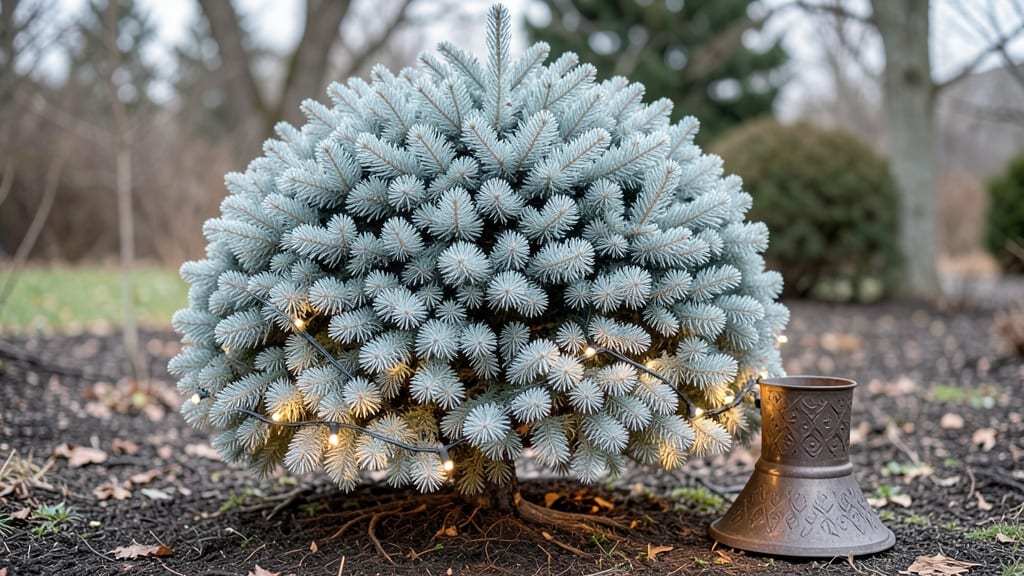
A mini Christmas tree outdoor doesn’t just belong in December—it’s a year-round statement piece that brings evergreen elegance to your garden. 🌲 I’ve transformed my backyard corner with dwarf conifers that stay lush through winter storms and summer heat, their dark green needles contrasting beautifully with seasonal blooms.
The key is choosing the right varieties—dwarf Alberta spruce, mugo pine, or ‘Blue Star’ juniper all thrive in containers or garden beds. Pair them with winter pansies or spring bulbs for year-round color, and you’ve got a living holiday centerpiece that never fades.
These trees stay compact (3–6 feet tall), so they fit cozy patios or sprawling landscapes alike.
Imagine your outdoor space glowing with twinkling lights in winter, then bursting with fresh spring growth—no artificial decorations needed. The best part? These trees require minimal pruning and love full sun to partial shade, making them the easiest way to add festive charm without the holiday hassle.
Whether you plant them in decorative pots for seasonal swaps or tuck them into garden beds as permanent accents, these mini trees become the heart of your outdoor decor. Let’s make your garden the talk of the neighborhood, every season of the year.
📚 In This Guide
- What you need
- Instructions
- Tips and common mistakes
- Wrapping up and next steps
What you need
- ● Live evergreen tree: A small, container-grown tree (3–5 ft tall) like a Dwarf Alberta Spruce, Miniature Blue Spruce, or Dwarf Hinoki Cypress (ensure it’s hardy in your climate zone).
- ● Large decorative pot: 1–2 ft in diameter with drainage holes (terracotta or ceramic for aesthetic appeal).
- ● High-quality potting mix: 2–3 bags of well-draining, acidic soil blend (e.g., 50% peat moss, 30% pine bark, 20% perlite).
- ● Slow-release fertilizer: 1 packet of osmocote or similar for evergreens (follow package instructions).
- ● Mulch: 1 bag of pine bark or wood chips to retain moisture and suppress weeds.
- ● Decorative accents: Miniature ornaments, fairy lights (weatherproof), and a small star or bow for the top.
- ● Gloves and long sleeves: To protect from thorns or sap.
- ● Trowel or shovel: For planting and soil adjustments.
- ● Watering can or hose: With a gentle spray nozzle.
- ● Pruners: Sharp, clean bypass pruners for trimming (sterilize with rubbing alcohol).
- ○ Stakes (optional): 2–3 bamboo stakes and twine to support young trees in windy areas.
- ○ Weatherproof paint (optional): For customizing the pot (e.g., metallic or holiday-themed colors).
How to create a mini outdoor Christmas tree canopy
Here's the simple way to craft a charming, evergreen focal point that stays lush all year.
🌱 Step 1: Choose the Right Evergreen Varieties
Select dwarf or slow-growing evergreens that stay compact—think 3-6 feet tall at maturity. I recommend Dwarf Alberta Spruce for classic shape, Emerald Green Arborvitae for dense foliage, or Mugo Pine for rugged texture. These varieties handle outdoor conditions beautifully while keeping a manageable size.
Here's the thing—avoid fast-growing trees like Leyland cypress. They'll outgrow your vision within a few years. Instead, focus on cultivars labeled "dwarf" or "miniature." Check the tag for mature height before buying, and plant 3-4 trees per cluster for a full, tree-like appearance.
🪴 Step 2: Prepare the Planting Site
Pick a spot with 6+ hours of sunlight daily—most evergreens need full sun to maintain vibrant color. Dig holes twice as wide as the root ball but only as deep. Evergreens prefer slightly raised roots to prevent waterlogging, which causes root rot.
Amend the native soil with 1 part compost mixed into the bottom 6 inches of each hole. This improves drainage while providing nutrients. Tap the tree gently to loosen roots if they're circling the pot, then place it in the hole so the top of the root ball sits 1 inch above ground level—evergreens hate having their crown buried.
☀️ Step 3: Plant and Stake for Stability
Fill the hole with soil, pressing gently around the roots to eliminate air pockets. Water deeply until moisture reaches 6 inches down—you'll see it pooling at the bottom of the hole. This settles the soil and removes air gaps that could dry out roots.
Stake each tree only if it leans noticeably. Use 2-3 flexible stakes per tree, tying the trunk loosely with soft garden twine. The goal is to prevent wind rock while allowing natural movement. Mulch with 2-3 inches of shredded bark around the base, keeping it 6 inches away from the trunk to prevent rot.
💧 Step 4: Water and Maintain Year-Round
Water once a week for the first month, then adjust based on rainfall. Evergreens need consistent moisture but hate soggy roots. Check by pushing a finger 2 inches into the soil—if it's dry, water until it runs out the drainage area. Drip irrigation works best to keep moisture even.
Fertilize lightly in early spring with slow-release evergreen fertilizer—follow package rates, but halve them if your soil is already amended. Prune only to shape in late winter, removing no more than 1/3 of new growth at a time. This keeps the tree dense and encourages fresh, vibrant foliage.
Tips & tricks for perfect mini outdoor Christmas trees
Took me a while to figure these out, so here's how to make your evergreen canopy thrive for years.
Selection Tip: When shopping for your 3-4 trees per cluster, look for plants with firm, vibrant foliage—avoid any with brown needles or sparse branches. These are signs of stress or disease. I always check the root ball for tight, white roots rather than dark, mushy ones. This ensures your trees will establish quickly and stay healthy through winter's harshest months.
Planting Depth Matters: That 1-inch above ground level rule in Step 2 is critical—evergreens can't handle having their crown buried. If planted too deep, the tree may suffocate and develop rot. Use a level or stick to check depth before backfilling. Pro tip: Mark the top of the root ball with a pencil before planting so you can verify placement later.
Watering Wisdom: The 6 inches deep watering in Step 3 isn't just about moisture—it's about training your trees to develop deep root systems. After the first month, check soil moisture at 2 inches down (not just the surface) to ensure roots are getting the hydration they need. Drip irrigation is ideal because it delivers water slowly and evenly, preventing runoff that wastes water and leaves roots thirsty.
Mulching Magic: That 2-3 inches of shredded bark mulch serves two purposes: it regulates soil temperature and prevents weeds. But keep it 6 inches away from the trunk—piling mulch against the base creates a moisture trap that leads to rot. I like to refresh the mulch layer every spring, mixing in a little compost to give the trees a gentle nutrient boost without overdoing it.
Pro Tips for Mini Christmas Tree Outdoor
- Took me a while to figure these out, so here's how to make your evergreen canopy thrive for years.
- Selection Tip: When shopping for your 3-4 trees per cluster, look for plants with firm, vibrant foliage—avoid any with brown needles or sparse branches.
- Planting Depth Matters: That 1-inch above ground level rule in Step 2 is critical—evergreens can't handle having their crown buried.
Frequently asked questions
Can a mini outdoor Christmas tree stay alive all year?
A well-chosen mini outdoor Christmas tree (like a dwarf Alberta spruce or pot-grown pine) can thrive outdoors year-round if planted in the ground or a large container with proper drainage. Evergreens are hardy, but avoid species like Norfolk Island pine—they’re tropical and need winter protection. Mulch the base in cold climates to insulate roots!
Do I need to prune my outdoor mini tree in winter?
Pruning is best done in late winter or early spring (before new growth starts). Avoid heavy cuts in winter, as it stresses the tree. Focus on shaping in spring by trimming only dead or overgrown branches—never remove more than 25% of the foliage at once. Use sharp shears for clean cuts!
How do I keep my mini tree from drying out in hot weather?
Outdoor mini trees need consistent moisture. Water deeply 2–3 times per week in summer (more in containers, which dry faster). Use mulch to retain soil moisture and avoid overhead watering to prevent fungal issues. A lightweight shade cloth can also protect delicate varieties from scorching.
What’s the best alternative if I want a mini tree but no maintenance?
If you crave low-maintenance festive greenery, consider:
- Artificial mini trees: Pre-lit, weatherproof options (like Balsam Hill’s 3-foot trees) need zero watering or pruning.
- Evergreen shrubs: Dwarf boxwoods or junipers offer year-round color with minimal trimming.
- Potted holiday plants: Skip the tree entirely—opt for poinsettias, amaryllis, or cyclamen in decorative pots.
Why are my mini tree’s needles turning brown?
Brown needles usually signal one of three issues:
- Overwatering: Check soil moisture—soggy roots cause root rot.
- Underwatering: Dry soil or wind stress can scorch needles.
- Pests/disease: Inspect for spider mites or fungal spots (treat with neem oil or fungicide).
Trim affected branches and adjust care—most trees bounce back with proper attention!
Wrapping up and next steps
A mini outdoor Christmas tree isn’t just a seasonal decoration—it’s a year-round statement of evergreen elegance that brings joy, texture, and charm to your landscape. Whether you’re pruning for shape, selecting the perfect variety, or troubleshooting common issues, the key is consistent care and creativity.
With the right techniques, your tiny tree will thrive, becoming a festive (and functional!) centerpiece for holidays and beyond.
Ready to transform your space? Start small—pick your favorite variety, grab your pruners, and give it a try! Your outdoor oasis is just a trim away. 🎄✨