
Pruning
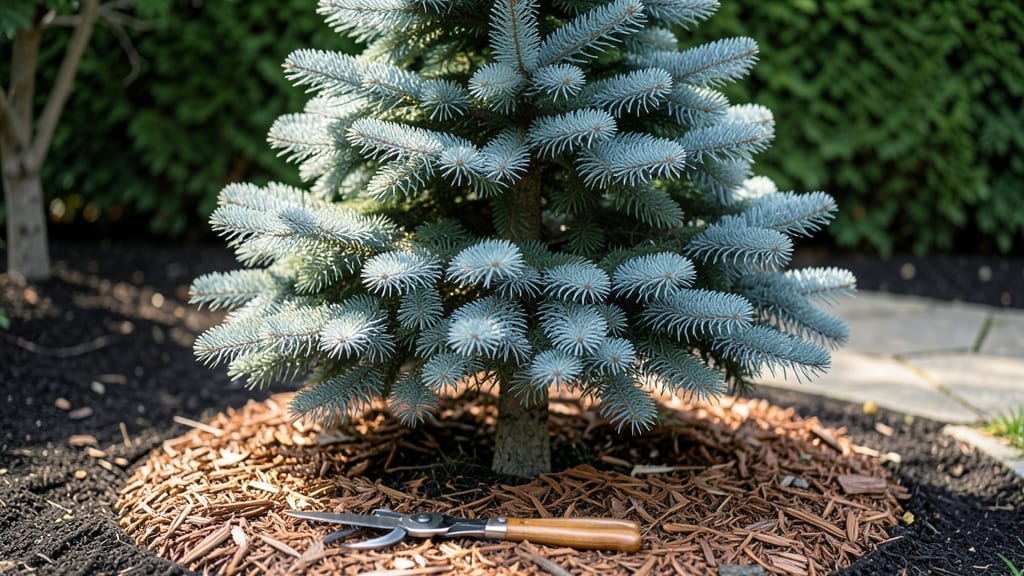
A blue spruce tree's natural elegance needs just a few strategic cuts to keep its signature blue-green needles looking their best year-round. 🌲 I've learned the hard way that aggressive trimming turns a stunning evergreen into a sad, lopsided shadow of itself—but the right approach keeps it thriving for decades.
The secret lies in understanding where to cut and when, because blue spruces grow slowly and heal differently than fast-growing trees.
You'll need sharp bypass pruners for small branches and a sturdy pruning saw for thicker limbs, plus gloves to protect your hands from those sharp needles. Timing matters too: late winter or early spring, just as new growth begins, is the ideal window.
This gives the tree time to recover before summer heat stress, and you'll avoid the messy sap flow that happens in warmer months.
What you'll end up with is a tree that maintains its natural pyramid shape while filling in any bare spots from winter wind or storm damage.
Focus on removing no more than 25% of the outer growth in any one season, and always cut just above a healthy branch collar where the branch meets the trunk. The result? A tree that stays full, vibrant, and structurally sound for years to come.
For trees taller than 20 feet, it's worth calling a professional—safety becomes a real concern when working from ladders. But for smaller blue spruces, this method gives you the confidence to shape them beautifully without risking their health. Let's get those pruners ready!
📚 In This Guide
- What you need
- Instructions
- Tips and common mistakes
- Wrapping up and next steps
What you need
- ● Pruning shears or hand pruners – Bypass-style, sharp, and clean (for small branches, ¼"–½" thick).
- ● Loppers – For medium branches (½"–1½" thick), with a 6–8" cutting head.
- ● Pruning saw – For thick branches (1½"+ thick), with a curved blade for precision.
- ○ Extension pole pruners – Optional but helpful for high branches (10–15 ft. reach).
- ● Work gloves – Heavy-duty, cut-resistant to protect your hands.
- ● Safety glasses – To shield eyes from debris (even small branches can snap!).
- ● Ladder or step stool – Sturdy, non-slip, and tall enough to reach branches safely (3–6 ft. height, depending on tree size).
- ● Disposable pruning bags or bucket – For collecting debris (5–10 gallon capacity).
- ● Rubbing alcohol or bleach solution – For sterilizing tools (70% isopropyl alcohol or 1 part bleach to 9 parts water).
- ○ Twine or zip ties – Optional, for securing branches during trimming.
- ● Choose the right time – Trim in late winter or early spring (before new growth starts) or summer (avoid extreme heat).
- ● Check weather conditions – Wait for dry, calm days to prevent slipping or spreading disease.
- ● Assess the tree’s health – Look for dead, diseased, or crossing branches to prioritize removal.
- ● Plan your cuts – Sketch a rough outline of your desired shape before climbing.
Step-by-step guide to trimming a blue spruce tree
Here's how I keep these evergreens looking sharp all year—without overdoing it.
✂️ Step 1: Identify and Mark the Target Areas
Start by examining your blue spruce from all sides. Look for branches that are crossing, rubbing, or growing inward—they'll compete for sunlight and create weak points. Use a small flag or twine to mark these areas temporarily. I like to work when the tree is dry; morning light reveals the shape most clearly.
Next, spot any dead or brown branches. These need removal first—they drain the tree's energy. Run your hand along the branch to feel for dry, brittle wood. If it crumbles easily, it's dead. Healthy branches have green needles that snap cleanly when bent slightly. Mark these with a different colored flag for easy identification during trimming.
✂️ Step 2: Use the Right Tools and Technique
Grab your sharp bypass pruners for branches under ½ inch thick and a pruning saw for anything larger. I always clean my tools with rubbing alcohol before starting—sap and old resin can harbor diseases. Cut just outside the branch collar, the swollen area where the branch meets the trunk. Never leave a stub; it invites rot and pests.
Make your cuts at a 45-degree angle for branches thicker than ½ inch. This prevents water from pooling in the wound. For smaller branches, a clean cut straight across is fine. Always cut on the underside of the branch to avoid tearing the bark. If you're unsure, practice on a few small branches first—they heal quickly and give you confidence.
☀️ Step 3: Thin Out and Shape Gradually
Begin by removing the dead branches first. Cut them back to the branch collar without hesitation—they're already dead weight. Next, tackle the crossing branches. Remove the smaller of the two competing branches to maintain the tree's natural shape. I like to step back every few cuts to check the overall silhouette from all angles.
For shaping, focus on maintaining the tree's natural pyramid form. Never remove more than ¼ of the tree's foliage in one session—blue spruces are slow to recover from heavy pruning. Trim the outer branches first, then work inward. Avoid cutting into old wood; new growth is more flexible and heals better. If you see water sprouts (vertical shoots growing straight up), remove them entirely—they disrupt the tree's balanced shape.
⏰ Step 4: Clean Up and Monitor Recovery
After trimming, rake up all the debris and dispose of it properly. Leaving clippings on the ground can harbor pests and diseases. I like to sterilize my tools again with alcohol before putting them away. Water the base of the tree deeply after pruning to help it recover. Blue spruces don't need much water, but a good soak after trimming gives the roots a boost.
Watch the tree closely for the next few weeks. If you see yellowing needles or wilting, you may have over-pruned. Healthy new growth should appear within 4-6 weeks. Avoid fertilizing immediately after trimming—let the tree focus on healing first. If you notice any signs of stress, like excessive needle drop, cut back on future pruning and give the tree more time to recover.
Tips & tricks for perfect blue spruce trimming
Here's what I've learned after years of keeping my blue spruces looking their best—without causing stress to the tree.
Timing is Everything: Trim your blue spruce in late winter or early spring, just before new growth begins. This timing gives the tree time to recover before summer heat stress. Avoid trimming in fall or winter when the tree is already conserving energy. I've found that late February to early March works perfectly in most climates—just check your local frost dates to be safe.
Tool Prep Makes All the Difference: Before you begin, sharpen your pruners and saw blades so they make clean cuts. Dull tools crush branches, creating larger wounds that heal poorly. I always carry a small file and rubbing alcohol in my tool bag—sharpening takes just a minute and makes the whole process smoother. For branches over ½ inch thick, a pruning saw with a fine-toothed blade prevents tearing the bark.
Visual Cues for Healthy Cuts: When making your 45-degree cuts on branches thicker than ½ inch, look for the branch collar—the swollen area where the branch meets the trunk. Your cut should be just outside this collar, following its natural slope. I like to visualize an invisible line connecting the top of the collar to the branch's base—this helps me make precise cuts every time. For smaller branches, aim for a clean cut that doesn't leave any stubs.
Recovery Watch: After trimming, monitor your tree for the next 4-6 weeks. Healthy new growth should appear within this window, and the remaining branches should look vibrant. If you notice excessive needle drop or yellowing, you may have removed too much foliage. Blue spruces are resilient, but they can't recover from more than ¼ of their foliage being removed in a single session. I keep a small notebook to track which branches I trimmed each year—this helps me maintain balance over time.
Pro Tips for How Do You Trim A Blue Spruce Tree
- Here's what I've learned after years of keeping my blue spruces looking their best—without causing stress to the tree.
- Timing is Everything: Trim your blue spruce in late winter or early spring, just before new growth begins.
- Tool Prep Makes All the Difference: Before you begin, sharpen your pruners and saw blades so they make clean cuts.
Frequently asked questions
Got questions about trimming your blue spruce? You’re not alone! Here are answers to the most common concerns—whether you’re a first-time pruner or looking to refine your technique.
When is the best time to trim a blue spruce?
The ideal time is late winter or early spring (February–March), just before new growth starts. Avoid heavy pruning in late summer or fall, as it can stress the tree. Light shape-up cuts in early summer are fine, but skip major trims during extreme heat or drought.
How much can I trim off without harming the tree?
Never remove more than 25% of the tree’s foliage in a single year—blue spruces are sensitive to over-pruning. Focus on selective cuts to open the canopy or remove dead branches. Thin out crowded branches first; avoid shearing like a hedge, as it can damage the tree’s natural shape.
Why are my blue spruce branches turning brown after trimming?
Brown needles after pruning usually mean over-trimming or cutting into old wood. Always trim just above a healthy bud or branch collar. If branches die back, prune them off in the following season. Avoid trimming in hot, dry weather, which accelerates stress.
Can I shape a blue spruce like a topiary or hedge?
Blue spruces can be shaped into topiaries or hedges, but they require regular, gentle maintenance (every 4–6 weeks in growing season). Use hand pruners for fine details and avoid power shears, which can tear branches. Start with a loose, natural form before refining into tight shapes.
Do I need to disinfect my tools before and after trimming?
Absolutely!
Disinfect pruners with rubbing alcohol or a 10% bleach solution before and after trimming to prevent disease spread (like fungal infections). Blue spruces are prone to cankers—clean tools help keep your tree healthy and your workspace safe.
Pro Tip: Label your cuts!
If you’re unsure which branches to trim, snap a photo of the tree before pruning. This helps you visualize the original shape and avoid over-correcting. Happy trimming!
Wrapping up and next steps
Trimming your blue spruce tree doesn’t have to be intimidating—just follow the right techniques to keep it healthy and stunning year-round! 🌲 Whether you’re shaping for aesthetics, safety, or growth, remember to use sharp tools, prioritize clean cuts, and time your pruning for the best results.
With patience and care, your blue spruce will thrive and stay a showstopper in your landscape.
Ready to tackle the task? Grab your tools, put on your gloves, and give your tree the TLC it deserves! If you’re still unsure, consider consulting a local arborist for a pro’s touch. Happy pruning! ✂️