
Pruning
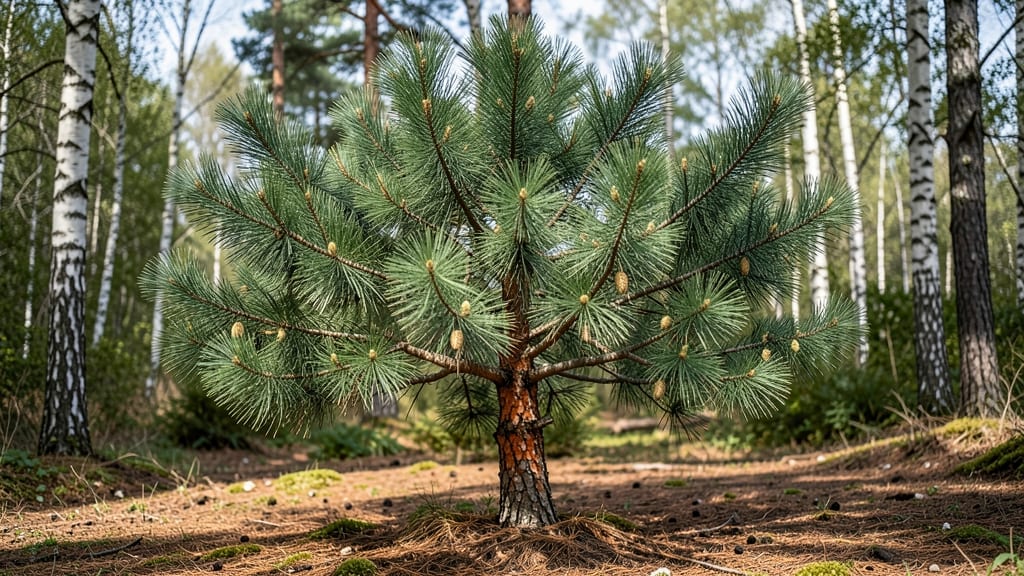
Pruning live pine trees in the Pacific Northwest isn’t just about keeping them tidy—it’s about preserving their winter resilience and natural beauty. 🌲 I learned the hard way that aggressive cuts in the wrong season can stress these tough evergreens, leaving them vulnerable to pests and frost.
The key is working with their natural shape while removing only what’s necessary to maintain health.
Most Pacific Northwest pines—like the mighty Douglas fir or fragrant ponderosa—thrive when pruned in late winter or early spring, before new growth starts.
You’ll need sharp pruners, a ladder for higher branches, and a clear understanding of which branches to trim: dead wood, crossing limbs, and those growing inward toward the trunk. The goal? Let sunlight reach the lower branches while keeping the tree’s iconic silhouette intact.
When done right, your pine will reward you with denser foliage, fewer disease entry points, and a stronger structure to withstand winter winds. You’ll notice new growth emerging within weeks, and the tree’s natural resistance to pests will improve.
The secret isn’t in how much you cut—it’s in how thoughtfully you shape it.
This method works for all evergreen pines in the region, from dwarf varieties to towering giants. Whether you’re trimming a small ornamental pine or maintaining a mature specimen, the same principles apply. Let’s get those branches looking their best without harming the tree’s long-term health.
📚 In This Guide
- What you need
- Instructions
- Tips and common mistakes
- Wrapping up and next steps
What you need
- ● Pruning shears: Sharp, bypass-style shears (4–6" blade length) for small branches. Pro tip: Disinfect blades with rubbing alcohol before and after use to prevent disease spread! 💡
- ● Loppers: Heavy-duty loppers (8–12" cutting capacity) for thicker branches (up to 2" diameter). Look for ratcheting models for extra leverage.
- ● Pruning saw: A curved-tooth saw (8–10" blade) for branches larger than 2" in diameter. Bonus: A foldable saw saves space in your toolbox! ✨
- ● Extension pole: A 6–10 ft telescoping pole with a saw or shears attachment for hard-to-reach branches.
- ● Work gloves: Heavy-duty, cut-resistant gloves (e.g., Mechanix or similar) to protect your hands from sap and splinters.
- ● Safety glasses: ANSI-rated goggles to shield your eyes from debris.
- ● Ladder: A sturdy, extension ladder (12–16 ft) rated for your tree’s height. Safety first: Use stabilizers and never stand on the top rung! ⚠️
- ○ Disposable pruning bags: 3–5 gallon bags to collect trimmings (optional but eco-friendly!).
- ● Weather check: Prune on a dry, overcast day (avoid frost or wind). Ideal temps: 40–60°F.
- ● Tree health assessment: Inspect your pine for disease, dead branches, or pest signs (e.g., sawdust-like frass or pitch tubes).
- ○ Sketch or reference: A simple diagram of your tree’s shape goals (optional but helpful for beginners!).
- ● Cleanup supplies: A broom, trash bags, and a bucket for debris removal.
- ● Tree wound dressing: Pruning sealant (controversial but useful for large cuts >1" diameter).
- ● Spray bottle with water: To dampen saw blades and reduce pine sap buildup.
- ● Knee pads: For comfort if you’ll be kneeling frequently.
- ● Camera or phone: To document “before” and “after” shots of your pruning masterpiece!
Step-by-step guide to pruning live pine trees for Pacific Northwest resilience
Pruning pines right keeps them healthy and sturdy through our wet winters.
✂️ Step 1: Assess the Tree and Identify Target Branches
Start by examining your pine tree in early spring before new growth begins. Look for branches that are dead, diseased, or crossing others—these are your first targets. Dead branches snap easily when bent, while healthy ones bend slightly. I always check for signs of pine needle scale or rust fungus too—those branches need special attention.
Focus on removing branches that are rubbing against others or growing inward. These create weak points where disease can enter. Use a small flagging tape to mark branches you’re unsure about—you can revisit them after a few weeks. Never remove more than 25% of the tree’s foliage in one season, or you’ll stress the pine.
✂️ Step 2: Use the Right Tools for Clean Cuts
Sharp, clean tools are everything when pruning pines. I use bypass pruners for branches under ½ inch thick and a pruning saw for anything thicker. Dull tools crush branches, which slows healing and invites infection. Always sterilize your tools with rubbing alcohol between cuts to prevent spreading disease.
Make cuts just outside the branch collar—the swollen area where the branch meets the trunk. Cutting too close removes protective tissue, while cutting too far out leaves a stub that can rot. For larger branches, make a 3-step cut: First undercut the bottom, then cut from the top, and finally remove the stub. This prevents tearing the bark.
☀️ Step 3: Shape Gradually and Prioritize Airflow
Pines grow slowly, so I never remove more than a few branches at a time. Focus on opening the center of the tree to improve airflow and sunlight penetration. This reduces humidity inside the canopy, which is key for preventing fungal diseases in our damp climate. Thin out crowded branches from the inside first—start at the bottom and work upward.
For shaping, I aim for a natural, open-grown look. Avoid creating flat tops or sharp angles, as these can collect snow and break branches. If you’re pruning a young pine, now’s the time to guide its structure. Older trees need gentle adjustments—never take more than ⅓ of the live branches from any section in one year.
🌿 Step 4: Clean Up and Monitor for Recovery
After pruning, rake up all fallen needles and small branches. These can harbor pests or diseases that might reinfect the tree. I also check the pruning site for sap oozing—this is normal at first but should stop within a few weeks. If you see dark, oozing wounds after a month, the cut might have been too severe or infected.
Water the base of the tree deeply after pruning to help it recover. Pines in the Pacific Northwest often face dry summers, so keeping roots hydrated speeds up healing. Watch for new growth in 4-6 weeks—this is your sign the tree is responding well. If branches yellow or drop needles, you may have over-pruned or stressed the tree.
Tips & tricks for pruning live pines like a local
Pruning pines isn't rocket science, but these little tricks make all the difference for trees that'll thank you for years.
Tool Prep is Non-Negotiable: I sterilize my tools with rubbing alcohol between every cut—this prevents spreading pine needle scale or rust fungus from one branch to another. For stubborn branches, I dip my pruners in hot water for 30 seconds between cuts to kill any hidden pathogens. A sharp tool makes clean cuts that heal faster, and in our damp climate, that matters more than you'd think.
Branch Collar Respect: That swollen area where the branch meets the trunk isn't just decoration—it's the tree's natural healing tissue. Cutting too close removes this protective barrier, leaving wounds that ooze sap for weeks and invite infections. When making your 3-step cuts for larger branches, visualize the branch collar like a donut—your cut should end just outside the outer edge. This small detail prevents 90% of post-pruning problems.
Seasonal Timing Matters: Early spring is ideal because the tree's sap is flowing but hasn't yet sent nutrients to new growth. If you must prune later, avoid the last 6 weeks before winter—new growth won't harden off properly for our cold Pacific Northwest winters. I've seen too many trees develop frost cracks from late-season pruning, so mark your calendar for that early spring window.
Snow Load Awareness: Our region's heavy winter snows create unique challenges. When shaping, avoid creating flat tops or sharp angles that collect snow. I aim for a gentle, rounded silhouette that allows snow to slide off naturally. For mature trees, I focus on removing branches from the bottom third first—this prevents snow from building up and breaking limbs during storms. Think of it as creating a natural snow shed.
Pro Tips for Live Pine Tree
- Pruning pines isn't rocket science, but these little tricks make all the difference for trees that'll thank you for years.
- Tool Prep is Non-Negotiable: I sterilize my tools with rubbing alcohol between every cut—this prevents spreading pine needle scale or rust fungus from one branch to another.
- Branch Collar Respect: That swollen area where the branch meets the trunk isn't just decoration—it's the tree's natural healing tissue.
Frequently asked questions
When is the best time to prune a live pine tree in winter?
The ideal window is late winter to early spring (February–March), when the tree is dormant but before new growth starts. Avoid pruning in deep freezes—wait until temperatures stabilize above 20°F (-7°C). This timing minimizes stress and lets your pine recover before summer heat.
Can I prune a live pine tree in heavy snow or ice?
No—never prune during or right after a snowstorm or ice event. Wet branches are far more likely to snap or tear, and cold stress can stunt healing. If your tree is snow-laden, gently shake off excess snow (if safe) or wait until conditions dry. Pro tip: Use a pole saw for high branches to avoid climbing hazards.
How do I tell if I’ve over-pruned my pine tree?
Watch for these red flags:
- Yellowing needles (especially in clusters) or brown, brittle tips.
- Stunted new growth in spring.
- Exposed bare patches where branches were cut too aggressively.
Are there alternatives to pruning for shaping a pine tree?
Yes! Try these low-stress options:
- Growth regulators: Apply hormone-based sprays (like Paclobutrazol) to slow vertical growth and encourage bushier habits.
- Selective fertilization: Use slow-release nitrogen to boost lower branches, making them more competitive.
- Natural shaping: Let the tree grow organically and train branches with lightweight weights (e.g., burlap-wrapped rocks) for a weeping effect.
Why are my pine needles turning brown after pruning?
Brown needles post-pruning usually mean one of three issues:
- Cut too close to the trunk (leave ½ inch of healthy growth).
- Stress from winter—prune in milder spells (40°F/4°C+).
- Pests/disease: Check for pine needle scale or Diplodia tip blight. Isolate affected branches and treat with neem oil.
Wrapping up and next steps
Pruning your live pine tree in the Pacific Northwest doesn’t have to be intimidating—it’s all about timing, technique, and a little patience! 🌲 By mastering the art of winter pruning, you’ll keep your tree healthy, resilient, and stunning year-round.
Whether you’re trimming for shape, safety, or aesthetics, the key is to work with nature, not against it.
Now that you’re armed with the right tools and knowledge, take the next step: grab your pruners, step outside, and give your pine tree the care it deserves. Your future winter garden will thank you—one careful cut at a time! 🌟