
Pruning
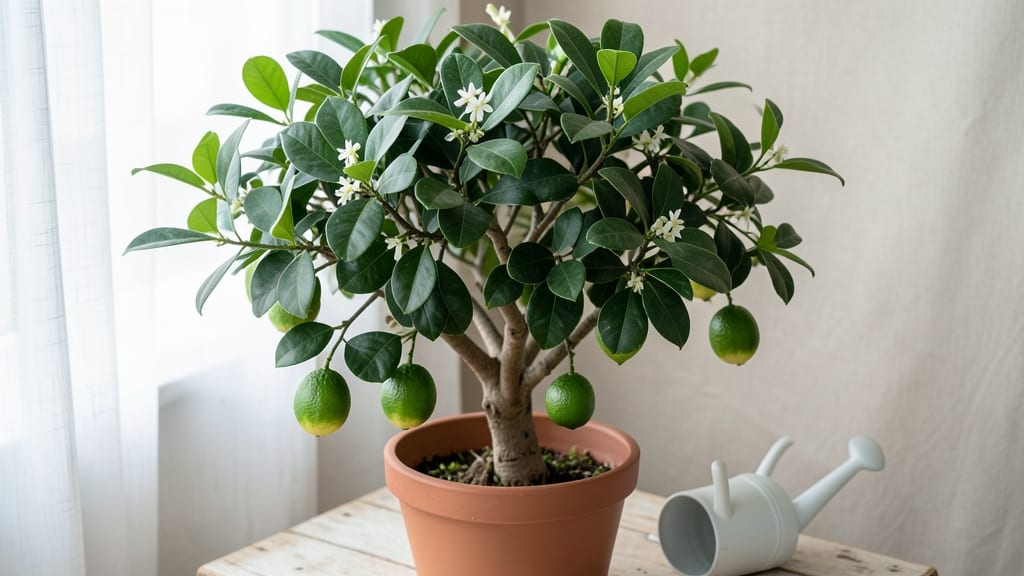
Growing a key lime tree in a pot lets you enjoy fresh limes year-round on your patio, balcony, or even indoors—no backyard required. 🌱 I’ve kept mine thriving for five years by mastering the right pot, soil, and pruning rhythm, and the tangy reward makes every effort worth it.
The secret isn’t complicated: it’s about matching the tree’s tropical needs to your space, whether that’s a sunny deck or a bright kitchen corner.
Start with a 5-gallon container (minimum) for young trees, upgrading to 10+ gallons as it grows, and always prioritize drainage—root rot is the silent killer of potted citrus.
A well-draining mix of 50% potting soil, 30% perlite, and 20% compost keeps roots happy, while monthly feeding with a citrus-specific fertilizer ensures those signature limes stay plentiful.
Sunlight is non-negotiable: 6+ hours of direct light daily mimics its native Florida habitat, and winter protection (like a frost blanket) keeps it alive through chilly months.
Pruning isn’t just about shaping—it’s about encouraging fruit production. Cut back leggy growth in early spring and remove dead branches year-round, but never trim more than 25% of the foliage at once.
With the right balance, you’ll harvest dozens of limes per season, their bright green skins and tart flavor putting store-bought to shame. The tree’s glossy leaves and fragrant blossoms make it a living centerpiece, too.
Even in pots, key lime trees face challenges: nutrient leaching (flush with water monthly), pests (watch for aphids and scale), and root binding (repot every 2–3 years). But with these adjustments, your tree will stay productive, healthy, and full of potential—just like the one I’ve sipped from countless times.
Ready to grow your own citrus grove in a pot?
📚 In This Guide
- What you need
- Instructions
- Tips and common mistakes
- Wrapping up and next steps
What you need
- ● Key lime tree (Citrus aurantifolia) – Choose a healthy, potted sapling (3–5 gallons) or a young tree from a nursery. Pro tip: Look for one with vibrant green leaves and no signs of pests! 🌿
- ○ Pot – A 15–20 gallon container with drainage holes (terracotta or ceramic works best). Optional: Add saucers for aesthetics or to catch runoff.
- ● Well-draining potting mix – A blend of 50% citrus-specific soil, 30% perlite or pumice, and 20% compost. Avoid garden soil—it compacts and suffocates roots! 🌱
- ● Pruning tools: Sharp bypass pruners (for clean cuts on small branches)
- ● Loppers (for thicker stems, ½–1 inch in diameter)
- ● Sterilizing alcohol wipes (to disinfect tools between cuts)
- ● Slow-release fertilizer – A citrus-specific granular fertilizer (e.g., 6-6-6 NPK ratio) or organic options like fish emulsion. Apply every 2–3 months in growing season. 🌟
- ● Drainage tray – To catch excess water and prevent root rot.
- ● Support stake or trellis – Helps young trees stay upright as they grow.
- ● Mulch (organic, like bark chips) – Retains moisture and regulates soil temp.
- ● pH test kit – Key limes thrive in slightly acidic soil (pH 6.0–7.0).
- ● Grow lights or LED bulbs – If your space lacks 6+ hours of sunlight daily.
- ● Glove and safety goggles – For thorny branches (trust us, they will prick!).
Step-by-step guide to pruning your potted key lime tree
Here's how I keep my key lime tree lush, productive, and compact—no overgrowth, no stress.
✂️ Step 1: Time Your Pruning for Optimal Growth
Prune your key lime tree in late winter or early spring, just as new growth begins but before buds swell. This timing ensures you remove last year's growth while encouraging fresh, vigorous shoots. Avoid pruning in fall or winter—your tree needs all its energy to store nutrients for next year's fruit production.
If you notice leggy growth reaching toward light sources, you can do a light pruning in mid-summer to shape the tree, but never remove more than 25% of the foliage at once. Key limes are sensitive to heavy pruning, and overdoing it can stress the tree or even kill it.
✂️ Step 2: Sterilize Tools and Assess the Tree
Before you cut, sterilize your pruning shears with rubbing alcohol to prevent spreading disease. Inspect the tree for dead, diseased, or crossing branches—these are your first targets. Dead branches snap easily when bent; diseased branches may have blackened spots or oozing sap. Remove these immediately to improve airflow and tree health.
Next, look for branches growing toward the center of the tree or rubbing against others. These compete for sunlight and nutrients. Use sharp shears to make clean cuts at a 45-degree angle, about ¼ inch above a leaf node or outward-facing bud. This encourages new growth in the right direction and prevents water from pooling on the cut.
✂️ Step 3: Shape for Airflow and Light Penetration
Step back and visualize the tree’s canopy. Aim for an open, vase-like shape that allows sunlight to reach the inner branches. Key lime trees produce fruit on older wood, so avoid aggressive pruning that removes too many mature branches. Focus on thinning out rather than topping—never cut back more than ⅓ of the branch length in one session.
Prune to create a balanced silhouette with the widest part of the canopy at the top. This prevents the tree from becoming top-heavy and reduces the risk of branches breaking under fruit weight. If your tree is pot-bound, prune roots lightly too—gently loosen the outer roots and trim any that circle the pot.
💧 Step 4: Post-Pruning Care for Recovery
After pruning, water the tree deeply to help it recover. The root system will need to support new growth, and moist soil reduces shock. Apply a balanced citrus fertilizer (with micronutrients like zinc and iron) to support regrowth. I use a slow-release granular fertilizer spread evenly over the soil surface, then water again to activate it.
Monitor the tree for new shoots emerging within 4-6 weeks. These indicate successful pruning. If you notice yellowing leaves or wilting, reduce watering slightly—overwatering after pruning can lead to root rot. Keep the tree in bright, indirect light for a few weeks to minimize stress while it adjusts.
☀️ Step 5: Adjust Light and Maintenance for Year-Round Health
Move your potted key lime tree to a south-facing window or under a grow light for 6-8 hours of sunlight daily. Lack of light causes leggy growth and weak branches, which can snap under fruit weight. If outdoors, place it in partial shade during peak summer heat to prevent leaf scorch.
Continue pruning lightly every 3-4 months to maintain shape and encourage flowering. Key limes bloom on new growth, so regular, gentle pruning keeps the tree productive. Avoid heavy pruning in fall—let the tree rest and store energy for next year’s fruit.
Tips & tricks for perfectly pruned potted key lime trees
These pruning insights will help you maintain a healthy, productive key lime tree without stressing the plant.
Timing is Everything: The late winter/early spring window is critical because it aligns with the tree's natural dormancy period. If you must prune in mid-summer for leggy growth, do it early in the season when the tree has energy reserves. I've seen trees recover beautifully from summer pruning when done before August, but avoid this after the first frost—your tree will struggle to heal before winter dormancy.
Tool Precision Matters: Never use dull shears—they crush branches instead of making clean cuts. I invest in bypass pruners with sharp, replaceable blades and keep them sterilized between uses. For larger branches, use a pruning saw with a fine-tooth blade to avoid tearing the bark. Remember the 45-degree angle cut—this prevents water from pooling on the wound and reduces disease risk.
Shape with Purpose: The open vase shape isn't just aesthetic—it's functional. Inner branches need sunlight to produce fruit, while outer branches support the tree's structure. When shaping, visualize sunlight penetration from all directions. I like to create a slightly wider top than bottom to prevent top-heavy instability, especially important for potted trees that don't have deep root support.
Recovery Care is Non-Negotiable: That first deep watering after pruning is crucial—it helps the tree transport nutrients to new growth areas. I've found that adding a seaweed-based fertilizer (rich in micronutrients) to the post-pruning watering boosts recovery. Watch for new shoots appearing within 4-6 weeks as your confirmation of successful pruning. If you don't see new growth by week 8, your pruning was likely too aggressive.
Pro Tips for Key Lime Tree In Pot
- These pruning insights will help you maintain a healthy, productive key lime tree without stressing the plant.
- Timing is Everything: The late winter/early spring window is critical because it aligns with the tree's natural dormancy period.
- Tool Precision Matters: Never use dull shears—they crush branches instead of making clean cuts.
Frequently asked questions
Got questions about keeping your key lime tree in a pot thriving? You’re not alone! Here are some of the most common concerns—and their straightforward solutions—to help you grow a lush, fruit-bearing tree year-round.
How often should I repot my key lime tree?
Repot your key lime tree every 2–3 years or when roots start circling the pot. Spring is the best time—avoid winter when growth slows. Choose a pot just 1–2 inches larger in diameter to prevent root stress. Pro tip: Use a well-draining mix with perlite or sand to mimic its tropical soil needs!
When is the best time to prune for fruit production?
Prune late winter or early spring (just before new growth) to shape your tree and encourage fruiting. Avoid heavy cuts in fall/winter—this can stress the tree. Focus on removing dead, crossing, or overcrowded branches first. For best results, prune after flowering (summer) to redirect energy to fruit development.
Why isn’t my potted key lime tree producing fruit?
Lack of fruit often stems from poor pollination, insufficient sunlight, or nutrient deficiencies. Key lime trees need 6+ hours of direct sun daily and may benefit from hand-pollinating flowers with a soft brush. Check for yellow leaves (overwatering) or drooping (underwatering). Fertilize with citrus-specific food in spring/summer for a boost!
Can I grow a key lime tree in a pot indoors?
Yes, but with careful conditions: Place it near a south-facing window or use grow lights (12+ hours/day). Keep humidity high (mist leaves or use a pebble tray) and avoid drafts. If outdoors isn’t an option, rotate the pot weekly so all sides get even light. Winter temps below 40°F can damage it—bring it inside if needed!
What do I do if my tree’s leaves turn yellow or drop?
Yellow leaves usually mean overwatering, root rot, or nutrient imbalance. Let the top 2 inches of soil dry out between waterings and ensure the pot has drainage holes. For nutrient issues, flush the soil with water to remove excess salts, then fertilize lightly. Brown edges? Could be underwatering or low humidity—adjust care and monitor closely.
Wrapping up and next steps
Growing a key lime tree in a pot is a rewarding journey that brings tropical charm to your space year-round! With the right pruning techniques—like shaping for airflow, removing dead growth, and encouraging fruit-bearing branches—you’ll keep your tree healthy, productive, and stunning.
The key is consistency: a little care now means lush foliage and sweet, tangy limes for seasons to come.
Ready to harvest the fruits of your labor? 🌿 Start by observing your tree weekly—prune as needed, and soon, you’ll be enjoying homegrown key limes straight from your patio! Next, explore how to propagate cuttings to expand your citrus collection.