
Pruning
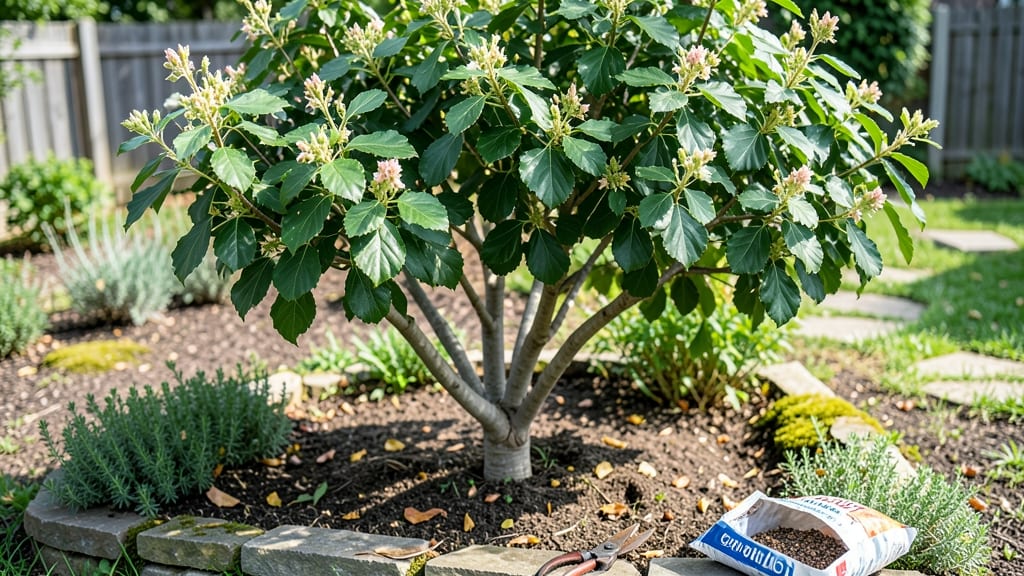
Pruning a juvenile mulberry tree isn’t just about trimming branches—it’s about shaping its future. 🌱 I’ve learned the hard way that skipping early pruning leads to tangled, weak growth later, but with the right cuts at the right time, you’ll build a tree that’s strong, open, and productive for decades.
The key is working with its natural shape while it’s young, when it can bounce back faster than an old, established tree.
Start by removing any crossing or rubbing branches—they’ll strangle each other as the tree grows. Next, thin out the center to let light and air reach the core, which prevents rot and encourages new growth.
I like to do this in late winter or early spring before new shoots appear, but mulberries are forgiving, so you can prune lightly anytime except when they’re fruiting. Just avoid heavy cuts in fall, or you’ll risk winter damage.
What you’ll end up with is a tree that’s easier to harvest from, resists disease better, and produces fruit more reliably. The branches will spread evenly, so you won’t have to fight for space in your yard or garden.
Plus, the earlier you start pruning, the less work it’ll be down the road—trust me, your future self will thank you.
This method works for both backyard trees and larger landscapes, and it’s just as effective in containers if you’re growing mulberries in urban spaces. The only real challenge is resisting the urge to over-prune—mulberries recover fast, but they don’t need drastic cuts to thrive.
Start small, observe how the tree responds, and adjust as you go.
📚 In This Guide
- What you need
- Instructions
- Tips and common mistakes
- Wrapping up and next steps
What you need
- ● Pruning shears: A sharp, bypass-style pair (for cuts up to ½ inch thick). Example: Felco F-2 or Corona Tools.
- ● Loppers: Long-handled, for branches ½–1½ inches thick. Look for: Ratchet or bypass action.
- ● Hand pruners: Anvil-style for small twigs (if shears aren’t available). Note: Avoid dull tools—they crush branches!
- ● Disposable gloves: Heavy-duty, nitrile-coated (to protect from thorns and sap). Pro tip: Bring a backup pair!
- ○ Tree wound sealant (optional): Pruning paste (e.g., Tanglefoot Tree Wound Pruning Sealer) for cuts >1 inch in diameter.
- ● Disinfectant: 70% isopropyl alcohol or bleach solution (1:9 ratio) to sterilize tools between cuts.
- ● Ladder or step stool: Extendable, stable, and tall enough to reach the highest branches safely.
- ● Trash bags or bucket: For collecting pruned branches (1–2 large bags or a 5-gallon bucket).
- ● Permanent marker: Fine-tip, for labeling branches if training the tree.
- ● Timing: Prune on a dry, cloudy day (avoid frost or extreme heat). Early morning is ideal!
- ● Weather check: No rain forecast for 24 hours (wet wood rots faster).
- ● Safety gear: Closed-toe shoes, long sleeves/pants (mulberry thorns are no joke!).
- ● Tree health assessment: Inspect for pests/diseases (e.g., aphids, powdery mildew) before pruning.
- ● Plan your cuts: Sketch a rough outline of your desired shape (or use a reference photo).
- ● Extension pole saw: For high branches (if ladders aren’t safe).
- ● Tree paint: For sealing large cuts (e.g., Tree Seal Tape).
- ● Pruning saw: For thick, stubborn branches (if loppers won’t cut it).
- ● Camera/phone: To document progress or share your masterpiece!
Step-by-Step guide for pruning young mulberry trees
Here's how I shape my mulberry saplings—keeping them healthy, strong, and full of potential.
✂️ Step 1: Prune for Structure in Early Spring
Wait until late March or early April when new growth begins but before buds swell. I look for the first tiny green tips on branches—this is your cue. Remove any dead, crossing, or weak branches first. Use sharp pruning shears to make clean cuts just above outward-facing buds.
For the main trunk, I leave the strongest, straightest branch as the central leader. If multiple branches compete, I choose the one growing straightest upward. This ensures a single, sturdy trunk. Cut the others back to a strong side branch or bud. Avoid leaving stubs—always cut at a 45-degree angle just above a bud.
✂️ Step 2: Light Summer Maintenance After Fruit Set
After the tree produces its first fruit in summer, I do a light pruning to improve airflow and sunlight penetration. Look for branches that rub together or grow inward—they’ll compete for space and weaken the tree. Remove any suckers growing from the base or trunk, cutting them off at the ground level.
I also thin out some of the smaller branches inside the canopy to let light reach the center. This prevents dense, shaded growth that can harbor pests. Never remove more than 20% of the tree’s foliage in one session—you want to keep the tree’s energy balanced.
✂️ Step 3: Fall Cleanup Before Dormancy
In late fall, after leaves drop but before hard frosts, I do a final cleanup. Remove all dead or diseased branches first—they can harbor fungal spores over winter. Then, I shorten any overly vigorous branches by about one-third to encourage a more compact shape.
I also check for any water sprouts—those fast-growing, vertical shoots that appear after pruning. These saplings drain energy from the tree, so I cut them back to a lateral branch or bud. This is also the time to sterilize your pruning tools with rubbing alcohol to prevent spreading disease between cuts.
⏰ Step 4: Winter Pruning for Shape and Safety
During dormancy, I focus on shaping the tree for the coming season. Look for branches that are growing in the wrong direction or creating weak angles. I make cuts just above outward-facing buds to encourage new growth in the right direction. Avoid heavy pruning in winter—mulberries are sensitive to cold stress.
If you notice any branches with cracks, splits, or signs of storm damage, remove them immediately. These are entry points for pests and disease. I also check for any low-hanging branches that could break under snow or ice and prune them back. This keeps the tree safe and strong for spring.
Tips & tricks for pruning young mulberry trees
Here's what I've learned after years of shaping my own mulberry saplings—these tricks make all the difference for healthy growth.
Timing is Everything: That late March to early April window for Step 1 is crucial because it's when mulberries start their active growth cycle. I've found that pruning too early (while still dormant) can encourage weak, spindly growth, while waiting too long risks removing next year's fruit buds. Look for those first tiny green tips—your visual cue that it's time to start shaping.
Tool Prep Makes the Difference: Before you begin Step 1, sterilize your pruning shears with rubbing alcohol. I learned this the hard way after transferring fungal spores between cuts. Also, keep your tools sharp—dull blades tear tissue, making wounds more vulnerable to disease. A quick check with your fingernail should show clean cuts, not jagged edges.
Understanding Branch Angles: When selecting your central leader in Step 1, look for branches forming a 45-degree angle with the trunk. These angles create strong structural support. I've seen too many trees develop weak "V" crotches where branches grow directly opposite each other—these often split under fruit weight. Always cut back competing branches to outward-facing buds to encourage proper growth patterns.
Seasonal Balance Matters: The 20% foliage limit in Step 2 isn't arbitrary—it's about maintaining the tree's energy balance. I've noticed that removing more than this can stress young mulberries, especially in summer when they're putting energy into fruit production. Think of it as giving your tree room to breathe while still keeping enough leaves for photosynthesis.
Pro Tips for Juvenile Mulberry Tree
- Here's what I've learned after years of shaping my own mulberry saplings—these tricks make all the difference for healthy growth.
- Timing is Everything: That late March to early April window for Step 1 is crucial because it's when mulberries start their active growth cycle.
- Tool Prep Makes the Difference: Before you begin Step 1, sterilize your pruning shears with rubbing alcohol.
Frequently asked questions
Got questions about pruning your juvenile mulberry tree?
You’re not alone! Here are answers to the most common concerns—from timing to troubleshooting—to keep your tree thriving.
When is the best time to prune a juvenile mulberry tree?
For juvenile mulberry trees (under 3 years old), focus on late winter or early spring (just before buds swell). Avoid heavy pruning in fall—it can stimulate late growth vulnerable to frost. Light shaping in summer is fine, but prioritize winter for major cuts to encourage strong, structured growth.
How much can I prune off a young mulberry tree?
Stick to the 10-20% rule: Never remove more than 20% of the tree’s canopy in one session. For juveniles, aim for 5-10% max to avoid stress. Focus on removing dead, crossing, or weak branches—this keeps the tree balanced and promotes healthy fruit production later.
What if my mulberry tree isn’t growing after pruning?
Slow growth could mean over-pruning, poor soil, or pests. Check for:
- Root health: Ensure the tree’s roots aren’t compacted or waterlogged.
- Nutrients: Mulberry trees love well-draining soil rich in nitrogen. Add compost or a balanced fertilizer in spring.
- Pests/disease: Inspect for aphids, scale, or fungal spots (like powdery mildew). Prune infected branches immediately and treat with neem oil if needed.
Can I prune a mulberry tree in summer?
Yes, but lightly and strategically. Summer pruning is best for:
- Removing water sprouts (fast-growing, vertical shoots).
- Thinning leafy growth to improve airflow (reduces disease risk).
- Avoid heavy cuts—this can stress the tree and delay fruit set.
If pruning in summer, do it early morning or late evening to minimize sun stress on fresh cuts.
Are there alternatives to pruning for shaping a juvenile mulberry?
If you’re hesitant about pruning, try these low-impact methods:
- Training branches: Gently tie young branches to a trellis or stake to guide growth (great for espalier styles!).
- Selective fertilization: Use a low-nitrogen fertilizer to encourage bushier growth without aggressive pruning.
- Natural thinning: Remove only suckers (shoots from the base) to redirect energy upward.
For mulberries, pruning is still key for long-term health, but these tricks can supplement shaping.
Wrapping up and next steps
Growing a thriving juvenile mulberry tree is all about balance—pruning with care to shape its future while nurturing its strength. By following seasonal techniques and avoiding common mistakes, you’ll set the stage for a robust, fruitful tree. 🌱✨
Now that you’re armed with the secrets, roll up your sleeves and get pruning! Start with a single branch this weekend—confidence grows with every cut. Happy gardening!