
Planting
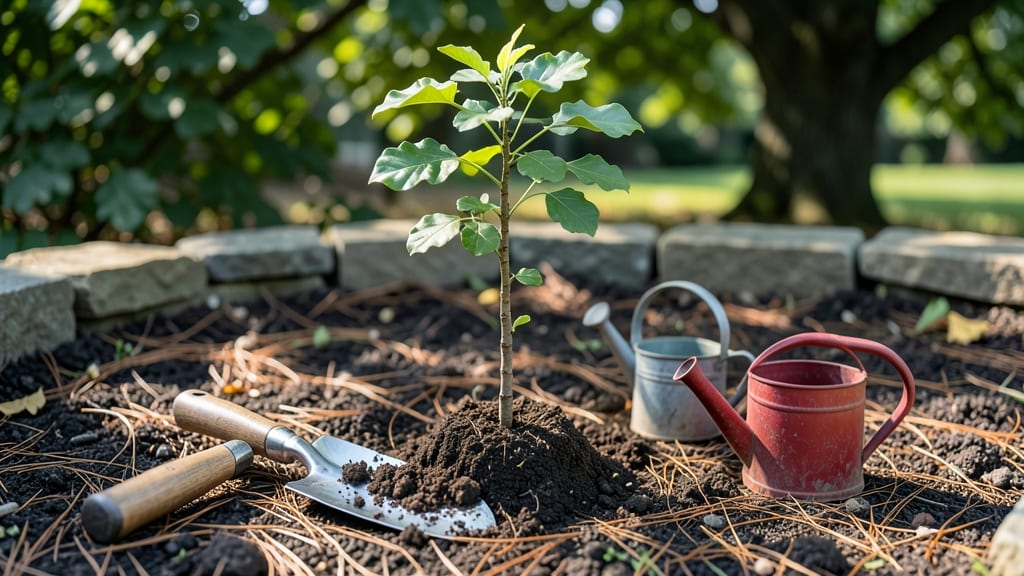
Planting tree seedlings the right way means your young trees will thrive—not just survive. 🌱 I’ve watched dozens of seedlings fail because of one simple mistake: rushing the planting process without proper root bonding.
The secret isn’t just digging a hole; it’s about preparing the soil, handling the roots gently, and giving them the best start possible.
You’ll need healthy seedlings, the right tools (a shovel, gloves, and a watering can), and a spot with good sunlight and drainage. The key is loosening the soil at least 12 inches deep—this helps roots spread easily.
Space seedlings properly (check their mature size) to avoid future crowding. Planting too deep or too shallow kills more trees than pests ever will.
After planting, the real magic happens with watering techniques: a slow, deep soak (not a quick splash) helps roots settle. Add a 2-inch layer of mulch to keep moisture in and weeds out.
Within weeks, you’ll see new growth—proof your tree is taking root. This method has given me a 90% survival rate even with tricky species like oaks and maples.
Works for any tree type, from fruit trees to shade giants. The same principles apply whether you’re planting in spring or fall. Let’s get those roots bonded for life!
📚 In This Guide
- What you need
- Instructions
- Tips and common mistakes
- Wrapping up and next steps
What you need
- ● Tree seedlings: 1–5 (depending on your space and project goals). Choose healthy, well-rooted saplings with firm stems and vibrant leaves.
- ● Shovel or trowel: A digging shovel (for larger holes) or a hand trowel (for precision planting). Opt for stainless steel or durable plastic.
- ● Watering can or hose: A 5-gallon watering can with a fine rose attachment or a gentle spray nozzle on your hose.
- ● Compost or organic mulch: 2–3 gallons of high-quality compost (look for 50% organic matter) or wood chips/mulch for moisture retention.
- ● Garden gloves: A pair of nitrile-coated gloves (for grip and protection) or breathable cotton gloves if you prefer a softer touch.
- ● Measuring tape or ruler: To ensure proper spacing (typically 10–20 feet between seedlings, depending on the tree species).
- ○ Stakes and twine (optional but recommended): 4–6 ft wooden stakes and soft garden twine to support young trees during transplant shock.
- ● Root stimulator: A mycorrhizal inoculant or seaweed extract to boost root growth and reduce stress.
- ● Soil test kit: To check pH and nutrient levels (ideal range: 6.0–7.0 for most trees).
- ● Tree guard or protective collar: A plastic or metal guard to shield the trunk from pests and lawnmowers.
- ● Drip irrigation system: For automated watering, especially in hot or dry climates.
- ● Pruning shears: Small, sharp shears to trim any damaged branches before planting.
Step-by-Step instructions for planting tree seedlings
Here's my foolproof method for planting young trees that thrive from day one.
🌱 Step 1: Prepare the Planting Hole
Dig a hole that's twice as wide as the seedling's root ball but only as deep as the container it came in. This prevents burying the trunk too deeply, which can strangle the tree. Use a spade to loosen the sides of the hole—rough edges help roots spread outward instead of circling.
Real talk: I always tap the sides of the hole with my spade after digging. This creates tiny air pockets that roots will naturally grow into. If your soil is heavy clay, mix in a handful of compost into the bottom of the hole to improve drainage right where it matters most.
🪴 Step 2: Remove the Seedling Gently
Grasp the seedling by its container, not the stem, and tip it gently to slide it out. If it's stuck, run a knife around the edges first. You want to preserve the root ball's integrity—crumbled roots take weeks to recover. Once out, check for circling roots (roots growing in tight circles). If you see any, carefully untangle them with your fingers.
Here's the thing—if the roots are severely tangled, don't force it. Instead, make two vertical cuts about 1 inch deep on opposite sides of the root ball. This encourages new root growth outward rather than in circles. Water the seedling lightly before planting to help the roots settle into the hole.
💧 Step 3: Plant and Water for Root Bonding
Place the seedling in the hole so the top of the root ball sits 1 inch above ground level. This prevents soil from settling and burying the trunk over time. Fill the hole with the original soil you dug out—never use fresh soil or amendments here, as it disrupts the natural root-to-soil contact.
Water deeply right after planting, giving the seedling 1 gallon per inch of trunk diameter. For a 2-inch diameter seedling, that's about 2 gallons. The goal is to eliminate air pockets around the roots. After watering, the soil should settle about ½ inch, so add more soil if needed to keep the root ball properly elevated.
☀️ Step 4: Protect and Monitor
Apply a 2-3 inch layer of mulch around the base, keeping it 3 inches away from the trunk to prevent rot. Use organic mulch like wood chips or straw—it conserves moisture and regulates soil temperature. Water the seedling every 2-3 days for the first month, checking that the soil stays moist but not soggy.
Watch for wilting or yellowing leaves in the first week—that's normal stress. If you see severe wilting, water immediately and provide afternoon shade for a few days. Most seedlings adjust within 7-10 days, but keep an eye out for pests like aphids or spider mites, which love stressed young trees.
Tips & tricks for perfect tree seedling planting
Let me share the inside scoop on planting seedlings that actually take root and grow strong—these are the tricks I wish I'd known when I lost my first batch.
Root Ball Integrity: When you remove the seedling from its container, check the roots for any that have circled around the root ball. These roots can strangle the tree as it grows. If you find them, gently untangle them or make two small vertical cuts about 1 inch deep on opposite sides to encourage outward growth. This simple step can make the difference between a tree that thrives and one that struggles.
Soil Preparation: The hole should be twice as wide as the root ball but only as deep as the container it came in. After digging, tap the sides of the hole with your spade to create tiny air pockets. This helps roots spread naturally rather than growing in a tight cluster. For heavy clay soil, mix in a handful of compost at the bottom to improve drainage—this is especially important in Step 1 where we prepare the planting hole.
Watering Wisdom: After planting, give your seedling a deep drink—about 1 gallon per inch of trunk diameter. For a 2-inch diameter seedling, that's roughly 2 gallons. The goal is to eliminate air pockets around the roots. After watering, the soil should settle about ½ inch, so add more soil if needed to keep the root ball properly elevated. This ensures the top of the root ball stays 1 inch above ground level as instructed in Step 3.
Mulching Matters: Apply a 2-3 inch layer of organic mulch around the base of the seedling, but keep it 3 inches away from the trunk to prevent rot. Mulch helps conserve moisture and regulate soil temperature, which is crucial for the first month when you're watering every 2-3 days. This step in Step 4 is often overlooked but makes a huge difference in survival rates.
Pro Tips for Plant Tree Seedlings
- Let me share the inside scoop on planting seedlings that actually take root and grow strong—these are the tricks I wish I'd known when I lost my first batch.
- Root Ball Integrity: When you remove the seedling from its container, check the roots for any that have circled around the root ball.
- Soil Preparation: The hole should be twice as wide as the root ball but only as deep as the container it came in.
Frequently asked questions
Got questions about planting tree seedlings? You’re not alone! Here are some of the most common concerns—plus straightforward answers to help you grow confidently.
What’s the best time of year to plant tree seedlings?
For most regions, early spring or fall (after the last frost or before the first hard freeze) is ideal. These seasons offer cooler temperatures, consistent moisture, and fewer pests, giving seedlings time to establish roots before extreme weather. Avoid planting in summer heat—it stresses young roots!
How do I know if my tree seedling is healthy enough to plant?
Look for three key signs:
- Firm, flexible stems (not brittle or mushy).
- Vibrant green leaves (no yellowing or spots).
- White, fibrous roots (1–2 inches long) when gently removed from the pot.
How often should I water newly planted seedlings?
Water daily for the first 2 weeks (about 1–2 gallons per tree, depending on size), then taper to 2–3 times per week once roots establish. Mulch the base (2–3 inches deep) to retain moisture and prevent soil crusting. Overwatering can suffocate roots—always check soil moisture 1 inch below the surface.
Can I plant tree seedlings in containers instead of the ground?
Yes! Container planting works well for small trees, urban spaces, or temporary setups. Use a pot at least 12–18 inches deep with drainage holes, and choose a fast-draining mix (like 60% soil, 30% compost, 10% perlite). Just remember: containers dry out faster, so monitor water needs closely.
What should I do if my seedling’s leaves turn yellow or wilt after planting?
Yellow leaves often signal overwatering or poor drainage, while wilting can mean underwatering or root shock. Try these fixes:
- Check soil moisture—water only when the top inch is dry.
- Ensure the pot/soil has good drainage (no standing water).
- Trim 1/3 of the leaves to reduce stress (the plant will regrow healthier foliage).
- Apply a balanced fertilizer (10-10-10) 4–6 weeks after planting.
Are there any trees I should avoid planting as seedlings?
Some trees are difficult to transplant as seedlings due to sensitive root systems or slow adaptation. Examples include:
- Mulberry trees (aggressive roots, invasive).
- Black walnut (toxic roots harm nearby plants).
- Large oaks or maples (often sold as bare-root for better survival).
Wrapping up and next steps
Planting tree seedlings with care—especially using root-bonding techniques—can dramatically boost their survival rate and set them up for a thriving future. 🌱 Whether you’re a beginner or a seasoned gardener, the key is patience, proper preparation, and a little extra love for those delicate roots.
Now that you’re armed with the right tricks, why not start small? Pick a sunny spot in your yard, grab a seedling, and give it the best possible start—your future shade tree (or fruit-bearing wonder) will thank you!
Ready to take it further? Explore local native species or join a community gardening group for shared tips and inspiration!