
Planting
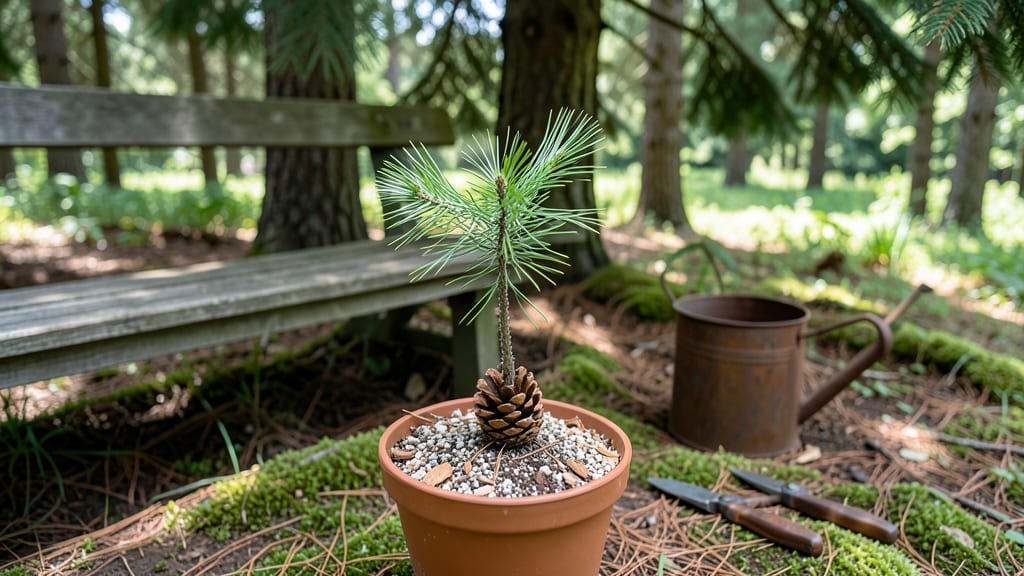
Planting a pine tree from a pine cone is the ultimate long-term project—imagine the tiny seedling you nurture today standing as a 50-foot sentinel in 50 years. 🌲 The trick isn't just dropping a cone in the dirt; it's creating the exact conditions that mimic a pine tree's natural forest environment, from soil moisture to sunlight exposure.
You'll need patience (germination can take months) and a few simple supplies: fresh pine cones from a healthy tree, a shallow container, well-draining soil mix, and a sunny spot that gets at least six hours of light daily.
The biggest challenge? Keeping the seedbed consistently moist without drowning the seeds—too much water kills them faster than too little.
What you'll end up with is a slow-growing but rewarding evergreen that outlasts generations. Those first needle clusters appear within a year, and by year three, you'll have a sturdy sapling ready for transplanting. The real magic happens when you realize you're growing something that will outlive you—and your grandchildren.
This method works best in cooler climates (zones 3-7) and with native pine species like white pine or ponderosa. For warmer regions, consider container growing or shade-tolerant varieties. Let's get those cones prepped—the journey to a towering pine starts now.
📚 In This Guide
- What you need
- Instructions
- Tips and common mistakes
- Wrapping up and next steps
What you need
- ● Mature pine cones: Collect fresh, healthy pine cones from native pine trees (avoid cones from ornamental or hybrid species—they may not produce viable seeds). Aim for 5–10 cones to increase your chances of success.
- ● Scissors or pruning shears: For carefully opening cones without damaging the seeds inside.
- ● Small paper bags or breathable mesh bags: To store cones while they dry (if not planting immediately). Use 2–3 bags, one per cone or a few cones per bag.
- ● Well-draining potting mix: A blend of peat moss, perlite, and sand (or a cactus/succulent mix) in a 1:1:1 ratio. You’ll need about 1–2 quarts per seedling.
- ● Small seedling trays or pots: 2–4 inch diameter pots with drainage holes (or a flat seed tray with individual cells). Plan for 10–20 pots to account for germination rates.
- ● Plastic wrap or humidity dome: To create a mini greenhouse effect and retain moisture.
- ● Spray bottle: For gently misting seeds without disturbing them.
- ● Labeling tags and marker: To track pine species and planting dates.
- ● Heat mat: Speeds up germination (ideal for 70–80°F soil temps).
- ● Grow lights: If starting indoors with limited natural light.
- ● Fungicide (organic, like neem oil): To prevent damping-off disease in seedlings.
- ● Larger nursery pots (3–5 gallons): For transplanting seedlings after they sprout.
- ● Outdoor space or greenhouse: For hardening off seedlings before permanent planting.
Step-by-Step instructions for germinating pine tree seeds
Here's how to turn a simple pine cone into a towering evergreen—patience and the right conditions are key.
🌱 Step 1: Extract and Prepare the Seeds
Collect fresh pine cones from the ground in early fall after they've opened naturally. The seeds inside are most viable when they've been through one natural drying cycle. Gently pry open the cone and remove the winged seeds—these are your future saplings.
Soak the seeds in lukewarm water for 24 hours before planting. This softens the outer coating and jumpstarts germination. I use a shallow dish with just enough water to cover the seeds completely. Don't let them dry out during this process—check them every few hours if you're impatient like me.
💧 Step 2: Plant in a Controlled Environment
Fill a small container—like a 4-inch plastic pot—with a mix of 50% peat moss and 50% perlite. This lightweight blend prevents rot while holding enough moisture. Plant the seeds ¼ inch deep, spacing them 1 inch apart to avoid overcrowding as they grow.
Keep the soil consistently moist but never soggy. Pine seeds need humidity to germinate, so place a clear plastic bag over the container or use a humidity dome. Set the whole thing in a warm spot (70-75°F)—a sunny windowsill or under a grow light works best. Germination can take 4-12 weeks, so don't rush it.
☀️ Step 3: Provide Light and Gradual Exposure
Once the first true needles appear—those aren't the tiny cotyledons but the needle-like leaves—remove the plastic cover. This is your signal to start hardening off the seedlings. Move them to a bright spot with indirect sunlight for the first week, then gradually introduce more direct light over 2-3 weeks.
Pine seedlings are sensitive to sudden changes, so I like to rotate the pots weekly. This ensures even growth and prevents them from leaning toward the light. You'll notice the needles darken and thicken as they adjust—this is a good sign they're thriving.
🪴 Step 4: Transplant to a Permanent Spot
After 6-12 months, when the seedlings reach 6-12 inches tall, it's time to move them outdoors. Choose a location with full sun and well-draining soil. Dig a hole twice as wide as the root ball but no deeper—pine roots are shallow and don't like being buried too deep.
Water deeply after transplanting to help the roots settle. Mulch around the base with 2-3 inches of organic mulch to retain moisture and protect the young roots. The first year is critical—keep the soil moist but not waterlogged, and avoid fertilizing. Pines grow slowly, and rushing them leads to weak, spindly trees.
Tips & tricks for perfect pine tree germination
Growing a pine tree from a pine cone is all about patience and precision—here's what I've learned to make the process smoother.
Seed Selection: Only use pine cones that have opened naturally in the fall. These seeds have already gone through one drying cycle, which increases their viability. Avoid cones that are still tightly closed or appear moldy—they won't germinate properly. I've found that cones from white pines (like Eastern White Pine) tend to germinate more reliably than those from ornamental pines.
Soaking Strategy: During that critical 24-hour soaking in Step 1, use a mesh bag or cheesecloth to contain the seeds—this makes it easier to handle them when transferring to soil. Change the water halfway through if it starts looking murky. The goal is to soften the seed coat without damaging the seed itself. Pro tip: If you're really impatient, you can soak them for up to 48 hours (optional), but don't exceed that or you risk reducing germination rates.
Humidity Control: The plastic bag or humidity dome in Step 2 creates a mini greenhouse effect. I like to poke a few small holes in the bag to allow for some airflow—this prevents mold while maintaining humidity. Place a small tray of water near the container to increase ambient moisture, especially if your home has dry air. The 70-75°F temperature range is non-negotiable—any cooler and germination slows dramatically, any warmer and mold becomes a risk.
Transplant Timing: When you're ready to move your seedlings outdoors after 6-12 months, do it on an overcast day or in the late afternoon. This gives the delicate seedlings time to adjust to the sun without immediate stress. I've seen many beginners rush this step and end up with scorched seedlings. Harden off gradually by placing them outside for just an hour the first day, then increasing time over a week.
Pro Tips for Plant A Pine Tree From A Pine Cone
- Growing a pine tree from a pine cone is all about patience and precision—here's what I've learned to make the process smoother.
- Seed Selection: Only use pine cones that have opened naturally in the fall.
- Soaking Strategy: During that critical 24-hour soaking in Step 1, use a mesh bag or cheesecloth to contain the seeds—this makes it easier to handle them when transferring to soil.
Frequently asked questions
Got questions about growing a pine tree from a pine cone? You’re not alone! Here are some of the most common queries—and their straightforward answers—to help you succeed.
How long does it take for a pine cone seedling to grow into a mature tree?
A pine tree grown from a pine cone takes 10–20 years to reach maturity, depending on the species. Some fast-growing varieties like Pinus strobus (white pine) may mature sooner, while slower growers like Pinus ponderosa (ponderosa pine) take longer. Patience is key—think of it as a long-term investment in your landscape!
When is the best time of year to plant pine cone seeds?
The ideal time is early spring or fall, when soil temperatures are mild (50–70°F). Planting in spring gives seeds a head start, while fall allows them to establish roots before winter. Avoid planting in extreme heat or frost—seeds need consistent moisture and warmth to germinate successfully.
What if my pine cone seeds don’t sprout? What went wrong?
Several factors could delay germination:
- Stratification issues: Seeds may not have undergone cold treatment long enough (try 30–90 days in the fridge).
- Poor soil: Compacted or waterlogged soil suffocates roots. Use well-draining, sandy loam.
- Drought stress: Keep soil consistently moist (not soggy) for the first 3–6 months.
- Patience: Some pine seeds take up to 2 years to sprout—don’t give up!
Can I plant a pine cone seed indoors first, then transplant outside?
Yes! Start seeds indoors in biodegradable pots (like peat or coconut coir) 4–6 weeks before the last frost. Use a warm, sunny windowsill or grow light, and keep soil moist. Once seedlings are 3–4 inches tall with a sturdy root system, harden them off (acclimate to outdoor conditions) before transplanting in spring.
Are there any pine tree species that are easier to grow from pine cones?
Some of the most beginner-friendly species include:
Species
Germination Time
Growth Rate
Pinus strobus (White Pine)
6–12 months
Moderate (1–2 ft/year)
Pinus sylvestris (Scots Pine)
4–8 months
Fast (2–3 ft/year)
Pinus taeda (Loblolly Pine)
8–16 months
Moderate (1–2 ft/year)
Wrapping up and next steps
Growing a pine tree from a pine cone is a rewarding journey that connects you to nature’s patience and resilience. 🌱 With the right preparation, care, and a little time, you’ll nurture a seedling that could one day tower over your backyard. Start small, stay consistent, and celebrate each milestone—your future evergreen is worth the wait!
Ready to take the next step? Explore our guide on transplanting young saplings or dive into advanced pine tree care to keep your new tree thriving. Happy planting! 🌲