
Propagation
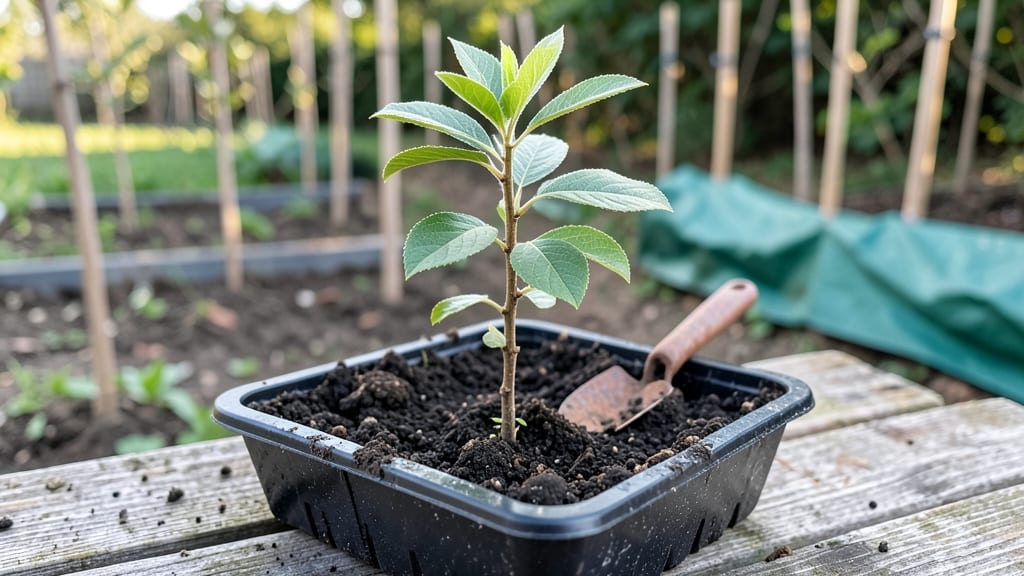
Growing a plum tree from seed is the ultimate test of patience—but the first sweet fruit you harvest makes it worth every wait. 🌱 I’ve watched my own seedling go from a tiny sprout to a sturdy sapling, and while it won’t bear fruit for years, the journey is part of the magic.
The key is starting with the right seed and giving it the exact conditions it needs to break dormancy.
You’ll need just a few supplies: a ripe plum (or saved pit), a damp paper towel, a small pot, and well-draining soil. The hardest part? Waiting. Some seeds take weeks to sprout, and the first year is all about nurturing that fragile root system.
But once you see those first true leaves, you’ll know you’re on the right track—even if fruit won’t appear for three long seasons.
By the time your tree reaches maturity, you’ll have a sturdy, productive fruit-bearing tree that’s uniquely yours. The branches will stretch toward the sky, and the scent of blossoms in spring will remind you why the wait was worth it.
The real reward isn’t just the harvest—it’s the satisfaction of growing something from nothing.
This method works best in zones 5-9, where plum trees thrive, but with the right care, you can adapt it to other climates. Whether you’re a beginner or a seasoned gardener, the process teaches you more about tree biology than buying a sapling ever could. Let’s get those seeds sprouting!
📚 In This Guide
- What you need
- Instructions
- Tips and common mistakes
- Wrapping up and next steps
What you need
- ● Fresh plum seeds: 1–3 viable, pitted seeds from a ripe, organic plum (avoid hybrid or processed plums—they may not grow true to type).
- ● Paper towels or damp cloth: 1–2 sheets for seed stratification (to mimic winter chilling).
- ● Plastic bag or airtight container: 1 small bag with a zipper to store seeds during stratification.
- ● Potting soil: 1 bag of well-draining, sterile seed-starting mix (avoid garden soil—it can harbor pests or fungi).
- ○ Small pots or seed trays: 2–4 (3–4 inches deep) with drainage holes. Optional: Biodegradable pots for easier transplanting.
- ● Spray bottle: 1 for gentle watering (avoid over-saturating seeds).
- ● Grow lights or sunny windowsill: A south-facing window or LED grow lights (12–16 hours/day) for seedlings.
- ● Fertilizer: A balanced, water-soluble fertilizer (e.g., 10-10-10) or organic option like fish emulsion (diluted to half-strength).
- ● Pruning shears or scissors: 1 pair (sterilized with rubbing alcohol) for trimming seedlings.
- ○ Mulch (optional but helpful): Straw or wood chips to retain moisture in outdoor plantings.
- ● Seed stratification timer: A fridge or cool basement (34–40°F) to simulate winter.
- ● Humidity dome or plastic wrap: To create a mini greenhouse for seedlings.
- ● pH testing kit: To ensure soil pH is 6.0–7.0 (plums prefer slightly acidic to neutral soil).
- ○ Rooting hormone: (Optional) Speeds up germination for stubborn seeds.
- ● Garden gloves: To protect hands from soil and sharp seed shells.
Step-by-step instructions for growing a plum tree from seed
Here's how I turn a single pit into a fruit-bearing tree in just three years.
🌱 Step 1: Extract and Stratify the Seed
After enjoying a ripe plum, crack open the pit and remove the large, flat seed inside. Don't wash it—just let it dry for a week. This prevents rot during the next step. I place the seed in a small paper towel, dampen it just enough to feel slightly moist (like a wrung-out sponge), then fold the towel around it. Put the wrapped seed in a sealed plastic bag and refrigerate for 8-12 weeks.
This cold treatment mimics winter and breaks seed dormancy. I check it weekly—if the towel dries out, mist it lightly. The goal is to keep it consistently damp, not soggy. After 8-12 weeks, the seed should feel plump and ready to sprout.
💧 Step 2: Plant the Stratified Seed
Fill a small 4-inch pot with sterile seed-starting mix—not garden soil. Press the mix down lightly so it's firm but not compacted. Make a ½-inch deep hole with your finger and place the seed inside, pointy end up. Cover it with ¼ inch of additional mix, then water gently until the surface feels damp.
Place the pot in a warm spot (65-75°F) with bright, indirect light. A seedling heat mat helps speed up germination. Keep the soil consistently moist—never soggy—by checking the top inch daily. You'll see the first tiny shoot in 2-4 weeks. Here's the thing—don't move the pot once sprouted. Even a slight shift can break the delicate root.
☀️ Step 3: Transplant and Care for the Seedling
When the seedling reaches 4-6 inches tall (usually after 3-4 months), transplant it into a 6-inch pot with fresh seed-starting mix. Gently loosen the root ball to encourage spreading roots. Place the pot in full sun for at least 6 hours daily. Plums need plenty of light to grow strong and avoid becoming leggy.
Water deeply when the top 1 inch of soil feels dry. Young plum seedlings hate soggy roots, so ensure the pot has drainage holes. Fertilize lightly every 4-6 weeks with a balanced 10-10-10 fertilizer diluted to half strength. You'll notice new leaves forming—this is your signal the tree is establishing itself.
🌿 Step 4: Prepare for Outdoor Planting
After 1 year, when the seedling is 2-3 feet tall and has multiple branches, it's time to move it outdoors. Choose a sunny spot with well-draining soil. Dig a hole twice as wide as the root ball but no deeper. Place the seedling in the hole, ensuring the top of the root ball sits 1 inch below soil level. Fill the hole with soil and water deeply.
Mulch around the base with 2-3 inches of organic mulch to retain moisture and regulate soil temperature. Here's where it gets fun—watch the tree grow! In 2-3 years, it'll produce its first flowers, and with patience, fruit. Real talk: Seed-grown plums may take 5-7 years to bear fruit, but the wait is worth it for a tree you nurtured from scratch.
Tips & tricks for growing a plum tree from seed
Turning a simple pit into a fruit-bearing tree takes patience—but these little tricks will help you avoid common pitfalls and give your seedling the best start.
Seed Selection: Choose pits from ripe, healthy plums—avoid those with soft spots or cracks, as they may already be compromised. I've found that European plums (like Santa Rosa or Stanley) often produce more reliable trees than some Asian varieties. If you're unsure about the variety, don't worry—the tree will still grow, though fruit characteristics may vary.
Stratification Success: During your 8-12 week cold treatment, place the bagged seed in the crisper drawer of your fridge where temperatures stay consistently cold. This mimics natural winter conditions better than the main fridge compartment. I like to label the bag with the date so I don't forget when to check for sprouting—trust me, you'll be excited when those first little roots appear!
Lighting Strategy: For Step 2, if you don't have a seedling heat mat, a simple DIY solution works: place the pot on top of your refrigerator (not inside) which often maintains that perfect 65-75°F range. For lighting, a south-facing window gets the brightest indirect light, but if that's not available, a basic grow light on a timer for 12 hours daily will work wonders. The key is consistency—plum seedlings need reliable light to avoid becoming leggy.
Transplanting Timing: When moving your seedling to the 6-inch pot in Step 3, time it just before you'd normally water it. This prevents shocking the roots with extra moisture during the transition. I've also found that gently tapping the sides of the pot before removing the seedling helps loosen the root ball without damaging it—this makes the transplanting process much smoother.
Pro Tips for Grow Plum Tree From Seed
- Turning a simple pit into a fruit-bearing tree takes patience—but these little tricks will help you avoid common pitfalls and give your seedling the best start.
- Seed Selection: Choose pits from ripe, healthy plums—avoid those with soft spots or cracks, as they may already be compromised.
- Stratification Success: During your 8-12 week cold treatment, place the bagged seed in the crisper drawer of your fridge where temperatures stay consistently cold.
Frequently asked questions
Got questions about growing a plum tree from seed? You're not alone! Here are some of the most common queries—and their straightforward answers—to help you succeed.
How long does it take for a plum seed to germinate?
Germination can take anywhere from 3 to 6 weeks (sometimes longer!) if you’re using the stratification method. If you skip stratification and plant seeds directly, they may never sprout. Patience is key—keep the soil moist and warm (around 70°F) to encourage growth. Pro tip: Some seeds take up to 3 months—don’t give up!
Will a plum tree grown from seed produce fruit like the parent tree?
Probably not! Trees grown from seed are not true to type, meaning the fruit may differ in size, flavor, or even color from the original tree. For consistent fruit, consider grafting a known variety onto your seedling later. If you’re okay with surprises, though, seed-grown plums can still be delicious—and a fun experiment!
How many years until my seedling bears fruit?
Plum trees from seed can take 5 to 10 years (or longer!) to bear fruit, depending on the variety and growing conditions. The article’s 3-year estimate refers to a young sapling reaching maturity, but fruit production is a marathon, not a sprint. Choose a fast-growing variety like Stanley or Santa Rosa for earlier rewards.
What’s the best temperature for growing plum seeds?
Plum seeds thrive in warm soil (65–75°F) for germination. After sprouting, keep seedlings in 60–70°F conditions. If your climate is too cold, start seeds indoors under grow lights 6–8 weeks before the last frost. Once transplanted outside, young trees need full sun (6+ hours daily) to flourish. Warning: Plums hate frost—wait until spring to plant!
Why did my plum seedling leaves turn yellow?
Yellow leaves (chlorosis) usually signal overwatering, nutrient deficiency, or poor drainage. Check the soil—it should be moist but not soggy. Plum trees need well-draining soil and balanced fertilizer (like 10-10-10). If the problem persists, test for iron or magnesium deficiencies and amend the soil accordingly. Fix it fast: Let the soil dry slightly between waterings!
Can I grow a plum tree from a store-bought plum?
Yes! Just save the pit, clean it, and follow the stratification steps in the article. However, commercial plums are often hybridized and may not grow true to type. For better results, use seeds from a heirloom or open-pollinated variety. If you’re impatient, consider buying a 1-year-old grafted tree for faster fruit.
Wrapping up and next steps
Growing a plum tree from seed is a rewarding journey that blends patience with the joy of nurturing life.
While it may take a few years to see fruit, every step—from seed selection to transplanting—builds your gardening skills and connects you to nature’s cycle. Now’s your chance to take the next step: grab those seeds, pick a sunny spot, and let your green thumb bloom! 🌱
Ready to watch your tiny seed transform into a thriving tree? Start today—your future plum harvest awaits!