Pruning
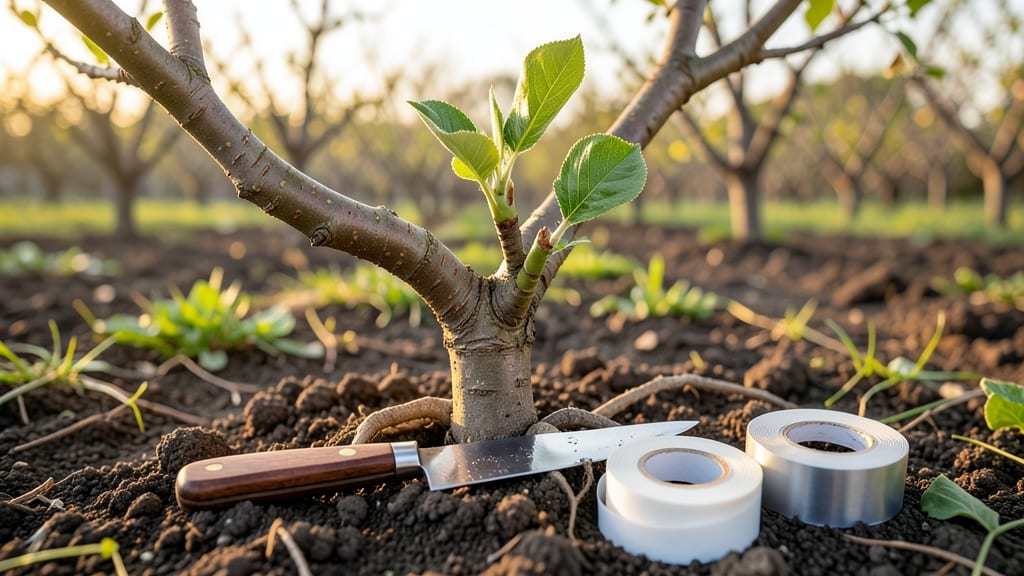
Grafting a tree lets you combine the best of two plants—strong roots with desirable fruit or flowers. 🌳 I’ve grafted apple trees in my backyard, and the first time I saw the scion take, I knew this skill would change how I garden forever.
The key is timing: do it during the tree’s dormant season when sap isn’t flowing. You’ll need a sharp grafting knife, grafting tape, and compatible rootstock and scion. Fruit trees like apples, peaches, and plums are perfect for beginners because they heal quickly and produce visible results.
Once you make your cuts—whether whip-and-tongue or cleft grafting—the real magic happens when the two pieces knit together. In just a few weeks, you’ll see new growth sprouting where the graft joined, and by next season, you’ll have a tree with exactly the traits you want.
This method works for backyard orchards, heirloom varieties, or even repairing damaged trees. The best part? You’re not just growing a tree—you’re creating something uniquely yours. Let’s get started with the tools and steps that make it foolproof.
📚 In This Guide
- What you need
- Instructions
- Tips and common mistakes
- Wrapping up and next steps
What you need
- ● Scion wood: Healthy, dormant shoots (about pencil-thick) from the tree you want to propagate. Quantity: 3–5 per graft.
- ● Rootstock: A compatible, established tree (1–3 years old) with a smooth, ½–1-inch diameter trunk.
- ● Grafting tape or rubber bands: To secure the graft union snugly. Tip: Avoid plastic wrap—it can suffocate the graft!
- ● Pruning shears or a sharp grafting knife: Clean, sterilized tools to make precise cuts. Pro tip: Sharpen your blade before starting!
- ● Grafting wax or sealing compound: To protect the cut surfaces from drying out.
- ● Hand lens or magnifying glass (for inspecting cuts).
- ● Ruler or caliper (to measure scion and rootstock diameters).
- ● Pruning sealant (extra protection for larger grafts).
- ● Notebook and pen (to track graft types and success rates).
- ● Knowledge of compatible grafting pairs (e.g., apple scions on crabapple rootstock).
- ● Timing: Graft in late winter/early spring (dormant season) for best results.
- ● Weather: Overcast or cool days (reduces stress on the tree).
Step-by-step instructions for grafting trees like a pro
Here's how I've helped beginners create strong, thriving trees with perfect grafts.
🪴 Step 1: Choose and Prepare Your Scion and Rootstock
Select a healthy scion—this is the branch you'll graft from your desired tree variety. It should be about ¼ inch thick and have at least 3-4 buds. Cut it at a 45-degree angle just above a bud, making the cut about 1-2 inches long. The smoother and cleaner this cut, the better the graft will heal.
For the rootstock, pick a young, vigorous tree that's already established in the ground. I like to use a 1-2 year old sapling with a diameter similar to the scion. Make your cut on the rootstock about 6-12 inches from the ground, again at a 45-degree angle. The rootstock should be free of disease and have smooth bark for the best results.
✂️ Step 2: Make the Graft Cuts and Fit Them Together
Now for the fun part—aligning the scion and rootstock. Slide the scion cut down the rootstock cut until the cambium layers (that's the green layer just under the bark) match up perfectly. The scion should fit snugly, like puzzle pieces. If it doesn't, adjust your cuts slightly until it does.
Secure the graft with grafting tape or rubber bands. Wrap it tightly enough to hold the scion in place but not so tight that you cut into the bark. I like to wrap it twice around the rootstock and once around the scion for stability. Leave the top of the scion exposed to light and air.
🌱 Step 3: Seal and Protect the Graft
Apply grafting wax or sealant over the entire grafted area to prevent drying out and infection. This step is crucial—it keeps moisture in and pathogens out. Spread the wax evenly, covering the cuts and the tape. You'll want to create a smooth, sealed surface. If you see any gaps, add more wax until everything is fully covered.
Cover the entire graft with a plastic bag or grafting sleeve to create a humid environment. This helps the graft heal faster by keeping it moist. Secure the bag with a twist tie or rubber band, but make sure it doesn't squeeze the scion. You'll see new growth within 4-6 weeks if everything is done correctly.
☀️ Step 4: Monitor and Maintain the Graft
Keep the grafted area shaded and protected from direct sunlight for the first 2-3 weeks. Too much sun can dry out the graft and cause it to fail. Check the graft weekly to ensure the wax is still intact and the tape hasn't loosened. If you see any signs of drying or cracking, add more wax immediately.
Once you see new growth from the scion, you know the graft has taken! Remove the bag and tape after 6-8 weeks, but keep the area shaded for a few more weeks to help the new growth strengthen. Water the tree regularly, keeping the soil moist but not soggy. You'll want to see steady growth before you remove all protection.
Tips & tricks for perfect tree grafting
Here's what I've learned after years of grafting—these tricks make all the difference between a successful union and a failed attempt.
Scion Selection Tip: Look for scions with 3-4 buds that are firm to the touch, not mushy. The buds should be plump and green, not brown or shriveled. I always harvest scions in the morning when they're fully hydrated—this gives you the best chance for strong growth. Confession: I skipped this step for years and wondered why so many grafts failed!
Cambium Alignment Secret: In Step 2, when aligning the cambium layers, think of it like matching puzzle pieces. The cambium is that thin green layer just under the bark, and it's where the magic happens. If your cuts don't align perfectly, the graft won't heal properly. Here's what nobody tells you—use a magnifying glass if needed to see the cambium clearly. The smoother the fit, the stronger the union.
Wax Application Technique: Don't just slap on grafting wax! In Step 3, spread it thinly and evenly over the entire grafted area, including under the grafting tape. I like to use a popsicle stick to smooth it out. This creates an airtight seal that prevents drying and infection. Pro tip: Add a second layer if you notice any gaps—this is your best defense against failure.
Monitoring Timeline: The first 2-3 weeks are critical for keeping your graft shaded. I've seen too many beginners rush this step and end up with dried-out grafts. After 6-8 weeks, when you remove the bag, check for new growth from the scion—this is your sign that the graft has taken! If you don't see growth by then, don't give up—sometimes it takes a little longer, especially in cooler weather.
Pro Tips for Graft A Tree
- Here's what I've learned after years of grafting—these tricks make all the difference between a successful union and a failed attempt.
- Scion Selection Tip: Look for scions with 3-4 buds that are firm to the touch, not mushy.
- Cambium Alignment Secret: In Step 2, when aligning the cambium layers, think of it like matching puzzle pieces.
Frequently asked questions
Got questions about grafting trees? You’re not alone! Here are answers to the most common concerns—from timing to troubleshooting—to help you graft like a pro.
When is the best time of year to graft a tree?
The ideal window is late winter to early spring (just before buds swell), but you can also graft in late summer (after harvest but before fall). Avoid extreme heat or cold—aim for 50–70°F (10–21°C). For fruit trees, early spring is critical to sync growth with the rootstock.
Can I graft any tree, or are there restrictions?
Nope! Grafting only works between compatible species or cultivars (same genus or closely related). For example, apple scions won’t work on peach rootstock. Check a grafting compatibility chart for your tree type—mismatches lead to failure.
How long does it take for a graft to heal and grow?
Healing takes 2–4 weeks, but new shoots may appear in 4–8 weeks (or longer for stubborn grafts). Patience is key! Monitor for callus formation (a swollen, bumpy seal) and avoid disturbing the graft until it’s fully bonded.
What if my graft fails? Can I try again?
Don’t panic! Failing grafts often stem from poor compatibility, drying out, or improper technique. Try again with a healthier scion, better tools, or a different grafting method (e.g., whip-and-tongue vs. cleft). Sterilize cuts and use grafting tape/sealant to boost success rates.
Do I need to remove all branches from the rootstock?
Not necessarily! If the rootstock is vigorous, you can leave some branches (but prune them back by ⅓ to reduce competition). Remove any branches near the graft union to direct energy upward. Over time, the grafted scion will outcompete the rootstock’s growth.
Wrapping up and next steps
Grafting a tree is a rewarding skill that blends patience, precision, and a touch of nature’s magic! 🌱 By following these steps—from selecting the right tools to nurturing your graft—you’re not just growing a plant; you’re creating a legacy.
Remember, success starts with preparation, and even small mistakes can be fixed with care.
Ready to take the next step? Start small—practice with easy-to-graft species like apples or pears before tackling more delicate varieties. Then, document your progress in a gardening journal to track growth and refine your technique. Happy grafting, and may your trees thrive! 🌳✨