Pruning
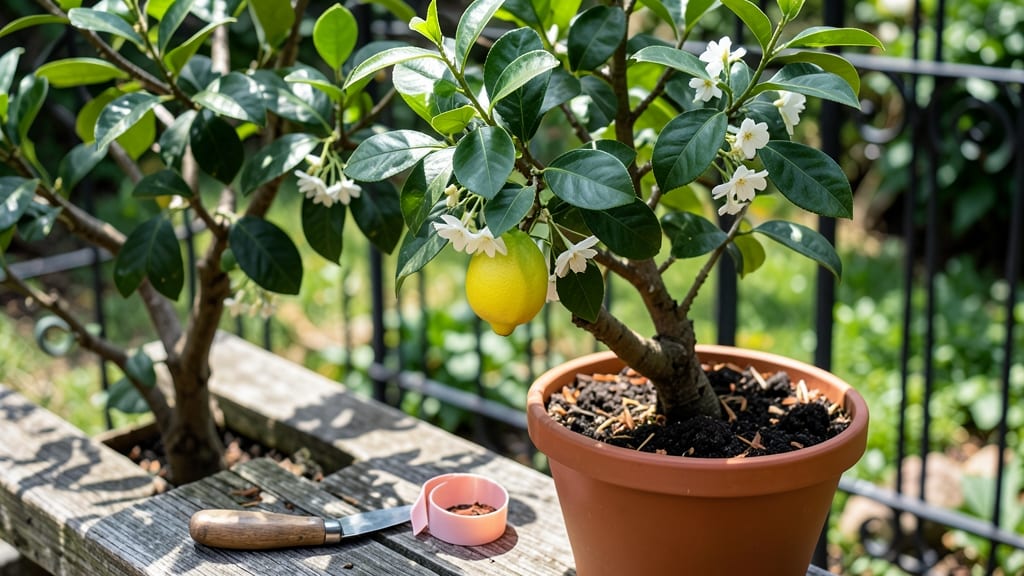
Grafting a lemon tree lets you combine the best of two plants—strong roots from one and sweet fruit from another. ✨ I’ll never forget the first time I saw my grafted Meyer lemon scion sprout new leaves after weeks of doubt.
The key is choosing the right rootstock (like rough lemon or trifoliate orange) and matching it with your favorite lemon variety.
You’ll need just a few tools: a sharp grafting knife, grafting tape, pruning shears, and a clear plastic bag for humidity. The best time to graft is late winter or early spring when the tree is dormant but ready to wake up.
Whip-and-tongue grafting works well for citrus, and with a little practice, you’ll get clean, precise cuts every time.
After grafting, keep the union moist and protected under that plastic bag for about two weeks. You’ll know it’s working when new growth appears from the scion—thicker and greener than the rootstock. Patience is everything; it can take months before you see fruit, but the reward is worth it.
Common mistakes include mismatched cambium layers or not sealing the graft properly. If you’re nervous, start with a practice graft on a less expensive citrus tree. Once you’ve mastered the technique, you’ll be creating your own lemon tree masterpieces in no time.
📚 In This Guide
- What you need
- Instructions
- Tips and common mistakes
- Wrapping up and next steps
What you need
- ● Scion wood: A healthy, disease-free branch (about pencil-thick) from your desired lemon tree variety. Tip: Harvest it in late winter or early spring for best results!
- ● Rootstock: A young, compatible lemon tree (or citrus rootstock like Citrus aurantifolia or Citrus × limon) with a smooth, 1-inch diameter trunk.
- ● Sharp grafting knife or pruning shears: Clean, sterilized, and razor-sharp to make precise cuts. Pro tip: A budding knife works great for whip-and-tongue grafts!
- ● Grafting tape or rubber tree band: A 1-inch-wide strip (2–3 feet long) to secure the graft. Avoid plastic wrap—it can suffocate the plant!
- ○ Pruning sealant (optional but recommended): A wound-healing compound (like Tanglefoot Tree Wound Pruning Seal) to prevent disease entry.
- ● Horticultural spray or fungicide: A mild solution (e.g., copper fungicide) to sterilize tools and cuts.
- ● Grafting clips or rubber bands: For extra support while the graft heals.
- ● Humidity dome or plastic bag: To maintain moisture around the graft site (especially useful in dry climates).
- ● Grafting wax: A natural alternative to sealant for organic gardeners.
- ● Notebook & pen: To track graft dates, varieties, and progress!
Step-by-Step instructions for grafting a lemon tree
Grafting lemon trees is easier than you think—here's my foolproof method for strong, disease-resistant growth.
🪴 Step 1: Select and Prepare Your Scion and Rootstock
Choose a healthy, disease-free scion (the top part) from a mature lemon tree you want to propagate. I look for new growth with at least 3-4 leaves—this ensures the scion has enough energy to heal. The rootstock (bottom part) should be a compatible citrus variety like Meyer lemon or trifoliate orange, with a pencil-thick stem and fresh cuts.
Using a sharp grafting knife, make a clean 45-degree angle cut on both the scion and rootstock. The cut should expose fresh, moist tissue—this is where the cambium layers (the green growth layer just under the bark) will join. Keep everything ready to graft within 5 minutes to prevent drying.
✂️ Step 2: Make the Perfect Grafting Cut
Here's where it gets precise: I make a 1-inch long slice into the rootstock's bark, stopping just before cutting all the way through. The goal is to create a flap that peels back easily. Match this with a corresponding cut on the scion's base—both cuts should align perfectly when joined.
Slide the scion's cut into the rootstock's flap, ensuring the cambium layers align. The scion should sit snugly, with no gaps. Wrap the graft immediately with grafting tape or a plastic bag secured with a rubber band. This keeps everything moist while the tissues fuse—usually within 2-3 weeks.
💧 Step 3: Secure and Maintain the Graft
Place the grafted tree in a shaded, humid environment. I use a clear plastic bag over the entire plant to maintain high humidity—this prevents the graft from drying out while it heals. Water lightly at the base every 3-4 days, keeping the soil moist but never soggy. Overwatering now can rot the graft before it takes.
Check the graft weekly for signs of healing. You'll see new growth emerging from the scion in 4-6 weeks—this means the graft has succeeded. Remove the plastic bag once you notice new leaves forming. If the scion doesn't grow, gently unwind the tape after 6 weeks to check for failure.
☀️ Step 4: Transition to Full Growth
Once the grafted scion shows strong, healthy growth with 5-6 leaves, it's time to move it to brighter light. Start with 4-5 hours of morning sun and gradually increase exposure over 2 weeks. Full sun can shock a newly grafted tree, so I ease it into the light to avoid sunburn.
Fertilize lightly with a balanced citrus fertilizer after 8 weeks, when roots have established. You'll know it's thriving when the tree grows 6+ inches of new growth in a month. Prune any suckers (shoots growing below the graft) immediately—they drain energy from your new lemon tree.
Tips & tricks for perfect lemon tree grafting
Here's what I wish I knew before my first attempt—these tricks will help you avoid common pitfalls and get stronger growth.
Scion Selection Matters: When choosing your scion with 3-4 leaves, look for ones with vibrant green color and firm stems. Avoid any with yellowing or brown spots—these signs of stress mean the scion won't heal properly. I've found that morning-harvested scions work best because they're fully hydrated from overnight dew. The 5-minute window after cutting is critical—if you're not ready, keep the cut ends wrapped in damp paper towel until you are.
The Perfect Cut Technique: For that 1-inch slice in Step 2, think of it like opening a book—you want the bark to peel back easily without tearing. I use a sharp grafting knife and make the cut on a clean, stable surface. The cambium layer (that green growth just under the bark) should be visible and continuous when you join the scion and rootstock. If you're struggling, try making the cut slightly longer—sometimes a 1.25-inch slice gives you more working room for alignment.
Humidity is Non-Negotiable: That clear plastic bag in Step 3 isn't just decoration—it creates the perfect humid environment for healing. If you don't have a bag, you can use a plastic container with small holes punched in the lid. I've seen grafts fail when humidity drops below 80%, even for just a few hours. Place a small tray of water near the grafted tree to add extra moisture to the air, especially if your home has dry conditions.
Patience Pays Off: The 4-6 week waiting period for new growth can be tough, but resist the urge to check constantly. I've learned to mark the date on the plastic bag with a permanent marker so I can track progress. If you see any darkening at the graft union after 6 weeks, gently unwind the tape to check for failure—sometimes the tissues just need more time to fuse. Remember, the 2-3 week healing period is just the beginning of the root connection forming.
Pro Tips for Graft A Lemon Tree
- Here's what I wish I knew before my first attempt—these tricks will help you avoid common pitfalls and get stronger growth.
- Scion Selection Matters: When choosing your scion with 3-4 leaves, look for ones with vibrant green color and firm stems.
- The Perfect Cut Technique: For that 1-inch slice in Step 2, think of it like opening a book—you want the bark to peel back easily without tearing.
Frequently asked questions
Got questions about grafting a lemon tree? You’re not alone—this process can seem tricky at first! Below, we’ve answered the most common questions to help you feel confident before you start.
When is the best time of year to graft a lemon tree?
The ideal time is late winter to early spring (just before new growth begins) or mid-summer (when the tree is actively growing). Avoid grafting during extreme heat, cold, or dormancy—these conditions stress the plant and reduce success rates. Pro tip: Morning or overcast days are best to minimize moisture loss!
Can I graft a lemon tree without a grafting knife or special tools?
While a sharp grafting knife (or even a clean, sterilized razor blade) is ideal, you can use alternatives like a pruning shear or utility knife in a pinch. Just ensure the cuts are smooth and clean to prevent damage. Sterilize your tools with rubbing alcohol to avoid bacterial infections.
What if my scion (the lemon cutting) doesn’t take?
Don’t panic! Graft failure is common, especially for beginners. Check for moisture loss (wilted scion) or infection (blackened or mushy tissue). If the graft doesn’t “callus” (seal) within 2–3 weeks, try again with a fresh scion. Pro tip: Keep the grafted area shaded and humid with a plastic bag until new growth appears!
Do I need to use a specific type of rootstock for lemon grafting?
Yes! Common rootstocks for lemons include Rough Lemon (drought-resistant) or Trifoliate Orange (cold-hardy). Avoid grafting onto unrelated citrus (like oranges) unless you’re experienced—compatibility affects success. Match the rootstock to your climate and desired tree size.
How long until my grafted lemon tree produces fruit?
Patience is key! A successfully grafted lemon tree may take 2–5 years to bear fruit, depending on the rootstock’s vigor and growing conditions. Focus on healthy growth first—prune wisely, fertilize moderately, and protect from pests. Pro tip: Dwarf rootstocks fruit faster but require more care!
Wrapping up and next steps
Grafting a lemon tree is a rewarding way to boost growth, improve fruit quality, and extend your tree’s lifespan—but success starts with patience and precision. You’ve got the tools, the know-how, and the confidence to tackle this project like a pro!
Now, watch your grafted branches thrive and enjoy the sweet (or tangy!) rewards of your hard work.
Ready to take the next step? Monitor your graft closely in the first few weeks, water consistently, and protect it from pests. Once your tree is established, share your progress with fellow gardeners or even join a grafting community for tips and inspiration. Happy grafting—your citrus future is bright! 🌱🍋