Pruning
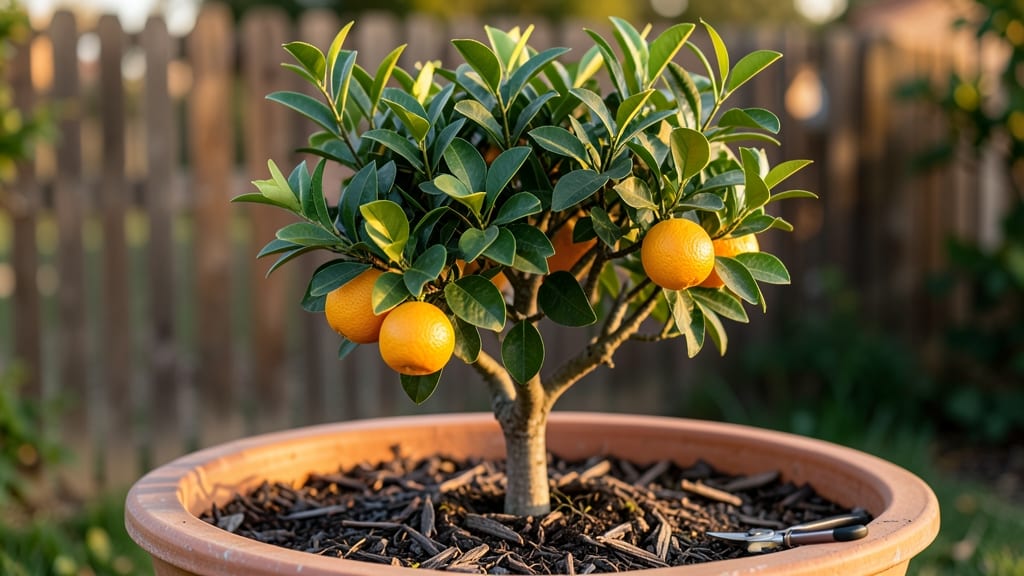
Growing a Honey Murcott tangerine tree starts with understanding its sweet, juicy nature—this isn’t your average citrus tree. 🌿 I’ve watched mine go from a scraggly sapling to a fruit-loaded powerhouse in just three years, and the secret isn’t just in the soil or sun, but in how you prune it year-round.
Most gardeners only think about pruning in winter, but this tree rewards consistent care, especially in its first few seasons when it’s building its structure.
The key to maximizing those golden, honey-sweet tangerines is balancing shape and airflow. You’ll need basic tools—a sharp pair of pruners, gloves, and a bucket for clippings—and a clear plan for when to cut.
Early spring is your best time to shape the tree, but light trimming in summer keeps it from getting too leggy, while winter’s dormant season is perfect for removing dead wood.
Think of it like giving your tree a haircut every few months—just enough to keep it looking good and producing.
What you’ll end up with is a tree that bursts with fruit from late fall through winter, when most citrus trees are done for the season.
The branches stay strong, the leaves stay glossy, and you’ll have more fruit than you can eat—unless you start sharing (which, honestly, is half the fun).
The first harvest will feel like a reward for all that careful pruning, and once you see how much easier it gets each year, you’ll wonder why you didn’t start sooner.
This method works whether you’re in USDA Zone 9-11 or a container in a sunny patio—just adjust for your climate. Cold snaps? Wrap the trunk. Too much rain? Elevate the pot.
The tree’s forgiving nature makes it perfect for beginners, but the real magic happens when you treat it like the delicate yet resilient powerhouse it is. Ready to turn that bare branch into a fruit-laden dream?
📚 In This Guide
- What you need
- Instructions
- Tips and common mistakes
- Wrapping up and next steps
What you need
- ● Pruning shears: Bypass pruners (sharp, clean, and sterilized with rubbing alcohol—1 pair).
- ● Loppers: For thicker branches (3/4"–1.5" diameter)—1 pair.
- ● Hand saw: Pruning saw for stubborn branches (>1.5" diameter)—1.
- ○ Gloves: Heavy-duty, cut-resistant gloves (optional but highly recommended for thorns!)
- ● Disinfectant: 70% isopropyl alcohol or bleach solution (1 part bleach to 9 parts water) for tool sterilization.
- ○ Pruning sealant: (Optional) Wound paint for large cuts to prevent disease—small bottle.
- ● Trash bags: Heavy-duty for debris—2–3 bags.
- ● Ladder: Sturdy, extendable ladder (if tree is >6 ft tall).
- ● Timing: Prune in late winter/early spring (before new growth) or summer (after harvest). Avoid pruning in frost-prone areas during cold snaps!
- ● Weather: Choose a dry, overcast day to minimize stress on the tree.
- ● Safety: Wear long sleeves/pants to protect against thorns and inspect the tree for pests/diseases before pruning.
- ● Research: Sketch a rough plan of your tree’s structure—Honey Murcotts benefit from open-center pruning for airflow.
- ● ✨ Sterilize tools between cuts to prevent spreading bacterial/fungal infections.
- ● 🌡️ Work in layers: Remove up to 25% of foliage max to avoid shocking the tree.
- ● 🎯 Label branches (if grafting): Use flagging tape to mark scions or bud unions.
Step-by-Step guide to year-round Honey Murcott tangerine tree pruning
Transform your Honey Murcott into a fruit-bearing powerhouse with this seasonal pruning approach.
🌱 Step 1: Early Spring Pruning (Late February)
Start as soon as new growth begins—around late February in most climates. This is your chance to remove any dead, diseased, or crossing branches first. I always use clean, sharp pruning shears to make 45-degree cuts just above a leaf node or outward-facing bud. This ensures the tree heals properly and new growth emerges in the right direction.
Look for branches that rub against each other or grow inward—they’ll compete for sunlight and nutrients. Remove these first, then thin out any overly dense areas to improve airflow. You’ll see the tree’s natural structure emerge as you work, with stronger branches taking shape. Aim to remove about 10-15% of the tree’s total growth during this first cut.
☀️ Step 2: Summer Light Pruning (June-August)
During the growing season, do light maintenance pruning every 4-6 weeks to shape the tree and encourage fruit production. Focus on removing any suckers—those vigorous shoots growing from the base or along the trunk. These drain energy from fruit development. Pinch them off just above a leaf node with your fingers or small shears.
Also watch for water sprouts—thin, fast-growing shoots that appear upright. These rarely bear fruit and create weak branch structures. Cut them back to a strong lateral branch. You’ll notice the tree’s energy shifts toward existing branches as you remove these competitors. Keep pruning sessions short—just 15-20 minutes—to avoid stressing the tree.
✂️ Step 3: Fall Cleanup (October-November)
After harvest, do a thorough cleanup to prepare for winter. Remove all fruit-bearing branches that produced this year’s crop—cut them back to the main scaffold branches. This opens up the tree’s center for better light penetration next season. Also remove any branches that grew too vigorously during summer, cutting them back to a strong lateral branch or bud.
Sterilize your pruning tools with rubbing alcohol between cuts to prevent disease spread. You’ll see the tree’s framework become more visible as you work, with stronger branches forming the main structure. This is also the time to remove any dead or weak wood that didn’t respond well to summer pruning.
⏰ Step 4: Winter Dormant Pruning (December-February)
While the tree is dormant, do your most aggressive structural pruning. Remove any branches that died over winter—they’ll be brittle and snap easily when bent. Also eliminate any branches growing toward the tree’s center or downward, as these create dense, shaded areas that reduce fruit production.
Open up the tree’s canopy by thinning out about 15-20% of the total branches, focusing on those that cross or rub against others. Make your cuts just outside the branch collar where the branch meets the trunk. You’ll see the tree’s natural shape emerge as you work, with better airflow and sunlight penetration throughout.
Tips & tricks for perfect Honey Murcott tangerine tree pruning
Your Honey Murcott deserves the right care to flourish—these simple tricks will help you prune like a pro and keep your tree thriving year-round!
Tool Prep Matters: Before you begin pruning, sharpen your tools and sterilize them with rubbing alcohol between cuts. Dull shears tear bark instead of making clean cuts, which invites disease. I also keep a small spray bottle of water handy to wipe down tools between cuts—this prevents sap buildup that can dull blades during Step 1 and Step 4 pruning. A clean cut heals faster and looks better!
Visual Cues for Pruning: When removing those 10-15% of branches in Step 1, look for branches that grow inward or cross others—they'll compete for sunlight. Imagine sunlight streaming through the tree's center after pruning. You want to create an open vase shape that lets light reach all branches. In Step 3, focus on branches that grew too vigorously during summer—they'll be thinner and less sturdy than the main scaffold branches.
Seasonal Timing Secret: The 4-6 week summer pruning schedule keeps your tree healthy without overwhelming it. If you miss a session, don't try to catch up—just resume the regular schedule. The tree adapts better to consistent, light maintenance than sporadic heavy pruning. And remember, those 15-20 minute sessions are perfect for keeping your tree from getting stressed while you shape it properly.
Branch Collar Respect: When making cuts during Step 4, always cut just outside the branch collar—the swollen area where the branch meets the trunk. This preserves the tree's natural healing ability. If you cut into the collar, you'll create wounds that take much longer to heal and may never fully close. I've seen trees recover from poor cuts, but they never look as healthy as when you respect the branch collar.
Pro Tips for Honey Murcott Tangerine Tree
- Your Honey Murcott deserves the right care to flourish—these simple tricks will help you prune like a pro and keep your tree thriving year-round!
- Tool Prep Matters: Before you begin pruning, sharpen your tools and sterilize them with rubbing alcohol between cuts.
- Visual Cues for Pruning: When removing those 10-15% of branches in Step 1, look for branches that grow inward or cross others—they'll compete for sunlight.
Frequently asked questions
Got questions about growing and maintaining your Honey Murcott tangerine tree? Here are some of the most common ones—plus expert answers to keep your citrus thriving!
When is the best time to prune a Honey Murcott tangerine tree?
The ideal time to prune is late winter or early spring, just before new growth begins (around February–March in most climates). Avoid pruning in fall or winter, as cold stress can harm the tree. For year-round pruning, remove dead/diseased branches anytime, but save major shaping for dormancy.
How much should I prune back my Honey Murcott tree?
Light to moderate pruning is best—aim to remove no more than 25% of the tree’s canopy in a single session. Focus on:
- Dead, crossing, or inward-growing branches
- Suckers at the base (remove immediately)
- Overcrowded limbs to improve airflow
Will pruning my Honey Murcott tree increase fruit yield?
Yes! Proper pruning boosts fruit quality and quantity by:
- Improving sunlight penetration (more energy for fruit)
- Reducing disease risk (better airflow)
- Encouraging larger, sweeter tangerines
What should I do if my Honey Murcott tree isn’t fruiting after pruning?
Check these common culprits:
- Age: Young trees (under 3–4 years) may need time to mature.
- Nutrients: Test soil for nitrogen/phosphorus; fertilize with citrus-specific blend in early spring.
- Pollination: Honey Murcotts are self-pollinating, but bees help! Plant near other citrus if pollinators are scarce.
- Environment: Too much shade or frost can stall fruit set.
Can I prune a Honey Murcott tree in containers?
Container-grown trees need more frequent pruning (every 6–12 months) due to limited space. Use the same techniques as above, but:
- Prune roots if pot-bound (trim 10–20% of root ball every 2–3 years).
- Choose dwarf varieties (like ‘Flying Dragon’) for easier maintenance.
- Water deeply after pruning to reduce transplant shock.
Wrapping up and next steps
Growing a Honey Murcott tangerine tree is a rewarding journey that combines patience, care, and a bit of pruning know-how. By mastering the art of year-round trimming—from summer thinning to winter shaping—you’ll unlock a bountiful harvest of sweet, juicy fruit.
Remember, each cut is an investment in healthier branches, better airflow, and more abundant yields.
Ready to take the next step? Start small: grab your pruners, review your tree’s growth patterns, and tackle one pruning session at a time. Before you know it, your Honey Murcott will be thriving—and your kitchen will be filled with homegrown citrus goodness! 🌱✨