Pruning
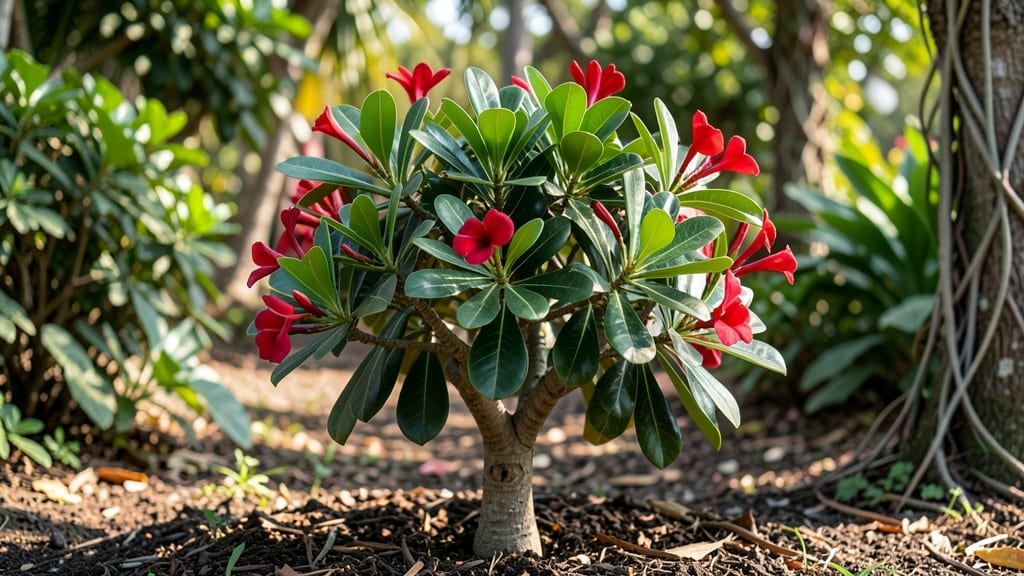
That first whiff of plumeria blossoms means summer in Hawaii—and you can grow your own Hawaiian lei tree even if you're thousands of miles away. 🌺 The key to getting those fragrant canopies starts with understanding how to prune them right, because this isn't just about trimming branches.
It's about shaping a tree that will reward you with years of blooms if you do it correctly.
Plumerias thrive in warm climates but can survive in cooler zones with winter protection. They love full sun, well-draining soil, and hate soggy roots—so we'll cover all the basics first.
The pruning itself is surprisingly simple once you know where to cut: just above leaf nodes, at the right time of year. My first tree nearly died from over-pruning, but I learned the hard way what works.
By the end of this, you'll have a tree that bursts with glossy green leaves and clusters of waxy, intoxicating flowers. The secret isn't just cutting back—it's timing those cuts to encourage new growth when the weather warms.
We'll walk through seasonal care, propagation from cuttings, and how to troubleshoot common issues like yellowing leaves or pests.
Whether you're starting from a cutting or nursing an established tree back to health, this guide gives you the confidence to prune like a pro. The payoff? A fragrant, flowering plumeria that becomes the centerpiece of your garden—or even your next homemade lei. Let's get those shears ready.
📚 In This Guide
- What you need
- Instructions
- Tips and common mistakes
- Wrapping up and next steps
What you need
- ○ Pruning shears: Bypass pruners (sharp, clean, and sterilized) for clean cuts. Optional: Loppers for thicker branches (1–2 inches in diameter).
- ● Hand pruners: Anvil-style for smaller stems (¼–½ inch thick). Pro tip: 💡 Sharpen blades before use to prevent tearing!
- ● Gloves: Heavy-duty gardening gloves (cut-resistant for thorns).
- ● Disinfectant: Rubbing alcohol (70%+) or hydrogen peroxide (3%) to sterilize tools between cuts.
- ○ Pruning sealant: Optional but helpful for large cuts (e.g., tree wound paint or pruning wax).
- ● Ladder or step stool: Sturdy and tall enough to reach upper branches safely.
- ● Trash bags or bucket: For collecting pruned branches and debris.
- ○ Notebook & pen: Optional to sketch a quick map of cuts or note growth patterns.
- ● Timing: Prune during the dormant season (late winter/early spring) or after flowering (avoid heavy pruning in fall).
- ● Weather: Choose a dry, overcast day to minimize stress on the tree.
- ● Safety gear: Sunglasses and long sleeves/pants to protect from thorns and sun.
- ● Tree health check: Inspect for diseased or pest-infested branches before pruning.
How to prune a Hawaiian lei tree for a full, healthy canopy
Reviving your lei tree’s shape takes patience and precision—here’s how to do it right.
🌿 Step 1: Assess the Tree’s Structure and Identify Problem Areas
Start by examining your lei tree from all sides. Look for branches that cross or rub against each other—these will compete for sunlight and weaken the tree over time. Also, spot any dead, diseased, or overly leggy branches. These are your first targets for removal. I like to use a small notebook to sketch the tree’s shape and mark areas that need attention.
Check for branches growing inward toward the center of the tree. These block airflow and sunlight, which can lead to fungal issues or sparse foliage. A good rule of thumb: if a branch isn’t contributing to the tree’s overall fullness or health, it’s a candidate for pruning. Don’t rush this step—take your time to visualize the tree’s ideal shape after cuts.
✂️ Step 2: Prune for Shape and Airflow Using the Right Cuts
Use clean, sharp pruning shears to make cuts just above a leaf node or outward-facing bud. This encourages new growth in the right direction. For thicker branches, use a pruning saw to avoid tearing the bark. Always cut at a slight angle to prevent water from pooling on the wound, which can cause rot.
Focus on thinning out the center first. Remove about 20-30% of the tree’s interior branches to improve airflow and sunlight penetration. For outward-facing branches, trim back to a strong lateral branch or the main trunk to maintain the tree’s natural form. Avoid cutting more than 25% of the tree’s foliage in one session—this can stress the tree and lead to shock.
☀️ Step 3: Encourage New Growth with Strategic Cuts
After removing problem branches, look for areas where the tree looks sparse or leggy. Cut back these branches by about one-third of their length, just above a leaf node. This triggers the tree to produce new shoots from the remaining buds, filling out the canopy over time. I’ve found that making these cuts in early spring—just as new growth begins—gives the tree the best chance to recover quickly.
Pay special attention to the tree’s lower branches. If they’re overcrowded or dying, prune them back to encourage stronger growth higher up. This not only improves the tree’s shape but also makes harvesting leaves for leis easier. Water the tree deeply after pruning to help it recover and reduce stress.
🪴 Step 4: Maintain the Tree’s Health Post-Pruning
After pruning, monitor the tree closely for signs of stress, like yellowing leaves or wilting branches. If you see these, reduce watering slightly and keep the tree in a spot with gentle morning sunlight for a few days. Avoid fertilizing immediately—wait until new growth appears, which usually takes 4-6 weeks. This gives the tree time to heal and redirect energy to recovery.
Keep an eye out for pests or diseases that might take advantage of fresh cuts. If you notice any unusual spots, sap, or insects, treat them promptly with neem oil or an appropriate fungicide. A healthy lei tree will bounce back quickly with proper care, and you’ll see fuller growth within a season.
Tips & tricks for perfect Hawaiian lei tree pruning
Transforming your lei tree from sparse to lush starts with these key insights that’ll save you time and frustration.
Visualize First: Before making any cuts, grab a small notebook and sketch your tree’s current shape. Mark branches that cross, grow inward, or look unhealthy. This simple step prevents over-pruning and helps you visualize the ideal form. I’ve seen people cut too aggressively because they didn’t plan ahead—don’t make that mistake!
Cutting Technique Matters: Always make clean cuts just above a leaf node or outward-facing bud. Using dull shears creates jagged wounds that heal poorly and invite disease. For thicker branches, use a pruning saw to avoid tearing the bark. The slight angle you make helps water run off, preventing rot. This is especially important in Hawaii’s humid climate.
Spring Timing Is Critical: Schedule your pruning for early spring when new growth begins. This timing gives your tree the best chance to recover quickly. If you must prune outside this window, avoid doing it during flowering or fruiting times—your tree needs all its energy for those processes. The 4-6 week recovery period mentioned in Step 4 is your guide for when to expect new growth.
Post-Pruning Care: After finishing your cuts, water deeply to help the tree recover. For the first few days, keep your lei tree in gentle morning sunlight rather than full sun, which can stress newly pruned branches. This is when most people see their trees struggle—don’t skip this recovery step if you want that lush canopy!
Pro Tips for Hawaiian Lei Tree
- Transforming your lei tree from sparse to lush starts with these key insights that’ll save you time and frustration.
- Visualize First: Before making any cuts, grab a small notebook and sketch your tree’s current shape. Mark branches th...
- Cutting Technique Matters: Always make clean cuts just above a leaf node or outward-facing bud. Using dull shears cre...
Frequently asked questions
Got questions about nurturing your Hawaiian lei tree (Hibiscus rosa-sinensis)? You’re not alone! Here are answers to the most common queries to keep your tree thriving—especially after pruning.
When is the best time to prune a Hawaiian lei tree?
Prune your lei tree after flowering (late winter to early spring) to encourage new blooms. Avoid heavy pruning in fall or winter—it can stress the tree. Light shaping cuts are fine year-round, but major trims should wait for the growing season. Pro tip: Use sterilized tools to prevent disease!
How do I know if I’m pruning too much?
If you see yellowing leaves, stunted growth, or bare branches after pruning, you’ve likely cut too aggressively. A good rule: Never remove more than 1/3 of the tree’s foliage in one session. Focus on dead or overcrowded branches first. Over-pruning can shock the tree—go slow!
Will pruning my lei tree reduce its flowers?
Not if done right! Pruning stimulates new growth and blooms—just avoid cutting back flowering branches too early. Trim spent flowers (deadheading) regularly to encourage more blossoms. For heavy pruning, feed the tree with balanced fertilizer afterward to support recovery.
Can I grow a Hawaiian lei tree indoors?
Yes, but with caveats! Lei trees thrive outdoors in tropical climates, but they can adapt indoors near bright, indirect light (south-facing windows). Use a humidifier or pebble tray to mimic Hawaii’s moisture. Prune lightly indoors to control size, but expect fewer flowers than outdoor trees.
Why are my lei tree leaves turning brown or dropping?
Brown leaves often signal overwatering, underwatering, or pests. Check soil moisture (top inch should be dry) and inspect for aphids or spider mites. Pruning can also cause stress—water deeply after cuts and avoid fertilizing for 2–3 weeks. If spots appear, treat with neem oil.
Wrapping up and next steps
The Hawaiian lei tree thrives when you embrace patience and precision—its lush, fragrant canopy is well worth the effort! By mastering strategic pruning, you’ll not only revive its growth but also encourage vibrant blooms and a healthier structure.
Whether you’re trimming for shape, health, or aesthetics, remember: small, consistent cuts yield big rewards. 🌿✨
Ready to transform your tree into a tropical masterpiece? Grab your tools, follow your pruning plan, and watch it flourish. Next, why not explore seasonal care tips or share your progress with fellow gardeners for extra inspiration?