
Pruning
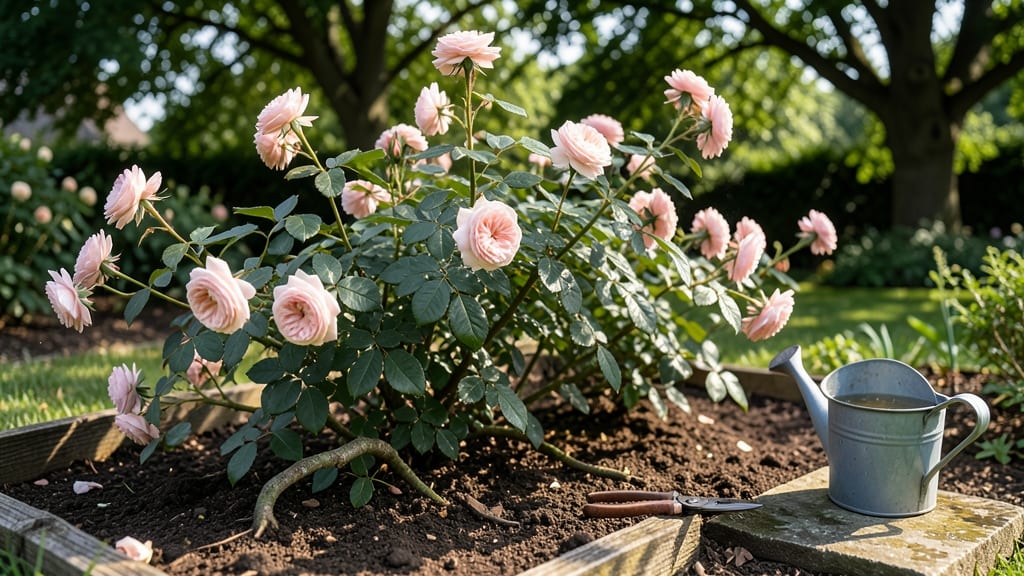
An English rose tree thrives in the Pacific Northwest’s damp climate when pruned at the right time—late winter, just before buds swell. ✂️ I learned the hard way that cutting too early invites frost damage, while waiting too long risks overgrowth.
The key is timing: prune when the ground is still frozen but the first buds hint at spring.
You’ll need sharp pruners, a bucket for clippings, and a clear day to avoid soggy soil. Focus on removing dead wood first, then thin out crowded canes to improve airflow—this cuts back on fungal diseases that plague roses in our rainy winters.
For varieties like 'Climbing Rosa,' aim to shape the tree while preserving its natural form.
By late spring, you’ll see fresh, vibrant growth where old canes once stood. The blooms arrive earlier and last longer, with fewer pests thanks to better air circulation. Plus, the tree’s structure becomes stronger, ready to handle summer storms and winter frosts alike.
Works for shrub roses too—just adjust the pruning height. The same principles apply whether you’re shaping a climbing rose or a bush. Here’s how to do it without stressing the plant or yourself.
📚 In This Guide
- What you need
- Instructions
- Tips and common mistakes
- Wrapping up and next steps
What you need
- ● Pruning shears: Bypass pruners (sharp, clean, and disinfected—think of them as your rose’s "scalpel"!). Quantity: 1 pair (or 2 if you have a large tree).
- ● Loppers: For thicker branches (½"–2" diameter). Quantity: 1 pair.
- ● Pruning saw: For stubborn, thick stems (2"+ diameter). Quantity: 1.
- ● Rubbing alcohol (70%+) or bleach solution: To sterilize tools between cuts (1:10 bleach-to-water ratio). Quantity: Small bottle or spray.
- ● Garden gloves: Heavy-duty, cut-resistant (roses have thorns!). Quantity: 1 pair.
- ○ Disposable pruning bags or bucket: For collecting debris (optional but highly recommended to reduce disease risk). Quantity: 1–2.
- ● Sharpie or permanent marker: To label cuts if needed (e.g., for future reference). Quantity: 1.
- ○ Pruning sealant (optional but helpful): For large cuts (½"+) to prevent disease entry. Quantity: Small tube.
- ● Weather: Choose a dry day with temps above 40°F (4°C)—no frost in the forecast!
- ● Timing: Late winter (after your last hard frost but before bud swell, typically February–March in PNW).
- ● Health check: Inspect your rose tree for dead, diseased, or damaged wood before pruning.
- ● Safety gear: Eye protection (goggles) and long sleeves/pants (roses will fight back!).
How to prune your English rose tree for Pacific Northwest resilience
This is the moment that matters: sharp cuts now mean vibrant blooms later.
🌿 Step 1: Time Your Pruning Precisely
Wait until late winter—after the worst frosts have passed but before new growth begins. In the Pacific Northwest, aim for mid-February to early March, when daytime temperatures hover around 45-50°F. You'll know it's time when you see swollen rose buds starting to plump up but haven't yet burst open.
Pruning too early risks frost damage to fresh cuts. Pruning too late encourages tender new growth that can't survive late frosts. Check your local frost dates—your rose will thank you for patience. I always mark the date on my calendar so I don't miss this critical window.
✂️ Step 2: Gather the Right Tools and Sanitize
Use only clean, sharp pruners—dull blades crush stems and invite disease. A bypass pruner works best for roses. Wipe blades between cuts with rubbing alcohol or a 10% bleach solution to prevent spreading black spot fungus. I keep a small bottle of 70% isopropyl alcohol in my toolbox specifically for this purpose.
You'll also need disposable gloves (thorns are no joke) and a bucket for trimmings. Don't skip the gloves—rose thorns can draw blood, and that's the last thing you want when handling fresh cuts. I keep a pair of heavy-duty leather gloves nearby for stubborn roses that seem to have thorns everywhere.
🌱 Step 3: Identify and Remove Dead or Diseased Wood
Start by cutting out any blackened, mushy, or hollow stems—these are dead or diseased beyond saving. Make your cuts 45 degrees just above an outward-facing bud, about ¼ inch above it. You'll see these buds as tiny bumps along the stem, usually at the base of where leaves used to be.
Don't leave stubs—every cut should be clean and precise. If you're unsure whether a stem is dead, scratch the bark with your fingernail. Green underneath means it's alive; brown means it's dead. I always work from the bottom up, removing the worst offenders first so I can see the structure more clearly.
☀️ Step 4: Open the Center and Shape the Tree
English rose trees need good air circulation to prevent fungal diseases. Cut back one-third of the oldest canes to the ground—these are the thickest stems at the center. You're making room for new growth and sunlight to reach the center. Look for canes that are thinner than a pencil—these are the ones to keep for next year's blooms.
Shape the tree by cutting back remaining canes to 18-24 inches tall, leaving 3-5 strong canes per tree. This encourages a balanced shape and prevents overcrowding. Step back frequently to check your work—you want to see light penetrating to the center of the tree. If you're unsure about a cut, wait and reassess after making a few others.
💧 Step 5: Clean Up and Fertilize for Spring Growth
Remove all trimmings from your yard immediately—don't compost them. Rose canes harbor diseases that can overwinter in the debris. Burn or bag them for trash pickup. After pruning, apply a balanced 10-10-10 fertilizer around the base of the tree, working it into the top 2-3 inches of soil. This gives your rose the nutrients it needs to recover and prepare for spring blooming.
Water deeply after fertilizing to help distribute the nutrients. You'll see new growth emerge within 3-4 weeks—that's your signal everything is working. Keep an eye out for any signs of stress, like yellowing leaves or wilting, and adjust your care accordingly. This is the moment when your rose starts its journey toward another season of beautiful blooms.
Tips & tricks for pruning your English rose tree
Here's what I learned after pruning my first English rose—these tricks make all the difference between a healthy bush and one that struggles.
Timing is Everything: That mid-February to early March window is non-negotiable. I learned this the hard way when I pruned too early and my cuts froze back overnight. Check your local frost dates—your rose's survival depends on it. If you're unsure, wait until you see those swollen buds starting to plump up. That's your perfect signal. The 45-50°F daytime temperature range is ideal because it's warm enough for your hands but still cool enough to prevent stress on fresh cuts.
Tool Prep Matters: Never skip sanitizing your pruners between cuts. I keep a small bottle of 70% isopropyl alcohol in my gardening toolbox specifically for this purpose. A quick wipe between each cut prevents black spot fungus from spreading. And for heaven's sake, use sharp bypass pruners—dull blades crush stems and create entry points for disease. I've ruined perfectly good roses by using the wrong tools, and I won't make that mistake again.
Visual Cues for Perfect Cuts: When making those 45-degree cuts just above outward-facing buds, look for tiny bumps along the stem—they're the buds. The cut should be about ¼ inch above the bud, and you should be able to see the bud clearly. If you're unsure whether a stem is dead, scratch the bark with your fingernail—green underneath means it's alive, brown means it's dead. I always work from the bottom up, removing the worst offenders first so I can see the structure more clearly as I go.
Shape with Purpose: When shaping your tree, remember that English roses need good air circulation. Cut back one-third of the oldest canes to the ground to open up the center. Leave canes that are thinner than a pencil—they're the ones that will produce next year's blooms. Step back frequently to check your work—you want to see light penetrating to the center of the tree. If you're unsure about a cut, wait and reassess after making a few others. This isn't a race; precision matters more than speed.
Pro Tips for English Rose Tree
- Here's what I learned after pruning my first English rose—these tricks make all the difference between a healthy bush and one that struggles.
- Timing is Everything: That mid-February to early March window is non-negotiable.
- Tool Prep Matters: Never skip sanitizing your pruners between cuts.
Frequently asked questions
Got questions about pruning your English rose tree in the Pacific Northwest?
You’re not alone! Here are some of the most common concerns—plus straightforward answers to help you tackle late-winter pruning like a pro.
When is the exact best time to prune my English rose tree in the PNW?
Prune your English rose tree in late winter (February or early March) after the worst frosts have passed but before new growth starts. In the PNW, aim for after the ground thaws but before bud swell—typically mid-February to early March. This timing balances frost protection and early-season growth.
Will pruning too early kill my rose in freezing PNW winters?
Yes! Pruning before the last frost exposes fresh cuts to cold damage, weakening the plant. English roses are hardy, but new growth is frost-sensitive. Wait until temps consistently stay above freezing (daytime highs of 40°F+) to avoid stress. If unsure, check your local frost date or cover cuts with tree wrap if pruning early.
How do I know if I’m pruning my English rose tree too hard?
English roses thrive with moderate pruning—aim to remove 1/3 of the plant’s height (not more). Look for outward-facing buds when cutting; these encourage airflow and blooms. If you’re left with <12” of stem or mostly bare wood, you’ve over-pruned. Pro tip: Step back often to visualize the shape!
Can I use the same pruning techniques for English roses as for hybrid teas?
Not quite! English roses (like ‘David Austin’ varieties) have looser, more natural growth than hybrid teas. Avoid harsh tip-pruning; instead, focus on thinning out crowded canes and shaping the plant’s form. Hybrid teas need more aggressive pruning to promote single blooms, while English roses reward you with clustered, repeat blooms if you prune lightly.
What should I do if my rose tree’s cuts bleed sap after pruning?
Sap bleeding (or “weeping”) is normal and harmless—it’s the tree’s way of healing. Don’t panic! Just avoid pruning on rainy days (wet cuts heal slower) and seal larger cuts (1”+) with pruning sealant to prevent pests like beetles. For small cuts, let them air-dry naturally. Most roses recover fully within a few weeks.
What’s a good alternative if my English rose tree doesn’t survive the PNW winter?
If your rose struggles with frost, consider hardier PNW-native alternatives like Rosa rugosa or Nootka rose, which tolerate colder temps and salt spray. For a similar look, try ‘Gertrude Jekyll’ or ‘The Fairy’—both are cold-resistant English roses. Pro tip: Plant near a south-facing wall or use mulch (6” deep) to insulate roots.
Wrapping up and next steps
Pruning your English rose tree in late winter isn’t just about shaping—it’s a crucial step to ensure its resilience against Pacific Northwest frosts and a burst of blooms come spring.
By following the right techniques, you’ll encourage healthier growth, stronger canes, and a stunning display of those classic, fragrant roses. 🌸
Ready to give your rose tree the care it deserves? Grab your pruners, roll up your sleeves, and get started! For extra confidence, consider joining a local gardening group or watching a few step-by-step tutorials to refine your skills. Your future blooms will thank you!