
Pruning
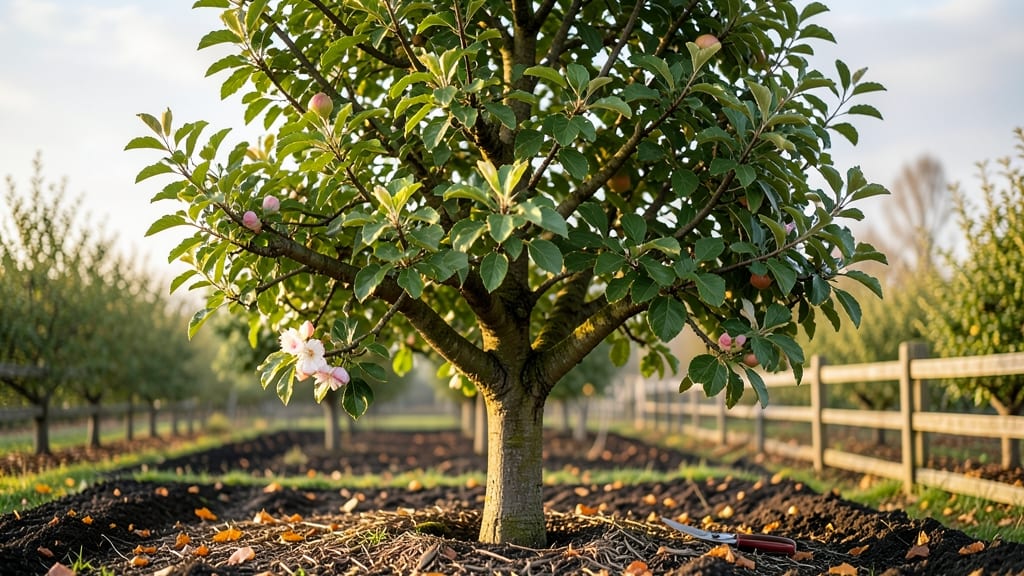
Pruning your Dorset apple tree in late winter isn’t just about shaping branches—it’s the secret to unlocking next year’s harvest. 🌱 I’ve watched this hardy variety transform from a tangled mess into a productive powerhouse after just one season of proper cuts, and the difference in fruit quality is night and day.
The best time to prune is when the tree’s dormant but the ground isn’t frozen—usually February or early March in most climates. You’ll need sharp bypass pruners, a ladder (for taller branches), and a clear day to see what you’re doing.
The goal is to open up the center for sunlight and air, which prevents disease and encourages fruit development.
What you’ll end up with is a tree that produces larger, sweeter apples with fewer pests and less disease pressure. The pruning itself takes about 30-60 minutes depending on size, and the long-term payoff is worth every minute.
You’ll recognize success when you see fresh green shoots by spring and a sturdy framework ready for fruit.
This method works for Dorset apple trees in USDA Zones 4-8, whether you’re growing in full sun or partial shade. The key is consistency—prune every year, and your tree will reward you with years of reliable harvests. Let’s get those branches trimmed for a better harvest next season.
📚 In This Guide
- What you need
- Instructions
- Tips and common mistakes
- Wrapping up and next steps
What you need
- ● Pruning shears: Bypass pruners (sharp, clean, and disinfected—think 5-7 inch blades for precision). Pro tip: 💡 Oil them before use to prevent rust!
- ● Loppers: For thicker branches (1.5–2 inches in diameter). Opt for ratchet-style loppers for easier cutting.
- ● Pruning saw: A folding bow saw or curved blade saw for branches >2 inches thick.
- ● Gloves: Heavy-duty, cut-resistant gloves (gardening or pruning-specific) to protect your hands.
- ● Disinfectant: 70% rubbing alcohol or a commercial pruning sealant (like Tanglefoot Pruning Seal) to sterilize tools between cuts.
- ● Ladder: A stable, extendable ladder (8–12 ft tall) if your tree is over 6 feet. Safety first: 🎯 Use a helper or secure it to a sturdy surface!
- ● Pruning tape: Rubber or plastic tape (1-inch wide) to wrap rough cuts and prevent bark tearing.
- ● Buckets or bags: Two 5-gallon buckets—one for small cuttings (compost), one for large debris (mulch or discard).
- ○ Notebook & pen: To sketch your tree’s structure and mark cuts. Optional but genius: 🌡️ Use a tree-pruning app (like iTree) for guidance!
- ● Pole saw: For high branches you can’t reach safely.
- ● Tree wound dressing: Controversial but some swear by Tanglefoot Tree Wound Pruning Paste for large cuts.
- ● Safety gear: Sunglasses (to shield from debris) and earplugs (if using a chainsaw for stubborn branches).
- ● Tree spray: Dormant oil or copper fungicide to treat diseases post-pruning (apply in early spring).
Step-by-step guide to reviving your Dorset apple tree
Here’s how to breathe new life into your tree with precise cuts and smart timing.
✂️ Step 1: Assess the Tree’s Structure and Identify Dead Wood
Start by examining the tree’s branches in bright daylight—look for dead, diseased, or crossing limbs. Dead wood will be brittle, dark, or lack any buds. I always begin at the outer canopy and work my way inward, making notes on branches that need removal. This is the moment that matters: removing dead wood now prevents pests and diseases from taking hold later.
Use your pruning shears to test a small branch—if it snaps cleanly with no green underneath, it’s dead. Healthy branches will bend slightly before breaking. Mark these branches with a piece of twine or flagging tape so you don’t miss them during the actual pruning. Real talk: skipping this step means you’ll end up with a weaker tree and fewer apples next season.
✂️ Step 2: Prune for Light and Airflow with Strategic Cuts
Make your first cuts to remove any branches that are rubbing against each other or growing inward—they’ll compete for sunlight and create entry points for disease. Use sharp pruning shears to cut just outside the branch collar (the swollen area where the branch meets the trunk). This ensures the tree heals properly and reduces the risk of infection.
Next, thin out the canopy by removing about 20-25% of the tree’s total branches. Focus on branches that are too close together or those that grow straight up—these rarely produce fruit and can block light from reaching the lower branches. You’ll see the difference immediately: more light reaches the center, and the tree’s structure becomes more open and inviting for new growth.
✂️ Step 3: Shape the Tree for Optimal Fruit Production
Now it’s time to shape the tree into an open-center form, which allows sunlight to penetrate the canopy and encourages fruit production. Start by selecting 3-5 strong, evenly spaced scaffold branches—these will form the backbone of your tree. Remove any branches that grow at sharp angles (less than 45 degrees) from the trunk or scaffold branches, as these are more prone to breaking.
For branches that are too long, make your cuts just above an outward-facing bud or lateral branch. This encourages the tree to grow outward rather than inward, creating a balanced shape. Here’s the thing—if you’re unsure where to cut, step back and visualize how the tree will look after the cut. You want a natural, open shape that lets air and light flow freely.
✂️ Step 4: Clean Up and Protect the Tree
After pruning, gather all the cut branches and dispose of them properly—burning or chipping them is best to prevent the spread of disease. Sterilize your pruning tools with rubbing alcohol or a 10% bleach solution to kill any lingering bacteria or fungi. This is non-negotiable: dirty tools can reintroduce pathogens right back into your tree.
Finally, apply a layer of dormant oil spray (if using) to protect the tree from overwintering pests like scale and mites. Water the base of the tree deeply to help it recover from the pruning stress. You’ll notice new growth buds swelling within 4-6 weeks, signaling that your tree is on the mend and ready for spring.
Tips & tricks for perfect Dorset apple tree pruning
Here’s what nobody tells you about transforming your apple tree—these are the details that make all the difference between a good prune and a great one.
Timing is Everything: Late winter is the ideal time to prune your Dorset apple tree because it’s still dormant but about to burst with new growth. Aim for pruning just before bud break, typically between late February and early March in most climates. This timing allows the tree to heal quickly and puts it in the best position to produce abundant fruit. If you're unsure when bud break will occur, watch for the first signs of swelling buds on the branches—prune just before they start to open.
The Right Tools Make All the Difference: Your pruning shears should be sharp and clean—dull tools crush branches instead of making clean cuts, which can damage the tree. I always sterilize my tools with rubbing alcohol or a 10% bleach solution before and after pruning to prevent spreading disease. For larger branches, use a pruning saw with a curved blade designed for wood—it gives you more control and reduces the risk of tearing the bark. Confession: I skipped this step for years and wondered why my tree never fully recovered.
Visualize the Final Shape: Before making any cuts, step back and visualize the tree’s final shape. You’re aiming for an open-center form that allows sunlight to reach all parts of the canopy. Focus on creating a balanced structure with strong scaffold branches that can support the weight of fruit. If you’re unsure where to cut, look for branches that grow at 45 degrees or more from the trunk—they’re less likely to break under the weight of apples. Here’s what I learned the hard way: removing too many branches at once can shock the tree, so stick to the 20-25% guideline and spread it out over a few sessions if needed.
Post-Pruning Care is Non-Negotiable: After you’ve finished pruning, don’t just walk away—your tree needs some TLC to recover. Apply a layer of dormant oil spray (if you’re dealing with overwintering pests) and water the base deeply. This helps the tree heal and prepares it for the growing season ahead. You’ll notice new growth buds swelling within 4-6 weeks, which is your first sign that the pruning was successful. Trust me on this: skipping the post-pruning care is like leaving a fresh wound exposed—it just won’t heal right.
Pro Tips for Dorset Apple Tree
- Here’s what nobody tells you about transforming your apple tree—these are the details that make all the difference between a good prune and a great one.
- Timing is Everything: Late winter is the ideal time to prune your Dorset apple tree because it’s still dormant but about to burst with new growth.
- The Right Tools Make All the Difference: Your pruning shears should be sharp and clean—dull tools crush branches instead of making clean cuts, which can damage the tree.
Frequently asked questions
Got questions about pruning your Dorset apple tree for a stellar harvest? You’re not alone! Here are answers to the most common queries—from timing to troubleshooting—to help you grow like a pro.
When is the best time to prune a Dorset apple tree?
Late winter (while the tree is still dormant but before buds swell) is ideal—typically between mid-February and early March in most U.S. climates. This timing minimizes stress, prevents disease spread, and encourages strong spring growth. Avoid pruning in fall or early winter, as wounds heal slower in cold weather.
What if I missed the late-winter window? Can I still prune?
Yes, but with caution! Light pruning can be done in early spring (after last frost) or even summer (June–July) to shape the tree. Avoid heavy pruning in summer, as it stresses the tree and may reduce fruit quality. If pruning in summer, focus on removing only diseased or crossing branches.
My Dorset apple tree has dead branches—how do I tell if they’re safe to cut?
Dead branches are usually brown, brittle, or lack bark (scratch the bark—if it’s dark underneath, it’s dead). Snap a small branch: if it breaks with a dry crack, it’s ready for removal. Pro tip: Sterilize your pruners with rubbing alcohol between cuts to prevent spreading disease to healthy wood.
Should I seal pruning cuts on my Dorset apple tree?
Nope! Sealing cuts with paint or pruning sealant is unnecessary for apple trees—it can even trap moisture and promote rot. Let the cuts heal naturally by exposing them to air and sunlight. The tree’s own healing response (callusing) works best without interference.
Will pruning reduce my apple harvest this year?
Not if done correctly! Pruning opens the canopy to sunlight and air, which actually boosts fruit quality and yield long-term. However, heavy pruning in one season might reduce harvest that year—stick to removing no more than 20–25% of the tree’s branches annually for gradual improvement.
Are there any pruning mistakes to avoid with Dorset apple trees?
- Over-pruning: Never remove more than ¼ of the tree’s branches at once—it stresses the tree and invites pests.
- Topping: Avoid cutting back the main trunk or large branches to a flat top—this creates weak, disease-prone growth.
- Ignoring water sprouts: Thin out vertical, fast-growing shoots (they steal energy from fruit production).
- Pruning in wet weather: Damp conditions spread fungal diseases like silver leaf or canker.
Wrapping up and next steps
Pruning your Dorset apple tree in late winter isn’t just about shaping—it’s your secret weapon for a healthier, fruitier tree! By removing dead wood, thinning crowded branches, and encouraging airflow, you’re setting the stage for a bountiful harvest and long-term vitality. 🌱
Now that you’re armed with the how-tos and pro tips, there’s no time like the present to grab your pruners and get started! Ready to transform your orchard? Mark your calendar for late winter (or early spring) and give your Dorset apple tree the care it deserves—your future harvest will thank you!
Next step: Check your tree’s current shape and sketch a quick plan before you begin. Happy pruning! ✂️🍏