
Pruning
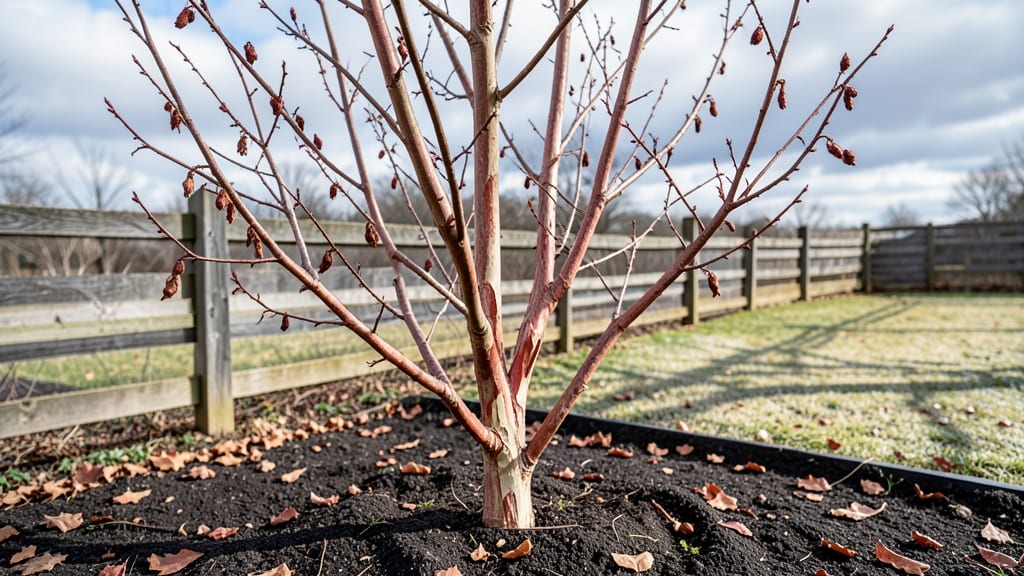
Winter pruning crape myrtle trees saves their buds from frost damage and sets up a stunning summer display. ✨ I learned the hard way that cutting too early leaves vulnerable wood exposed to cold snaps—now I time my cuts just before the ground freezes, when the tree’s energy has retreated for the season.
The key is sharp pruners and a clear goal: remove dead wood first, then thin out crowded branches to improve airflow. You’ll need about 30 minutes per tree, depending on size, and a bucket to collect debris.
The right timing means your tree won’t bleed sap or stress in early winter.
What you’ll end up with is a crape myrtle that blooms earlier, with thicker stems and more vibrant flowers. The pruning creates a natural shape while protecting those delicate buds from late frosts—something I wish I’d known before my first winter pruning disaster.
Works for crape myrtles in zones 6-9, though colder climates may need extra mulch. Here’s how to do it without over-pruning or inviting pests—common mistakes that turn a simple task into a headache.
📚 In This Guide
- What you need
- Instructions
- Tips and common mistakes
- Wrapping up and next steps
What you need
- ● Pruning shears: Sharp, bypass-style shears (for clean cuts on small branches). Size: 6–8" blades.
- ● Loppers: For thicker branches (½"–1½" diameter). Size: 18–24" handles for leverage.
- ● Pruning saw: For branches >1½" thick. Type: Curved-tooth saw (avoids tearing wood).
- ● Gloves: Heavy-duty, cut-resistant gloves (protects hands from thorns and sharp tools).
- ● Disinfectant: 70% isopropyl alcohol or pruning sealant (prevents disease spread).
- ● Ladder: Sturdy, non-slip (if tree exceeds 6' tall). Extension: 8–12' recommended.
- ● Trash bags: Heavy-duty (for debris disposal). Quantity: 1–2 per tree.
- ● Safety glasses: Protects eyes from debris.
- ● Work boots: With ankle support (for stability on uneven ground).
- ● Marking spray: Non-toxic paint (to tag branches for removal).
- ● Hand saw: For large, stubborn branches (backup to loppers).
- ● Tree wound dressing: Controversial but useful for sealing cuts >2" in diameter (follow up with research!).
Step-by-Step guide to winter pruning crape myrtles
Here's how to protect your crape myrtle's delicate buds from frost damage.
✂️ Step 1: Time Your Prune for Late Winter
Wait until late winter, after the worst cold snaps have passed but before new growth begins. In most climates, this means February or early March when daytime temperatures consistently stay above 40°F. You'll see the tree's buds starting to swell slightly—that's your signal to act.
Don't prune too early. If you cut back in late fall or winter, you risk exposing tender buds to unexpected frost. The goal is to remove dead wood while leaving next year's growth intact. I always check the weather forecast first—if a hard freeze is predicted within a week, wait a few more days.
🌿 Step 2: Remove Dead and Diseased Wood First
Start by identifying dead, diseased, or crossing branches. Dead wood is easy to spot—it's gray or brown, doesn't bend when you test it, and often has no leaves or buds. Use clean, sharp pruning shears to make your cuts just outside the branch collar (the swollen area where the branch meets the trunk).
For diseased branches, sterilize your shears between cuts with rubbing alcohol or a bleach solution. You don't want to spread any pathogens to healthy parts of the tree. If you see any cankers or oozing sap, remove those branches completely—they won't recover.
✂️ Step 3: Thin the Canopy for Better Airflow
Next, thin out the canopy by removing up to 25% of the branches to improve airflow and sunlight penetration. Focus on branches that are growing inward or rubbing against each other—these compete for resources and can create weak points. Cut these back to the branch collar, making a clean, angled cut just outside the collar.
Here's the thing—crape myrtles flower on new wood, so don't over-prune. You want to maintain the tree's natural shape while letting light reach the center. If you remove too many branches, you'll reduce next year's blooms. I like to step back every few cuts to visualize the tree's structure.
⏰ Step 4: Shape the Tree for Frost Protection
Now it's time to shape the tree for winter. Crape myrtles benefit from a slightly rounded, open shape that allows snow to slide off easily. Avoid cutting back to a stub—this encourages weak, water-sprout growth. Instead, make your cuts just above a leaf bud or lateral branch.
If your tree has multiple trunks, thin out the weakest ones to leave 2-4 strong stems. This improves the tree's stability and makes pruning easier in future years. After shaping, give the tree a final once-over to check for any remaining dead wood or irregular growth.
💧 Step 5: Clean Up and Protect the Tree
Once you've finished pruning, clean up all the debris and dispose of it properly. Don't leave branches on the ground—they can harbor pests or diseases. If you have time, apply a 2-3 inch layer of mulch around the base of the tree (but keep it away from the trunk) to insulate the roots.
For extra protection, consider wrapping the trunk with tree wrap or burlap if you're in a particularly harsh climate. This helps prevent sunscald and frost cracks. Water the tree deeply before the ground freezes to ensure it has enough moisture for early spring growth.
Tips & tricks for perfect crape myrtle winter pruning
Here's what I've learned after years of winter pruning—these tricks will help you avoid common mistakes and keep your tree healthy.
Timing is Everything: The late winter timing in Step 1 is crucial because you want to catch those swollen buds just before they burst into growth. I've seen too many gardeners rush and end up with frost-damaged new shoots. Check your local frost dates—if you're in Zone 7 or warmer, aim for mid-February, while colder zones may need to wait until March. The 40°F daytime temperature threshold is your best guide, but morning lows matter too: if temps dip below 32°F at night, hold off until you're sure the danger has passed.
Tool Prep Matters: Before you start cutting in Step 2, take 5 minutes to sharpen your pruning shears and sterilize them with rubbing alcohol. Dull blades tear wood instead of making clean cuts, which can damage the tree. I keep a small bottle of 70% isopropyl alcohol in my tool bag specifically for this purpose. For larger branches, consider using a pruning saw—it gives you more control and prevents the shears from getting overworked.
Visualize the Final Shape: When thinning the canopy in Step 3, step back every 5-6 cuts to visualize how the tree will look. You're aiming for that open, rounded shape that lets light and air circulate. I like to imagine the tree as an upside-down ice cream cone—wide at the bottom, tapering slightly toward the top. This shape also helps snow slide off more easily during winter storms, reducing branch damage. Remember, you can always remove more, but you can't put branches back once they're gone.
Protective Wrapping Secrets: For the extra protection mentioned in Step 5, I've had the best results with tree wrap rather than burlap. The wrap creates a microclimate that protects against sunscald while still allowing some airflow. Apply it starting from about 6 inches above the ground up to the first major branch fork. If you're in an extremely cold climate, consider adding a layer of insulating foam wrap underneath the tree wrap for added protection against frost cracks.
Pro Tips for Crape Myrtle Tree In Winter
- Here's what I've learned after years of winter pruning—these tricks will help you avoid common mistakes and keep your tree healthy.
- Timing is Everything: The late winter timing in Step 1 is crucial because you want to catch those swollen buds just before they burst into growth.
- Tool Prep Matters: Before you start cutting in Step 2, take 5 minutes to sharpen your pruning shears and sterilize them with rubbing alcohol.
Frequently asked questions
Got questions about keeping your crape myrtle thriving through winter? You’re not alone! Here are answers to the most common concerns—from timing to troubleshooting—so you can prune with confidence.
When is the absolute latest I can prune my crape myrtle before winter?
Prune after the first hard frost (typically late November to early December in most zones) but before new growth starts in early spring. Late pruning prevents tender buds from freezing, but avoid cutting too close to winter’s chill—aim for 3–4 weeks before expected frost for best results.
What if I miss the winter pruning window? Can I still do it?
Yes! If you miss the late-winter window, prune in early spring (March) before buds swell. Just avoid heavy cuts—focus on shaping and removing dead wood. Pro tip: Light pruning in late winter is better than none at all!
How much can I trim back my crape myrtle in winter without harming it?
For winter pruning, remove no more than 1/3 of the tree’s height. Cut back to a strong outward-facing bud just above a leaf scar or lateral branch. Avoid “topping” (cutting flat)—this weakens the tree and invites pests. Goal: Open the canopy for airflow and sunlight.
My crape myrtle has brown, crunchy bark after winter—is it dead or just dormant?
Crape myrtles often develop exfoliating bark in winter, which is normal. If the bark is soft, mushy, or oozing sap, it’s likely dead from frost or disease. Scrape a small section—if green underneath, it’s alive! If not, prune out dead branches before spring growth.
Are there alternatives to winter pruning if I’m not confident?
Try light structural pruning in late winter (focus on removing crossing branches) or spring pruning (March–April). For minimalists, just remove dead/diseased wood anytime. Key: Avoid heavy cuts—crape myrtles bloom on new wood, so prune after flowering for best results.
Wrapping up and next steps
Winter pruning your crape myrtle isn’t just about shaping—it’s about preparing for spring’s vibrant bloom. By following late-season cuts, you shield those precious buds from frost while setting the stage for a stunning display. You’ve got this! 🌿✨
Ready to see your tree thrive? Grab your tools, mark those branches, and get pruning—your future blooms will thank you. Next up: Monitor your tree’s progress and adjust as needed in early spring!