
Propagation
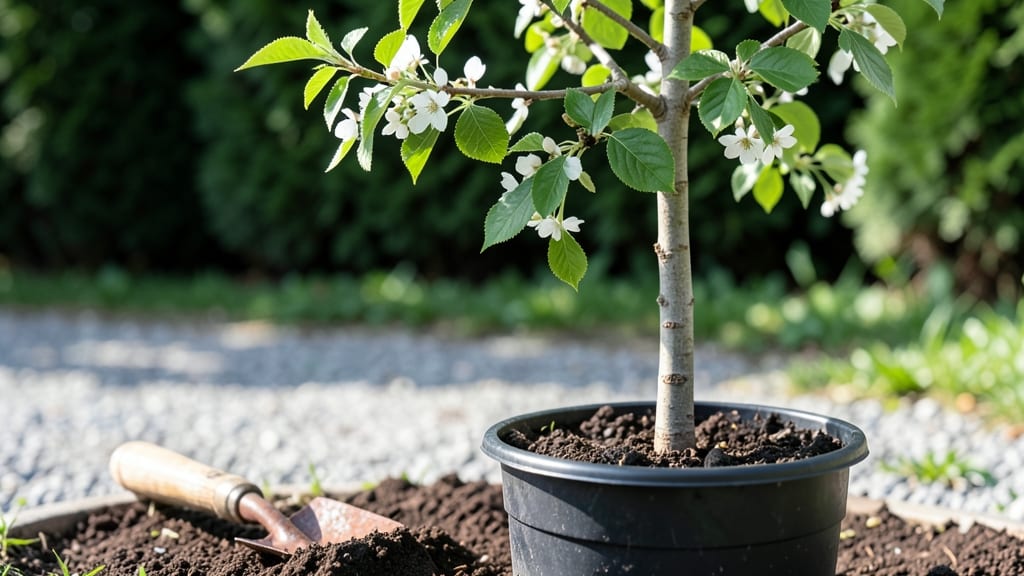
Growing a cherry tree from a cherry pit is the kind of project that turns a simple kitchen scrap into a decades-long reward. 🌱 The patience pays off with a tree that could one day produce fruit—though it’ll take years before you taste anything from it.
I’ve tried this twice, and while the first attempt failed, the second gave me a thriving sapling after three years of careful nurturing.
The secret isn’t magic—it’s matching the right conditions to the seed’s needs. You’ll need a cold stratification period to break dormancy, well-draining soil, and a sunny spot. Most people rush the process, but the key is letting nature take its time.
Even if the pit doesn’t sprout right away, don’t give up—some take months to crack open.
What you end up with is a tree that could grow 20 feet tall, with glossy leaves and the potential for sweet cherries—though the fruit may not be as flavorful as store-bought varieties.
The real joy comes from watching it grow, knowing you started with something as small as a pit. It’s a project that teaches patience and rewards persistence.
Whether you’re in a mild climate or a colder zone, the steps adapt. Just be ready for slow progress—this isn’t a quick harvest. Here’s how to get started without losing hope along the way.
📚 In This Guide
- What you need
- Instructions
- Tips and common mistakes
- Wrapping up and next steps
What you need
- ● Fresh cherry pit – From a sweet (not tart) cherry variety (e.g., Bing, Rainier, or Stella). Must be fully ripe!
- ● Small propagation pot or seed tray – 4-6 inches in diameter with drainage holes (or a recycled container like a yogurt cup with holes poked in the bottom).
- ● Potting mix – A well-draining blend: 50% peat moss or coconut coir, 30% perlite or vermiculite, and 20% sand (or a pre-mixed seed-starting mix).
- ● Plastic wrap or humidity dome – To retain moisture while the seed germinates.
- ● Spray bottle – For gentle watering (avoid over-saturating the soil).
- ● Permanent marker & label – To track planting dates and varieties.
- ● Patience (and sunlight!) – Germination can take 4-12 weeks, and full growth takes 5-10 years for fruit.
- ● Heat mat – Speeds up germination (set to 70-75°F).
- ● Grow lights or sunny windowsill – If natural light is limited (seedlings need 6+ hours/day).
- ● Pruning shears – For future shaping once the tree grows.
- ● Fertilizer (balanced 10-10-10 or organic compost) – Introduce 3 months after transplanting.
- ● Thermometer/hygrometer – To monitor soil temperature (60-70°F ideal for germination).
Step-by-Step instructions for growing a cherry tree from a pit
Here's my foolproof method for turning a single cherry pit into a tree—it just takes time.
🌱 Step 1: Extract and Prepare the Pit
Start by washing the cherry pit thoroughly under cool water to remove any fruit residue. I like to use a paper towel to dry it completely before moving forward—moisture speeds up mold growth, and you don't want that.
Place the pit between two sheets of paper towel, then fold them around it like a burrito. Put this bundle in a sealed plastic bag and refrigerate for 4-6 weeks. This mimics winter chilling, which breaks seed dormancy. You'll know it's ready when the pit feels slightly softened when squeezed gently.
💧 Step 2: Plant the Pit in a Small Container
Fill a 4-inch pot with sterile potting mix—not garden soil, as it may contain pathogens. Press the mix down lightly to create a firm planting surface. Make a small hole about ½ inch deep in the center using your finger.
Place the chilled pit in the hole with the flat side down (the pointed end should face up). Cover it with ½ inch of soil, then water gently until the soil feels evenly moist. Don't drown it—just keep it damp, like a wrung-out sponge. Place the pot in a warm spot with bright, indirect light (no direct sun yet).
☀️ Step 3: Wait for Germination and Early Growth
Keep the soil consistently moist but not soggy. Germination can take 4-12 weeks, depending on the variety and your growing conditions. I've seen some pits sprout in as little as 3 weeks, while others take months—patience is key here.
Once you see the first true leaves (not the initial seed leaves), move the pot to a sunny window or under a grow light for 12-14 hours daily. The leaves will tell you everything you need to know—if they're pale or leggy, your light isn't strong enough. At this stage, fertilizing is unnecessary; the seed contains enough nutrients for now.
🌿 Step 4: Transplant and Care for the Sapling
After the seedling reaches 6 inches tall and has 4-5 true leaves, it's time to transplant. Choose a 6-inch pot with drainage holes and fill it with well-draining potting mix. Gently remove the seedling from its original pot, keeping the root ball intact, and place it in the new container. Fill around the roots with soil, pressing lightly to secure it.
Water thoroughly after transplanting, then place the pot in full sun (at least 6 hours daily). Start fertilizing every 4-6 weeks with a balanced, water-soluble fertilizer diluted to half strength. This encourages strong, healthy growth without burning the young roots.
⏰ Step 5: Prepare for Outdoor Planting
When the sapling reaches 12-18 inches tall and has strong stems, it's ready for outdoor life. Harden it off by placing it outside in a sheltered spot for 1-2 hours the first day, gradually increasing time over 10-14 days. Watch for wilting or leaf drop—this means it's adjusting too quickly.
Choose a permanent spot in full sun with well-draining soil. Dig a hole twice as wide as the root ball but no deeper. Plant the sapling at the same depth it was in its pot, then water deeply. Mulch around the base with 2-3 inches of organic mulch to retain moisture and suppress weeds. It may take 5-10 years before your tree bears fruit, but the wait is worth it.
Tips & tricks for perfect cherry tree growth from a pit
Turning a cherry pit into a thriving tree requires patience and a few insider tricks to boost your success rate.
The Chilling Factor: That 4-6 week cold treatment in Step 1 is crucial—don't rush it! I've tried skipping this step, and the pits either rot or take forever to sprout. Place your sealed bag in the crisper drawer of your fridge where it's consistently cold. The slight softening you feel when squeezing is your signal that dormancy is broken.
Lighting Strategy: In Step 3, bright indirect light is key for those first few weeks. I use a simple LED grow light on a timer for 12-14 hours daily—it's more consistent than natural light. If you don't have one, place your pot near an east-facing window where morning sun is gentle. Avoid south-facing windows that can scorch delicate seedlings.
Transplant Timing: Wait until your seedling hits 6 inches tall with 4-5 true leaves before transplanting in Step 4. I check for sturdy stems that don't snap easily when gently tugged. The root ball should be dense and intact—if it crumbles, wait another week. This prevents transplant shock that can kill young seedlings.
Harden Off Gradually: When moving your sapling outdoors in Step 5, start with just 1-2 hours the first day. I place mine on a shaded patio and watch for any wilting. Gradually increase exposure over 10-14 days
Pro Tips for Cherry Tree From Cherry Pit
- Turning a cherry pit into a thriving tree requires patience and a few insider tricks to boost your success rate.
- The Chilling Factor: That 4-6 week cold treatment in Step 1 is crucial—don't rush it!
- Lighting Strategy: In Step 3, bright indirect light is key for those first few weeks.
Frequently asked questions
Growing a cherry tree from a pit is a rewarding but patient process—here are answers to the most common questions to help you succeed!
How long does it take for a cherry pit to sprout?
A cherry pit typically sprouts within 4–12 weeks after planting, depending on temperature and moisture. Cold stratification (refrigeration) mimics winter conditions, speeding up germination. If nothing appears after 3 months, the pit may be dormant or non-viable—don’t give up!
Will my cherry tree bear fruit?
Most homegrown cherry trees from pits won’t produce fruit for 5–10 years (or never at all), as they’re often seedlings with unpredictable traits. For reliable fruit, graft a known variety onto your seedling’s rootstock later. Patience is key!
Can I grow a cherry tree indoors?
Cherry trees need full sun (6+ hours/day) and outdoor space—they’re not ideal for indoor pots. Start them indoors for germination, then transplant outdoors after the last frost. If space is tight, choose dwarf varieties (like ‘Stella’ or ‘Black Tartarian’) for smaller gardens.
Why is my cherry seedling dying?
Common killers include:
- Overwatering: Keep soil moist but not soggy—root rot is a silent threat.
- Underwatering: Drooping leaves? Water deeply when the top inch of soil is dry.
- Pests: Watch for aphids or spider mites (spray with neem oil if needed).
- Cold snaps: Young seedlings are frost-sensitive—cover with burlap if temps drop below 25°F.
What’s the best cherry pit to use?
Use fresh, plump pits from sweet cherries (like Bing or Rainier)—they germinate better than tart varieties. Avoid pits from store-bought cherries (often treated to prevent sprouting). Pro tip: Soak pits in warm water overnight before planting to soften the shell and improve germination rates!
Wrapping up and next steps
Growing a cherry tree from a pit is a rewarding journey that blends patience, care, and a touch of magic—just like watching a tiny seed transform into a towering fruit-bearing giant! 🌱✨ While the process demands time (often years before harvest), the satisfaction of enjoying homegrown cherries—especially those you nurtured from scratch—is unmatched.
Whether you’re dreaming of sweet Bing cherries or tart Morello varieties, every step you take brings you closer to that giant nut harvest.
Ready to turn your kitchen scraps into a lush orchard? Start by planting that pit today—your future self (and hungry birds!) will thank you. And if you hit a snag? Lean on the tips and FAQs above to keep your green thumb thriving. Happy growing! 🍒🌿