Pruning
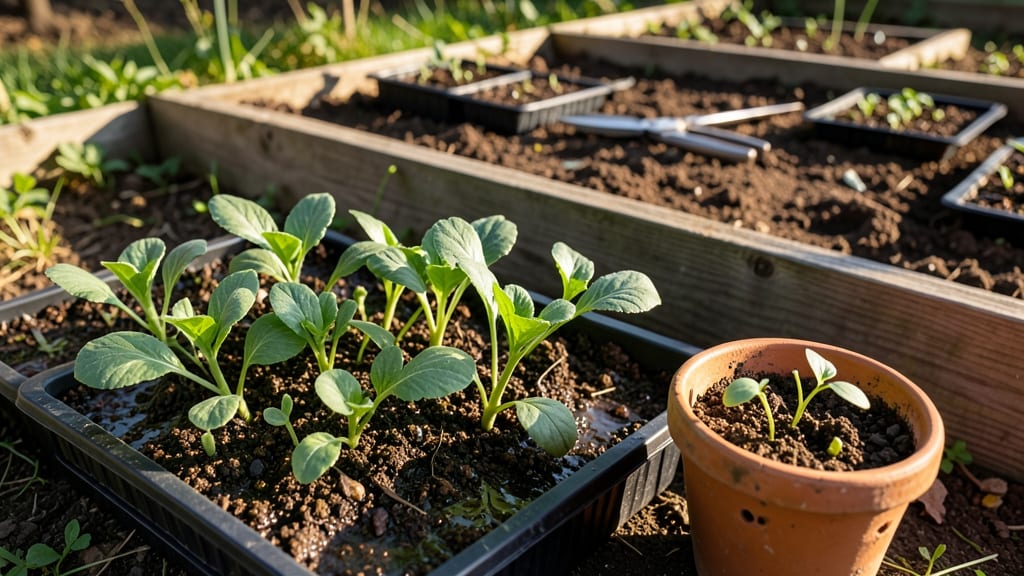
Growing cabbage tree seedlings from seed is where the magic happens—especially when you layer their care for Pacific Northwest resilience. 🌱 I learned the hard way that these plants need more than just good soil; they demand patience, the right timing, and a few tricks to survive our damp winters.
The key isn’t just planting them—it’s preparing them for the climate’s quirks, like heavy rains and cool summers.
Start with well-draining soil mixed with compost, and plant seeds indoors 8-10 weeks before your last frost. Keep them in a warm spot until sprouts appear, then gradually introduce them to outdoor conditions.
The real game-changer? Layering young seedlings with mulch to protect roots from temperature swings—this is what keeps them thriving through our unpredictable weather.
By the time you transplant them outdoors, you’ll see sturdy, dark-green seedlings ready to take on the Pacific Northwest. They’ll reward you with glossy foliage and that signature cabbage-tree shape, even when others struggle.
The secret is consistency—watering deeply but not drowning them, and giving them space to grow without crowding.
This method works for both container gardening and in-ground planting, whether you’re starting from seed or layering cuttings. The beauty of cabbage trees is their adaptability—once established, they’ll handle our climate like pros. Let’s get those seedlings off to the right start!
📚 In This Guide
- What you need
- Instructions
- Tips and common mistakes
- Wrapping up and next steps
What you need
- ● Healthy cabbage tree (Cordyline fruticosa) – Choose a mature plant with flexible, semi-woody stems (at least 1–2 inches in diameter).
- ● Sharp pruning shears or bypass pruners – Sterilized to prevent disease (rubbing alcohol wipe works!).
- ○ Rooting hormone (optional but recommended) – A fast-acting powder or gel (e.g., Clonex or Dip ‘N Grow).
- ● Well-draining potting mix – A blend of 50% peat moss, 30% perlite, and 20% sand (or coconut coir for sustainability).
- ● Small pots or containers – 4–6 inch diameter with drainage holes (plastic or biodegradable options work).
- ● Plastic wrap or clear dome – To create a humidity tent (e.g., a ziplock bag with holes or a propagation lid).
- ● Spray bottle – For gentle misting (avoid soaking the soil).
- ● Twine or plant ties – To secure layers to the stem (if using the air-layering method).
- ● Watering can with a fine rose – For light, consistent hydration.
- ● Labeling tags & marker – To track seedlings (especially useful for multiple varieties!).
- ● Heating mat – Speeds up rooting in cooler PNW springs (set to 70–75°F).
- ● Fertilizer (low-nitrogen) – A balanced 10-10-10 or seaweed extract once roots form.
- ● Grow lights – If propagating indoors with low natural light (12–14 hours/day).
- ● Moss (sphagnum) – For air-layering to retain moisture around the wound.
- ● Antifungal treatment – Like hydrogen peroxide (3%) to prevent rot in damp conditions.
How to propagate cabbage tree seedlings using layering techniques
Layering is the secret to multiplying your cabbage tree—especially when PNW winters test survival. Here’s how to do it right.
🌱 Step 1: Select Healthy Branches for Layering
Choose mature, flexible branches that are 1/4 to 1/2 inch thick—thicker stems take longer to root, while thinner ones may not survive. Look for branches that are free of disease or damage and have at least 3-4 leaves still attached. The best candidates are those growing low on the plant, where they naturally bend toward the ground.
Gently bend a branch downward until it touches the soil, but don’t snap it. If it bends easily, it’s a good candidate. Avoid branches under heavy fruit load—they’ll struggle to root while supporting extra weight. I like to work on overcast days when the plant is hydrated and less stressed.
💧 Step 2: Create the Layering Wound and Secure It
About 6-8 inches from the tip, make a small, diagonal cut (about 1/3 through the stem) using clean pruning shears. This wound will encourage root formation. If the branch is thick, you can make a shallow slit instead—just enough to expose the cambium layer without severing the stem completely.
Use a U-shaped wire or bent piece of rebar to hold the wounded section in contact with the soil. Bury it 1-2 inches deep in moist, well-draining soil (a mix of peat moss and sand works well). Secure the wire loosely—you don’t want to crush the stem, just keep it in place. Water the area lightly to settle the soil around the wound.
☀️ Step 3: Monitor Moisture and Light for Root Development
Keep the soil consistently moist (not soggy) around the layered branch—dry spells slow rooting, while overwatering can rot the stem. I check moisture by pressing a finger into the soil; if it feels dry 1 inch down, it’s time to water. Mulch lightly with shredded bark to retain humidity without suffocating the branch.
Place the layered branch in bright, indirect light—morning sun is ideal in the PNW, where afternoon heat can scorch tender new growth. Avoid deep shade; the branch needs enough light to photosynthesize while roots develop. You’ll see new growth at the tip in 4-6 weeks, signaling successful rooting.
✂️ Step 4: Sever and Transplant the New Plant
Once the layered branch has 3-4 inches of new roots (gently tug to check resistance), it’s ready to separate. Use clean shears to cut just below the wound, leaving 1-2 inches of stem attached to the parent plant. Transplant immediately into a 6-inch pot with well-draining soil mix (equal parts peat moss, perlite, and compost).
Water deeply after transplanting, then reduce watering slightly for the first 2 weeks to let roots establish without stress. Harden off new plants by gradually exposing them to outdoor conditions over 10-14 days before planting in the garden. The PNW’s cool, damp climate is perfect for cabbage trees—just keep them sheltered from harsh winds until established.
Tips & tricks for perfect cabbage tree layering
Here's what nobody tells you about layering cabbage tree branches—these tricks make all the difference in PNW survival rates.
Branch Selection Secret: The key to success lies in choosing branches that naturally bend toward the ground. These are already primed for layering because they've adapted to grow in that position. Look for ones with at least 3-4 leaves that show no signs of disease—yellowing or spots are red flags. I've found that branches growing from the lower third of the plant tend to root more reliably than those higher up, likely because they're already accustomed to less direct sunlight and more moisture.
Wound Healing Technique: When making that crucial 1/3-through cut in Step 2, angle your pruning shears slightly upward to create a larger surface area for root formation. This exposed cambium layer is where all the root magic happens. For thicker branches, I've had better luck with a shallow slit rather than a clean cut—just enough to expose the green inner layer without severing completely. The goal is to stimulate root growth while maintaining the branch's connection to the parent plant.
Soil Science Matters: That mix of peat moss and sand isn't just arbitrary—it creates the perfect balance of moisture retention and drainage that cabbage tree roots crave. I've learned the hard way that adding too much sand can dry out the wound too quickly, while too much peat can suffocate developing roots. Aim for a ratio of 2 parts peat to 1 part sand, and always bury the wounded section just 1-2 inches deep—any deeper and you risk smothering the roots before they form.
Light Management: The PNW's unpredictable weather makes light management critical. While morning sun is ideal, don't be afraid to provide some afternoon shade during our famously cloudy summers. I use lightweight shade cloth when needed, especially for branches showing signs of stress. Remember, you're aiming for bright but indirect light—think dappled sunlight under a mature tree rather than full noon exposure.
Pro Tips for Cabbage Tree Seedlings
- Here's what nobody tells you about layering cabbage tree branches—these tricks make all the difference in PNW survival rates.
- Branch Selection Secret: The key to success lies in choosing branches that naturally bend toward the ground.
- Wound Healing Technique: When making that crucial 1/3-through cut in Step 2, angle your pruning shears slightly upward to create a larger surface area for root formation.
Frequently asked questions
Got questions about growing cabbage tree seedlings in the Pacific Northwest?
You’re not alone! Here are answers to the most common queries to help you master layering and care for these resilient plants.
How long does it take for cabbage tree seedlings to root from layering?
With proper moisture and warmth (60–70°F), cabbage tree seedlings typically root in 4–8 weeks. Check for success by gently tugging the layered stem—if resistance is felt, roots have formed! Patience is key, especially in cooler PNW climates.
Can cabbage tree seedlings survive the PNW’s wet winters?
Yes! Once established, cabbage trees are hardy to USDA Zone 7 and thrive in the PNW’s mild, wet winters. Young seedlings benefit from mulch (3–4 inches) to insulate roots. Avoid soggy soil—ensure drainage to prevent rot.
What’s the best time to layer cabbage tree cuttings?
Spring (March–May) or early fall (September–October) are ideal. The soil should be warm but not scorching, and the parent plant should be actively growing. Avoid layering during drought or frost—timing matters for root success!
Are there alternatives to layering for propagating cabbage trees?
Try seed propagation (slower but rewarding) or stem cuttings dipped in rooting hormone. Layering is easiest for beginners, but cuttings work well if you’re short on time—just keep humidity high with a plastic bag!
Why are my cabbage tree seedlings turning yellow or wilting?
Yellowing leaves often signal overwatering or poor drainage, while wilting can mean underwatering or root stress. Check soil moisture (top inch should dry slightly) and ensure pots have drainage holes. Adjust care based on PNW’s unpredictable rain!
How do I know when to transplant layered seedlings?
Wait until roots are 2–3 inches long (gently lift to check) and new growth appears. Transplant in spring after last frost, spacing seedlings 10–15 feet apart for mature size. Water deeply post-transplant to reduce shock.
Wrapping up and next steps
Growing cabbage tree seedlings in the Pacific Northwest’s unique climate is totally doable with the right layering tricks!
By mastering techniques like air layering or tip layering, you’ll give your seedlings the best shot at thriving—even when winter rolls in. 🌿 With patience and these proven methods, you’ll soon be enjoying lush, resilient cabbage trees that stand the test of time.
Ready to take the next step? Grab your tools, pick a sunny spot, and start layering—your future forest begins with a single seedling! 🌱