Pruning
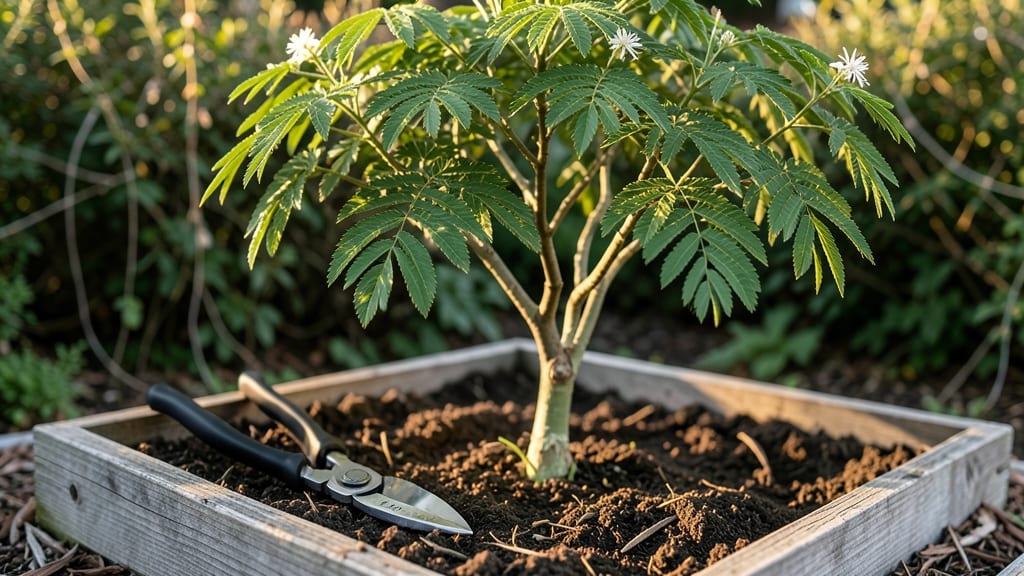
Trimming a moringa tree isn’t just about keeping it neat—it’s the secret to doubling your leaf harvest while preventing that wild, unruly look. 🌿 I’ve learned the hard way that skipping pruning turns a productive tree into a tangled mess with sparse yields, but the right cuts transform it into a leaf-producing machine.
The best part? You can trim year-round with the right approach, ensuring fresh growth every month.
Start with basic tools: sharp pruning shears for small branches and a handsaw for thicker stems. Timing matters most—harvest leaves every 2-3 weeks by cutting just above a leaf node, and prune back any leggy growth to encourage bushier, more productive branches.
This isn’t just about aesthetics; it’s about redirecting the tree’s energy toward leaf production instead of vertical growth.
Within weeks, you’ll notice thicker foliage and more frequent harvests. The tree stays compact, making it easier to reach the leaves, and pests have fewer hiding spots in dense growth.
Plus, regular trimming keeps the tree from becoming top-heavy, which is especially important if you’re growing in containers or small spaces.
Fair warning: Over-pruning in winter can stress the tree, while skipping pruning in summer leads to woody stems that produce fewer leaves. Balance is key—think of it as a conversation with your tree, not a one-time chore. Let’s get those shears ready and turn that moringa into a leaf factory!
📚 In This Guide
- What you need
- Instructions
- Tips and common mistakes
- Wrapping up and next steps
What you need
- ● Pruning shears: Sharp, bypass-style shears (4–6 inch blades) for clean cuts—1 pair.
- ● Hand pruners: For smaller branches (3–5 inch blades)—1 pair.
- ● Loppers: Heavy-duty, ratchet-style (for thicker branches, 8–12 inch blades)—1 pair.
- ● Disinfectant: 70% isopropyl alcohol or bleach solution (1 part bleach to 9 parts water) to sterilize tools.
- ● Gloves: Heavy-duty, cut-resistant gloves for protection—1 pair.
- ○ Trimming rope or twine: (Optional but helpful for tying branches during shaping).
- ● Bucket or tarp: To collect pruned branches (for composting or mulching).
- ● Safety gear: Safety glasses (if dealing with thorny varieties like Moringa oleifera).
- ● Pruning saw: For very thick branches (rare in young moringa trees).
- ○ Plant growth regulator: (Optional) Hydrogen peroxide (3%) or copper-based fungicide to treat cuts and prevent disease.
- ● Notebook & pen: To jot down trimming notes (e.g., branch locations, growth patterns).
- ● Ladder or stool: If your tree is over 6–8 feet tall.
Step-by-step instructions for pruning a moringa tree
Here’s how I keep my moringa trees thriving—with less stress and more harvests.
🌿 Step 1: Identify and Remove Dead or Diseased Branches
Start by scanning your tree for branches that look brittle, brown, or mushy at the base. These are the first to go—they’re dead weight that steals energy from healthy growth. Use clean, sharp pruning shears to cut just above a leaf node or lateral branch where new growth can emerge.
If you spot any yellowing leaves or sticky sap (a sign of pests or fungal issues), remove those branches immediately. Bag and dispose of them away from your garden to prevent spreading problems. Here’s the thing—moringa trees are tough, but they won’t recover from neglected deadwood.
✂️ Step 2: Shape the Tree for Airflow and Light Penetration
Moringa trees grow fast, but they need room to breathe. Focus on thinning out crowded branches to let sunlight reach the inner canopy. Aim to remove 20-30% of the foliage in one session—this encourages bushier growth and prevents fungal diseases that thrive in dense, shaded areas.
Start at the top and work your way down. Cut back branches that cross or rub against each other, as these create weak points where pests can enter. Leave the strongest, healthiest branches—these will support the most pods. You’ll know you’re doing it right when you see light filtering through the center of the tree.
🌱 Step 3: Prune for Pod Production and Harvest Access
Moringa pods grow best on new wood, so prune older branches back by one-third to stimulate fresh growth. Focus on branches that are 1-2 years old—these are prime candidates for rejuvenation. Use your shears to cut just above a leaf node or outward-facing bud to encourage growth in the right direction.
For easier harvesting, trim branches so pods are within 4-5 feet of the ground. This makes it simple to pluck them without climbing or straining. If your tree is tall, consider a step-ladder approach: prune the lower branches first, then work upward as the tree grows. This keeps you safe and makes maintenance manageable.
⏰ Step 4: Time Your Pruning for Seasonal Growth
The best time to prune moringa is early spring before new growth begins, but you can also do light trimming in late summer to encourage a second flush of pods. Avoid heavy pruning in fall or winter—your tree needs all its energy to survive cooler months. If you must prune in winter, keep it minimal and focus only on dead or diseased branches.
After pruning, give your tree a balanced fertilizer (like a 10-10-10 mix) to support new growth. Water deeply but not excessively—moringa trees hate soggy roots. You’ll see new leaves emerge within 2-3 weeks, signaling that your tree is recovering and preparing for another harvest season.
Tips & tricks for perfect moringa tree trimming
Here's what nobody tells you about keeping your moringa tree thriving—these tricks will transform your pruning routine.
Tool Prep: Sterilize your pruning shears with rubbing alcohol before you start. I learned this the hard way after my tree developed fungal spots from contaminated cuts. Clean tools prevent disease spread and keep your tree healthy. A small investment in a sharpening stone will also make your cuts cleaner, reducing stress on the tree.
Seasonal Strategy: Early spring is your golden window for heavy pruning, but don't overlook late summer's second chance. I've seen trees produce a second pod harvest when lightly trimmed in August—just focus on removing only the oldest growth. The key is to work with your tree's natural growth cycles rather than fighting them.
Visual Growth Cues: Look for these signs when pruning: new leaves emerging from buds mean you've stimulated growth correctly, while yellowing leaves on new growth indicate over-pruning. In Step 3, when you're cutting back older branches by one-third, aim to leave 3-4 strong buds per cut—this ensures continuous pod production without over-stressing the tree.
Pro Tips for Trimming Moringa Tree
- Here's what nobody tells you about keeping your moringa tree thriving—these tricks will transform your pruning routine.
- Tool Prep: Sterilize your pruning shears with rubbing alcohol before you start.
- Seasonal Strategy: Early spring is your golden window for heavy pruning, but don't overlook late summer's second chance.
Frequently asked questions
Got questions about keeping your moringa tree thriving with the right trims? Here are answers to the most common concerns—so you can prune like a pro!
When is the best time to trim a moringa tree for maximum growth?
Trim your moringa tree year-round, but focus on these key times:
- Early spring: Encourages new growth before the rainy season.
- After harvests: Promotes bushier foliage and more pods.
- Avoid heavy trims in winter: Unless pruning dead wood, let it rest.
How much can I cut back without harming the tree?
Moringa is resilient! You can safely remove up to 30–50% of the canopy in one session, but avoid over-pruning. Focus on:
- Dead or yellowing branches (cut to the base).
- Overcrowded stems (trim to 6–12 inches from the main trunk).
- Long, leggy growth (shorten to encourage branching).
Should I trim during the rainy season?
Light trims are fine during rain, but avoid heavy pruning. Why?
- Wet conditions slow healing, increasing disease risk (like fungal infections).
- Focus on removing only dead wood or pest-damaged branches.
- Save major trims for dry seasons when the tree can recover faster.
What if my moringa tree stops growing after trimming?
Don’t panic! Slow growth often means the tree is adjusting. Try these fixes:
- Check soil moisture: Moringa needs consistent water (1–2 inches per week).
- Fertilize lightly: Use a balanced 10-10-10 or compost tea after trimming.
- Inspect for pests: Look for aphids or mites (spray neem oil if needed).
- Wait and observe: New growth should appear in 2–4 weeks.
Can I use moringa leaves after trimming for cooking or medicine?
Freshly trimmed leaves
are packed with nutrients—just follow these tips:
- Harvest young leaves: They’re tender and more nutritious (avoid woody stems).
- Wash thoroughly: Rinse in saltwater (1 tsp salt per gallon) to remove pests.
- Use immediately or dry: Spread leaves in shade to preserve nutrients for teas, powders, or soups.
- Store dried leaves: Keep in airtight containers for up to 6 months.
Wrapping up and next steps
Trimming your moringa tree isn’t just about maintenance—it’s your secret weapon for year-round growth and abundant harvests! 🌿 By mastering the right techniques, timing, and tools, you’ll unlock healthier plants, faster regrowth, and even more nutrient-packed leaves.
Whether you’re a seasoned gardener or just starting, every snip brings you closer to a thriving garden.
Ready to level up your moringa game? Start by applying these tips to your next pruning session—and don’t forget to track your progress. Share your results with fellow gardeners or experiment with new methods to find what works best for your climate.
Happy trimming—your future harvests will thank you! 🌱✨