
Pruning
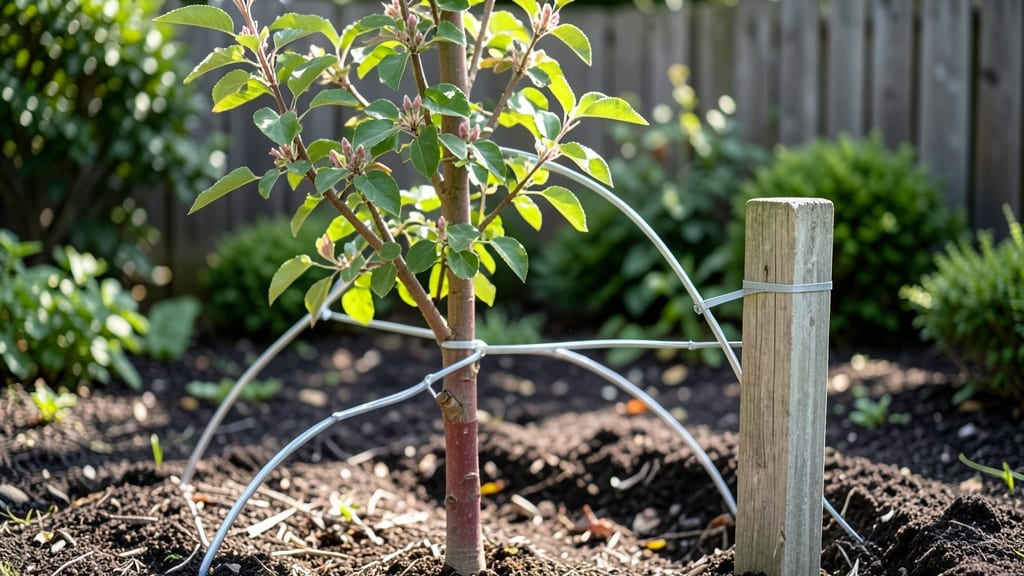
Young trees need sturdy tree brace support to stand tall without bending or breaking in storms. 🌳 I learned this the hard way when a sudden wind snapped a newly planted oak—now I use the right supports to give trees the stability they need to grow strong.
The key is choosing the right type of brace for your tree’s size and climate, then installing it just tight enough to prevent sway without strangling the trunk.
You’ll need basic supplies: tree ties, stakes, or spiral supports (depending on your tree’s needs), a mallet, and some protective padding to avoid damaging the bark. Most young trees benefit from support for their first 2-3 years, especially in windy areas or when planted in soft soil.
The right brace helps the trunk thicken naturally while preventing permanent lean or split bark.
With proper installation, you’ll see your tree develop a straighter trunk and stronger root system over time. The goal is to mimic natural wind resistance—just enough to steady the tree without restricting growth.
Too-tight braces can girdle the trunk, while loose ones won’t do their job. We’ll cover the exact steps to get it right the first time.
Whether you’re planting a delicate fruit tree or a fast-growing shade tree, the same principles apply. Storm-prone areas? Use deeper stakes. Heavy clay soil? Add extra padding. The right support system turns a fragile sapling into a resilient future giant—without the risk of damage. Let’s get those trees standing strong.
📚 In This Guide
- What you need
- Instructions
- Tips and common mistakes
- Wrapping up and next steps
What you need
- ● Tree brace support system: 1-2 tree support straps (adjustable, made of high-tensile polyester or nylon, rated for 100+ lbs of support)
- ● 1 tree support rod or stake (galvanized steel, 1.5–2 inches in diameter, 6–8 feet long)
- ● 1 tree brace or collar (flexible, padded, and adjustable to fit the tree trunk)
- ● Hardware: 4–6 heavy-duty screws or lag bolts (½–¾ inch, galvanized, for securing straps)
- ● 1–2 tree spikes or ground anchors (to stabilize the stake)
- ● Tools: 1 power drill or impact driver (for screws/bolts)
- ● 1 measuring tape (25+ feet)
- ● 1 level (to ensure proper alignment)
- ● 1 pruning shears or saw (if trimming is needed)
- ● 1 gloves and safety goggles (protection is key!)
- ● Tree wrap or protective padding (to prevent trunk damage from straps)
- ● Extra stakes or guy wires (for additional stability in windy areas)
- ● Concrete mix or heavy-duty base plate (to secure the stake permanently)
- ● Corrosion-resistant paint (to extend hardware lifespan)
Step-by-Step guide to installing tree brace supports
Here's how I stabilize young trees without damaging their growth—tested on wind-prone species.
🪴 Step 1: Choose the Right Brace Type and Size
Select a brace designed for your tree's trunk diameter and expected wind load. For most young trees, a 3-point tree brace with adjustable straps works best—it distributes pressure evenly. Measure your tree's trunk at 12 inches above ground and choose a brace with a 2-3 inch wider diameter range than your measurement.
I always opt for galvanized steel braces—they resist rust and last years. If your tree is in a high-wind zone, add a 4th support point for extra stability. Avoid plastic braces; they crack under pressure and fail when you need them most.
🌱 Step 2: Prepare the Tree and Position the Brace
Start by gently cleaning the trunk with a damp cloth to remove sap or debris where the brace will contact the tree. This prevents the brace from slipping later. Position the brace 12-18 inches above ground—low enough to catch wind at the tree's center of gravity but high enough to avoid damage from lawn equipment or animals.
Place the brace so the straps form a slightly angled "V" shape when viewed from the side. This mimics natural wind resistance patterns. Use a level to ensure the brace sits perfectly vertical—any tilt will create uneven pressure points on the trunk.
💧 Step 3: Secure the Brace Without Restricting Growth
Tighten the straps in a diagonal pattern, alternating sides to maintain even pressure. Start with just enough tension to hold the brace in place—you'll see slight give when you press the straps. Over-tightening can girdle the trunk as it grows. I like to leave 1/8 inch of play in the straps; this accounts for seasonal trunk expansion.
Check the fit by gently pushing the tree trunk side to side. The brace should resist movement but not feel rigid. If the tree bends more than 5 degrees, adjust the brace higher or add a second support point. Never use wire or zip ties—they can cut into the bark as the tree grows.
☀️ Step 4: Monitor and Adjust Seasonally
Inspect the brace every 3-4 weeks during the growing season. Look for signs of rubbing or loosening straps, and tighten as needed. In winter, check after heavy storms—wind patterns change with bare branches. If the tree outgrows the brace (you'll notice the straps gaping at the top), replace it immediately.
Here's the thing—brace supports should stay on for 2-3 years max. After that, the tree's wood strength should handle wind on its own. When removing, cut the straps with bolt cutters and peel them away slowly to avoid bark damage. I mark removal dates on my calendar so I don't forget.
Tips & tricks for perfect tree brace support
Common pitfalls—and how to sidestep every one when stabilizing young trees.
Material Matters: Galvanized steel braces are non-negotiable for longevity. I learned this the hard way after plastic braces cracked in my first winter storm. The zinc coating prevents rust, and the steel distributes wind pressure evenly. If you're working with a tree in a coastal area, consider stainless steel—it handles salt air better than standard galvanized options.
Positioning Precision: That 12-18 inch height range from Step 2 is critical for wind resistance. Too low and you risk damage from lawn equipment; too high and you miss the tree's center of gravity. I use a small chalk mark on the trunk to visualize the brace placement before attaching it. This helps me align the brace perfectly during installation without guessing.
Seasonal Strategy: The 3-4 week inspection schedule in Step 4 works best when paired with seasonal adjustments. In spring and summer, check every 3 weeks. In fall and winter, reduce to monthly inspections—wind patterns shift dramatically with leaf loss. I keep a small notebook by my tool shed to log inspection dates and any adjustments made.
Removal Technique: When those 2-3 years are up, don't just yank the straps off! Use bolt cutters to snip them cleanly at the base, then peel them away slowly from the bottom up. I've seen too many trees with deep gashes from improper removal. This careful approach prevents bark damage that could invite pests or disease into the tree.
Pro Tips for Tree Brace Support
- Common pitfalls—and how to sidestep every one when stabilizing young trees.
- Material Matters: Galvanized steel braces are non-negotiable for longevity.
- Positioning Precision: That 12-18 inch height range from Step 2 is critical for wind resistance.
Frequently asked questions
Got questions about tree brace support? You’re not alone! Here are some of the most common concerns—and straightforward answers—to help you make informed decisions for your young trees.
What types of trees need brace support?
Brace support is especially helpful for young, newly planted, or structurally weak trees—like willows, maples, or fruit trees—prone to bending in wind or storms. Trees with thin trunks, multiple leaders (central stems), or those planted in exposed areas benefit the most. If your tree sways noticeably when touched, it’s a good candidate!
How long should a tree stay in a brace support?
Most experts recommend leaving brace supports in place for 1–3 years, depending on the tree’s growth rate and stability. Remove them too soon, and the tree may develop weak, dependent growth. Check annually: if the trunk is sturdy and the tree stands firm without support, it’s time to take them off gradually to avoid sudden stress.
Can I DIY a tree brace support, or should I hire a pro?
You can DIY with basic materials (PVC pipes, metal stakes, or tree ties), but improper installation can damage the tree. For high-value or large trees, hire an arborist—they’ll ensure correct tension, placement, and materials to avoid girdling (trunk injury) or poor growth patterns. Think of it like bracing a new fence: precision matters!
What are the signs my brace support isn’t working?
Watch for these red flags:
- Trunk rubbing: The brace is too tight, causing bark damage or sap leaks.
- Leaning or bending: The tree isn’t stabilizing—check for loose stakes or weak anchors.
- Fungal growth: Moisture trapped by the brace can attract rot; ensure proper airflow.
Are there alternatives to traditional brace supports?
Yes! For smaller trees, try tree guards (plastic or metal cages) or staking systems with flexible ties. For ornamental trees, cable-and-pulley systems (installed by pros) offer adjustable support. If your tree is in a windy area, consider root ball stabilization (like deep planting or soil amendments) to boost natural resilience.
Wrapping up and next steps
Investing in tree brace support is a proactive way to safeguard your young trees and ensure their long-term health and stability.
Whether you're dealing with storm-prone areas or simply want to give your trees the best start, these supports provide peace of mind while promoting natural growth. Now’s the perfect time to take action!
Ready to get started? Assess your trees today and choose the right brace support for their needs. With the right tools and a little effort, you’ll be well on your way to a thriving, resilient landscape. 🌳💪