Pruning
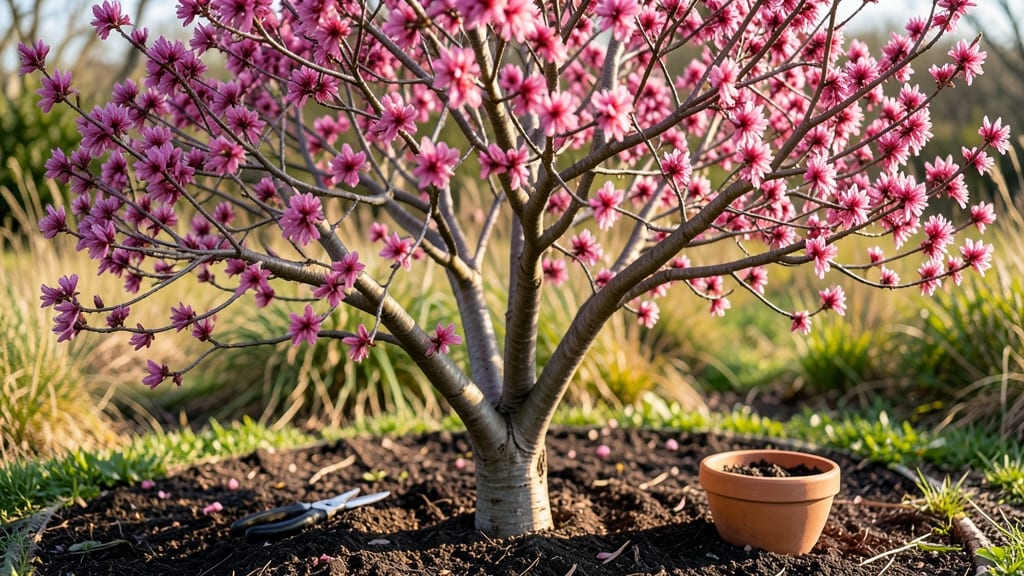
The sun redbud tree (Cercis canadensis) bursts into pink glory each spring, but late-winter pruning is what keeps it thriving—especially in the Pacific Northwest’s damp climate.
I’ve watched my own redbud transform from a tangled mess into a showstopper with just a few strategic cuts each year, and the difference is night and day. The key isn’t just timing (though that matters) but understanding how this tree’s unique growth habit responds to pruning.
You’ll need sharp pruners, a ladder if your tree is tall, and a clear day to work—no wet branches that’ll splinter. The goal is to open up the center for sunlight and air, which prevents disease and encourages those iconic bursts of pink.
I’ve pruned mine for five years now, and every spring, the blooms arrive earlier and last longer. Even beginners can nail this with a little patience and the right technique.
By late winter, you’ll see new growth starting, but the branches are still dormant enough to handle cuts without stress. Aim to remove about one-third of the oldest wood to keep the tree youthful, and always cut just above a bud or branch collar.
The result? A tree that looks like it was designed by a pro, with vibrant flowers that light up your garden before anything else wakes up.
This method works for redbuds in zones 5-9, whether you’re dealing with a young sapling or a mature tree. The Pacific Northwest’s mild winters make late winter the perfect window—just don’t wait until spring when the buds are already swelling. Ready to give your redbud the revival it deserves?
📚 In This Guide
- What you need
- Instructions
- Tips and common mistakes
- Wrapping up and next steps
What you need
- ● Pruning shears: Sharp, bypass-style (avoid anvil shears—crushes branches!)
- ● Lopping shears: For thicker branches (1–2 inches in diameter)
- ● Pruning saw: For branches over 2 inches thick (look for a curved blade for clean cuts)
- ● Garden gloves: Heavy-duty, cut-resistant (thorns!
- ● Disinfectant: 70% isopropyl alcohol or rubbing alcohol (1 small bottle)
- ● Trash bags: Heavy-duty, 5-gallon size (2–3 bags for debris)
- ● Ladder: Sturdy, extendable (if tree exceeds 6 feet tall)
- ● Notebook & pen: To sketch a pruning map of cuts
- ● Hand pruners: For fine-tuning small branches (ergonomic grip recommended)
- ● Tree wound dressing: Pruning sealant (controversial—use sparingly if needed)
- ● Extension pole saw: For high branches (if no ladder is available)
- ● Safety glasses: To protect eyes from debris
- ● Mulch or compost: To refresh the base after pruning
Step-by-Step guide to pruning your sun redbud tree
This is how I revive Pacific Northwest redbuds every late winter—without over-pruning.
Time Your Pruning for Late Winter
Prune your sun redbud between late February and early March when the tree is still dormant but buds are swelling. This timing ensures you remove dead wood while preserving next season’s blooms. Avoid pruning in fall or early winter—you’ll risk encouraging new growth that can’t survive frost.
Check the buds closely: they should look plump and firm, not yet cracked open. If you see green tips peeking through, you’ve waited too long. The goal is to shape the tree while it’s still resting but ready to wake up.
Remove Dead, Damaged, or Crossing Branches
Start by cutting out any dead branches—these snap easily when bent and have no green beneath the bark. Next, remove branches that cross or rub against each other, as these wounds invite disease. Use clean, sharp pruners to make 1/4-inch cuts just outside the branch collar.
Look for branches growing inward toward the center of the tree—these block light and air circulation. Thin these out first, cutting back to a healthy outward-facing branch. Never remove more than 25% of the tree’s canopy in one season, or you’ll stress the redbud.
Shape the Tree for Balanced Growth
Step back and assess the tree’s natural shape. Redbuds have a graceful, slightly weeping habit, so avoid heavy topping. Instead, focus on lightening the outer canopy by shortening branches that are too long or crowded. Cut just above a bud that faces outward.
Pay special attention to water sprouts—those fast-growing, vertical shoots that pop up after pruning. These sap energy and weaken the tree. Snip them off at the base as soon as you spot them. A well-shaped redbud will have an open center and a rounded silhouette.
Clean Up and Protect the Tree
After pruning, rake up all debris and dispose of it in the trash—not the compost pile—to prevent fungal spores from reinfecting the tree. Sterilize your pruners with rubbing alcohol between cuts if you’re working with diseased branches.
Apply a 2-inch layer of mulch around the base (but not touching the trunk) to retain moisture and regulate soil temperature. This is especially important in the Pacific Northwest’s wet winters, where soggy soil can suffocate roots. Water deeply if the winter has been dry.
Tips & tricks for perfect sun redbud tree pruning
Here's what nobody tells you about keeping your Pacific Northwest redbud thriving after pruning—these are the details that separate a healthy tree from one that struggles.
Timing Secret: The late February to early March window is non-negotiable for Pacific Northwest redbuds. This timing coincides with the tree's natural dormancy period, allowing it to recover quickly while preserving next year's blooms. I've seen redbuds pruned in fall develop frost-damaged new growth—don't make that mistake. Check your local frost dates to be extra precise, as some years can be colder than others.
Branch Identification: When removing branches in Step 2, look for the three key indicators: dead branches snap easily, crossing branches create V-shaped intersections, and inward-growing branches block sunlight. I use a simple scratch test—scrape the bark with my fingernail. Healthy bark is green underneath, while dead bark reveals brown or black. This visual cue saves time and prevents unnecessary cuts.
Pruning Technique: The 1/4-inch cut just outside the branch collar is critical—this precise cut promotes faster healing. I mark my cuts with a permanent marker before making them to ensure clean, straight angles. For larger branches, I make a second cut about 1 inch further out to prevent tearing. Remember, the goal is to remove the branch cleanly while preserving the tree's natural shape and health.
Post-Pruning Care: After pruning, the 2-inch layer of mulch acts as a protective blanket for your tree's roots. I always add a thin layer of coarse wood chips on top of the mulch to prevent it from compacting. This combination helps regulate soil temperature and retain moisture—especially important in our wet Pacific Northwest winters. Water deeply only if the ground feels dry to the touch, as overwatering can suffocate roots.
Pro Tips for Sun Redbud Tree
- Here's what nobody tells you about keeping your Pacific Northwest redbud thriving after pruning—these are the details that separate a healthy tree from one that struggles.
- Timing Secret: The late February to early March window is non-negotiable for Pacific Northwest redbuds.
- Branch Identification: When removing branches in Step 2, look for the three key indicators: dead branches snap easily, crossing branches create V-shaped intersections, and inward-growing branches block sunlight.
Frequently asked questions
Got questions about pruning your sun redbud tree? You’re not alone! Here are some of the most common concerns—plus expert-backed answers to keep your tree thriving in the Pacific Northwest’s unique climate.
When is the best time to prune a sun redbud tree in late winter?
The ideal window is late January to early March—just after the coldest snap but before buds swell. This timing balances dormancy (reducing stress) with early growth signals (encouraging vibrant spring blooms). Avoid pruning after March 15, or you might trim off next year’s flowers!
How much can I trim back my sun redbud tree without harming it?
Sun redbuds are hardy but respond best to moderate pruning. Remove no more than 25–30% of the canopy in a single session. Focus on dead/diseased branches, crossing limbs, and shaping—never cut more than 1/3 of the stem diameter at any cut to prevent decay.
What if my sun redbud tree isn’t blooming after pruning?
Bloom delays often stem from over-pruning or cutting too late (after buds form). Check for:
- Flower buds (plump, greenish nodes near branches—don’t prune these off!).
- Sunlight access: Redbuds need 6+ hours of sun daily.
- Soil health: Amend with compost if soil is compacted or poor.
Are there alternatives to sun redbud for low-maintenance PNW gardens?
Yes! If you want similar early blooms and drought tolerance, consider:
- Pacific Dogwood (Cornus nuttallii): Stunning white blooms, thrives in shade.
- Oregon Grape (Mahonia aquifolium): Evergreen, yellow flowers, wildlife-friendly.
- Western Red Cedar (Thuja plicata): Native, low-maintenance, and shade-tolerant.
Why are my sun redbud’s leaves yellowing after pruning?
Yellowing (chlorosis) often signals nutrient stress or root damage. Try this:
- Test soil pH—redbuds prefer 6.0–7.0. Amend with sulfur if too alkaline.
- Apply a balanced fertilizer (10-10-10) in early spring only if soil tests confirm deficiencies.
- Check for root rot (mushy stems, foul smell)—reduce watering if soil stays soggy.
Wrapping up and next steps
The sun redbud tree is a stunning addition to Pacific Northwest gardens, and with the right late-winter pruning, you’ll set it up for vibrant blooms and lush growth all season.
Remember to act early (before buds swell), use sharp tools, and prioritize structure and airflow—your efforts will pay off in spectacular pink cascades! 🌸
Ready to give your redbud the TLC it deserves? Grab your pruners, lace up those gardening boots, and get out there! Start small if you’re new, and soon you’ll be a pruning pro—your garden (and future visitors) will thank you. 🌿