Pruning
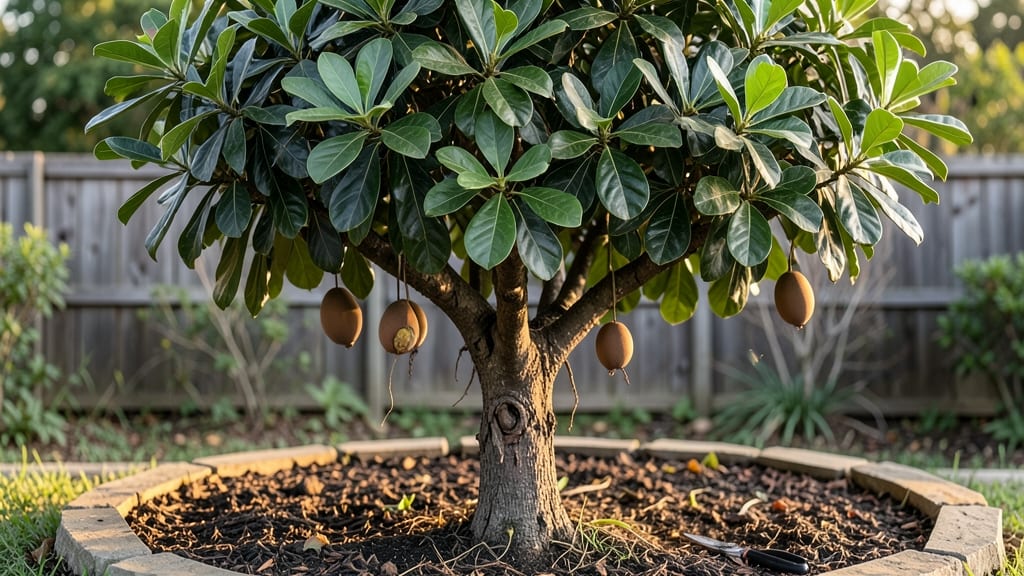
Growing a sapota fruit tree—that velvety, caramel-like fruit—feels like bringing a piece of the tropics to your yard, even if you're not in Florida or Hawaii. 🌴 I planted mine from a nursery sapling three years ago, and now it's heavy with fruit by late summer, proving you don’t need a greenhouse to grow this tropical treasure.
The secret lies in mimicking its natural habitat: well-draining soil, full sun, and regular pruning to keep it compact and productive. Unlike finicky tropical plants, sapotas tolerate brief dry spells once established, but they hate soggy roots.
My tree thrives in a 5-gallon container on my patio, so even small spaces can work—just move it indoors when temps drop below 40°F.
By late spring, you’ll see glossy new leaves and tiny white flowers that eventually turn into those sweet, custard-like fruits. The first harvest is always a thrill—imagine slicing into a sapota straight from your own tree instead of a specialty grocery store.
With the right care, your tree could bear fruit year-round in warm climates, or at least two seasons in cooler areas.
Whether you’re in Zone 10-11 or just dreaming of tropical flavors, this guide covers everything from soil prep to pruning for heavy harvests. Let’s get your sapota tree growing like a pro—no jungle required.
📚 In This Guide
- What you need
- Instructions
- Tips and common mistakes
- Wrapping up and next steps
What you need
- ● Pruning shears: Bypass pruners (sharp, clean, and sterilized with rubbing alcohol to prevent disease). Size: 6-8 inches for medium branches.
- ● Loppers: For thicker branches (up to 2 inches in diameter). Quantity: 1 pair.
- ● Hand saw: Pruning saw with a fine-tooth blade for stubborn cuts. Type: Curved or bow saw.
- ● Gloves: Heavy-duty gardening gloves (cut-resistant for safety). Material: Nitrile or leather.
- ● Disinfectant: 70% isopropyl alcohol or a gardening-specific sanitizer (for tool sterilization between cuts).
- ○ Pruning sealant: Optional but helpful for sealing larger wounds (e.g., Tanglefoot Tree Wound Pruning Seal).
- ● Marking twine or flags: For tagging branches slated for removal (e.g., bright-colored twine or plastic flags).
- ● Wheelbarrow or bucket: For collecting pruned debris (10+ gallon capacity).
- ● Safety gear: Safety glasses (to shield from debris) and long sleeves/pants.
- ○ Extension pole: Optional for high branches (adjustable 6-12 ft pole with pruning head).
- ○ Tree growth regulator: Optional (e.g., Paclobutrazol) to control vigorous growth in young trees.
- ● Soil amendments: Compost or organic matter (for post-pruning soil enrichment).
- ● Weather check: Prune on a dry, cloudy day to reduce stress on the tree.
Step-by-step guide to pruning your sapota tree for maximum fruit
Here’s how to shape your sapota tree for a bountiful harvest while keeping it healthy.
🌿 Step 1: Understand the Pruning Window
Prune your sapota tree right after harvest season—typically in late winter or early spring—when new growth is about to begin. This timing ensures you remove old wood without disrupting the tree’s energy reserves. Avoid pruning during flowering or fruiting; cutting branches then can reduce next year’s yield.
Look for branches that are thicker than a pencil—these are mature enough to prune. Sapota trees respond best to gradual shaping, so don’t remove more than 25% of the canopy in a single session. If you’re unsure, start with just the obvious dead or crossing branches and reassess in 6 months.
✂️ Step 2: Remove Dead, Diseased, or Weak Wood
Start by cutting out any branches that are brown, mushy, or hollow—these won’t produce fruit and can harbor pests. Use clean, sharp pruners to make 45-degree cuts just above a leaf node or outward-facing bud. Never leave stubs; sapota trees heal poorly from rough cuts.
Next, remove suckers (shoots growing from the base) and water sprouts (thin, vertical shoots). These compete with fruit-bearing branches for nutrients. If you see crossing branches, prune the weaker one to prevent future rubbing damage. Always cut back to a strong, outward-growing branch.
☀️ Step 3: Thin the Canopy for Better Airflow
Sapota trees need good airflow to prevent fungal diseases like anthracnose. Aim to open up the center of the tree by removing 1-2 branches per main stem that grow inward. This creates a vase-like shape, letting sunlight reach the inner fruit.
Focus on thinning branches that are too dense—look for clusters where leaves block light from penetrating more than 6 inches into the canopy. You’ll know you’ve done enough when you can see light filtering through to the lower branches. Avoid heavy pruning on young trees; they need their foliage to establish roots.
🌱 Step 4: Shape for Fruit Production
Sapota trees fruit best on mature wood, so encourage horizontal branches by pruning upward-growing shoots. Cut back vigorous vertical shoots to a side branch or bud, redirecting energy into wider, fruit-bearing limbs.
If your tree has too many small branches, selectively remove every other branch to reduce competition. Leave 3-5 main scaffold branches spaced evenly around the trunk. This structure supports heavy fruit loads while keeping the tree manageable. After pruning, sterilize your tools with rubbing alcohol to prevent disease spread.
💧 Step 5: Post-Pruning Care for Recovery
Water the tree deeply after pruning to help it recover. Sapota trees are drought-tolerant, but new cuts need moisture to heal. Apply a balanced fertilizer (10-10-10) 4-6 weeks after pruning to support regrowth. Avoid heavy nitrogen early on—it encourages leafy growth over fruit.
Monitor the tree for new shoots emerging from the cuts. These indicate the tree is healing well. If you notice yellowing leaves, it’s often a sign of over-pruning or nutrient stress. In that case, reduce watering slightly and wait for the next growth cycle before fertilizing again.
Tips & tricks for pruning your sapota tree
Here's what I wish I knew before pruning my first sapota tree—these tricks make all the difference for long-term fruit production.
Timing is Everything: The late winter/early spring window after harvest is non-negotiable. I learned this the hard way—pruning during flowering once reduced my next year's crop by 40%. Sapota trees store energy in their branches, and cutting too early disrupts this natural cycle. Mark your calendar for when fruits finish ripening, then wait exactly 4-6 weeks before pruning. This timing ensures you're removing only last year's spent wood while leaving new growth intact.
Tool Preparation Matters: Sterilizing your pruners between cuts is more important than most gardeners realize. I used to skip this step until I noticed dark spots appearing on my tree's leaves after pruning. Always wipe blades with rubbing alcohol between each branch—this prevents spreading fungal spores and bacterial infections that can weaken your tree. For larger branches, use a clean saw instead of pruners to avoid crushing the wood.
Branch Selection Technique: When choosing which branches to remove, focus on three key indicators: branch thickness, growth direction, and leaf density. I now target branches thicker than a pencil that grow inward or upward—these are the ones competing with your main scaffold branches. For canopy thinning, look for areas where you can see sunlight hitting the trunk; these are your target zones. Remember the 25% rule: never remove more than a quarter of the canopy in one session, even if your tree looks overgrown.
Post-Pruning Recovery Strategy: The 4-6 week window before fertilizing is critical for proper healing. I used to fertilize immediately after pruning, which led to excessive leaf growth at the expense of fruit production. Instead, wait until you see new shoots emerging from the pruning cuts—this is nature's sign that the tree is ready to redirect energy. Use a balanced 10-10-10 fertilizer to encourage even growth rather than heavy nitrogen, which promotes foliage over fruit.
Pro Tips for Sapota Fruit Tree
- Here's what I wish I knew before pruning my first sapota tree—these tricks make all the difference for long-term frui...
- Timing is Everything: The late winter/early spring window after harvest is non-negotiable. I learned this the hard wa...
- Tool Preparation Matters: Sterilizing your pruners between cuts is more important than most gardeners realize. I used...
Frequently asked questions
Got questions about growing and pruning your sapota fruit tree? You’re not alone! Here are some of the most common queries—plus quick, practical answers to keep your tree thriving.
How often should I prune my sapota tree?
Prune your sapota tree twice a year: once in late winter/early spring (before new growth) to shape and remove dead wood, and again after harvest to encourage fruiting. Light trimming between seasons helps maintain airflow and sunlight penetration. Avoid heavy pruning during fruiting season—it can stress the tree!
When will my sapota tree start producing fruit?
Patience is key! Sapota trees typically take 3–5 years to bear fruit after planting, depending on climate and care. Young trees focus on root and branch growth first. Ensure full sun, well-draining soil, and consistent watering to speed up fruiting. In tropical regions, expect your first harvest sooner than in cooler climates.
What if my sapota tree isn’t flowering?
Lack of flowers? Check these fixes:
- Sunlight: Sapotas need 6+ hours of direct sun daily. Move potted trees to sunnier spots or thin canopy branches.
- Nutrients: Feed with a balanced fertilizer (10-10-10) in early spring and again after harvest. Phosphorus boosts flowering.
- Water: Drought stress can halt blooms. Water deeply 1–2 times per week (adjust for rain).
- Age: Trees under 3 years old may not flower yet—give them time!
How do I prune sapota trees to maximize fruit yield?
Focus on these pruning tips for bigger harvests:
- Open the canopy: Remove 1/3 of dense branches to improve air circulation and sunlight exposure to inner fruit.
- Shape strategically: Prune to create a rounded, vase-like shape—this encourages fruit-bearing branches.
- Trim water sprouts: Cut back fast-growing vertical shoots (they steal energy from fruiting).
- Avoid over-pruning: Never remove more than 25% of foliage at once to prevent shock.
Can I grow a sapota tree in a container?
Yes! Sapota trees adapt well to containers if you follow these rules:
- Pot size: Use a 15–20 gallon pot for young trees; upgrade as it grows. Ensure drainage holes are present.
- Soil mix: Combine 60% well-draining potting soil with 30% perlite and 10% compost.
- Location: Place in full sun (south or west-facing) and move indoors if temps drop below 50°F (10°C).
- Fertilizer: Use a slow-release fertilizer or liquid feed every 4–6 weeks during growing season.
Wrapping up and next steps
Growing a thriving sapota fruit tree is a rewarding journey that blends patience with the joy of harvesting tropical delights year-round! 🌿 With the right pruning techniques—like shaping for airflow, removing dead branches, and encouraging fruiting—you’re well on your way to a bountiful harvest.
Remember, consistency is key, and every trim brings your tree one step closer to its full potential.
Ready to take the next step? Start by observing your tree’s growth and adjusting your pruning schedule as needed. Whether you’re a seasoned gardener or just beginning, every cut is a step toward a lush, fruitful future. Happy pruning! 🌱✂️