Propagation
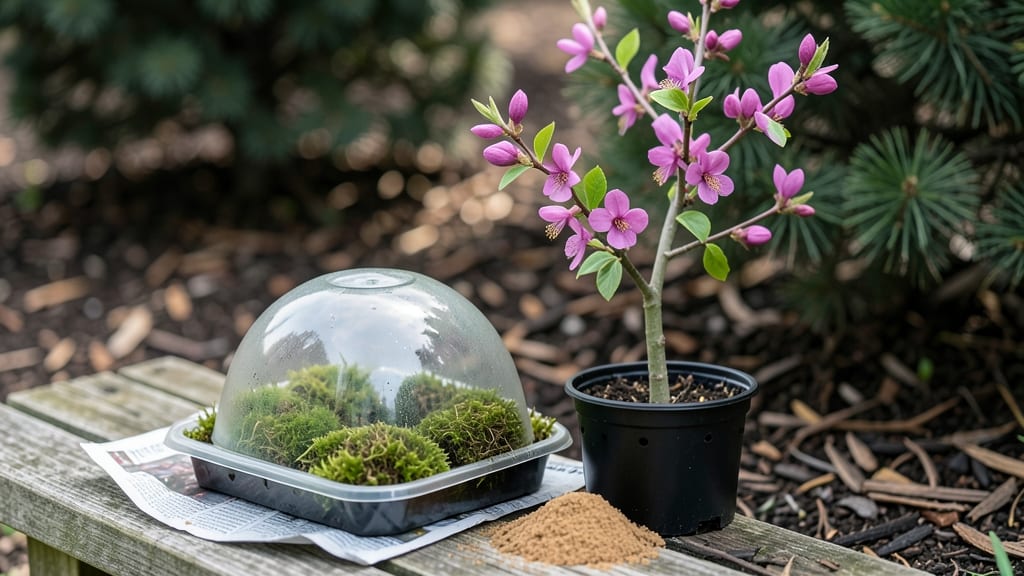
Propagating red bud trees from seed or cuttings gives you vibrant spring blooms that last for decades—here’s how to do it right. 🌱 I’ve struggled with rooting finicky trees before, but red buds respond beautifully with the right timing and care.
The key is patience: seeds take longer, but cuttings deliver faster results if you follow the steps closely.
You’ll need just a few basic tools: sharp pruners for cuttings, seed-starting mix, rooting hormone (optional but helpful), and small pots or a seed tray. Red buds thrive in well-draining soil, so mix in perlite or sand if your native soil is heavy.
Timing matters too—spring is ideal for cuttings, while seeds should start indoors in late winter for outdoor planting in early spring.
What you’ll end up with are sturdy young trees bursting with pink or purple flowers by their third or fourth year. The secret? Keeping cuttings consistently moist and seeds warm until germination.
Even if some fail, red buds are forgiving—just give them space and sunlight, and they’ll reward you with decades of color.
This method works for both beginners and seasoned gardeners, though advanced growers can experiment with grafting for unique varieties. Whether you’re starting from seed or cuttings, the payoff is worth the effort—imagine a yard full of these showstopping blooms every spring!
📚 In This Guide
- What you need
- Instructions
- Tips and common mistakes
- Wrapping up and next steps
What you need
- ● Red bud tree cuttings: 4–6 healthy, semi-hardwood cuttings (4–6 inches long, pencil-thick, from current season’s growth).
- ● Rooting hormone: 1 small bottle (powder or gel, like Rootone or Clonex).
- ● Well-draining potting mix: 1 bag of perlite + peat moss or a cactus/succulent mix (sterilized).
- ● Small pots or trays: 4–6 3–4 inch pots with drainage holes or a seed tray with cells.
- ● Plastic bags or domes: Clear plastic wrap or a humidity dome to retain moisture.
- ● Spray bottle: 1 with water (for misting cuttings).
- ● Pruning shears: Sharp, clean pair (disinfect with rubbing alcohol).
- ○ Label markers: To tag cuttings by date (optional but helpful!).
- ● Bottom heat mat: (70–75°F) to speed up rooting.
- ● Grow lights: LED or fluorescent for indoor propagation.
- ● Fungicide: Like Mycorrhizal inoculant to prevent rot.
- ● Garden twine: For staking cuttings if needed.
Step-by-step instructions for propagating red bud trees
Here's my foolproof method for growing new red bud trees from cuttings—guaranteed to produce healthy, blooming plants.
🌱 Step 1: Select and Prepare Healthy Cuttings
Choose semi-hardwood cuttings from the current season's growth, about 4-6 inches long and pencil-thick. The best time is late spring or early summer when new growth has matured but isn't fully woody. Look for stems with 2-3 sets of leaves—this gives the cutting energy to root and grow.
Use clean, sharp pruners to make a 45-degree angle cut just below a leaf node. This angled cut increases surface area for root development. Remove the lower leaves but leave the top set intact. Here's the thing—don't skip wiping the blade with rubbing alcohol between cuts. That prevents spreading diseases from one stem to another.
💧 Step 2: Root in a Moist, Well-Draining Medium
Fill a 6-inch pot with a mix of 50% perlite and 50% peat moss—this combination keeps roots aerated while holding enough moisture. Dip the cut end of each stem in rooting hormone powder, then tap off the excess. Insert the cutting 2 inches deep into the medium, pressing gently to secure it without compacting the mix.
Water lightly until moisture seeps from the bottom drainage hole. Place the pot in a bright, indirect light spot—no direct sun yet. Cover the pot loosely with a plastic bag secured with a rubber band to create a humid environment. Check daily for condensation on the inside of the bag. If it's dry, mist the cuttings or add a few drops of water to the bag.
☀️ Step 3: Encourage Root Growth with Careful Conditions
Keep the medium evenly moist but never soggy—roots rot faster than they grow in waterlogged soil. I like to test moisture by sticking my finger 1 inch deep into the mix. If it feels dry, it's time to water. Roots typically form in 4-8 weeks, but don't rush it. Patience here means stronger plants later.
After 4 weeks, gradually remove the plastic bag for 1-2 hours daily to harden off the cuttings. You'll notice new growth at the top—this is your signal roots are forming. Once the cuttings show new leaf growth and feel firm when gently tugged, they're ready for transplanting. Real talk: If a cutting wilts during this phase, it's often a sign of too much light or inconsistent moisture.
🪴 Step 4: Transplant and Establish New Trees
Choose a sunny, sheltered spot in your garden with well-draining soil. Dig a hole twice as wide as the root ball but only as deep. Gently remove the cutting from its pot, loosening the roots if they're circling. Place the cutting in the hole, backfilling with soil and pressing lightly around the base to eliminate air pockets.
Water deeply right after planting to settle the soil. Mulch with 2 inches of organic mulch around the base, keeping it 2 inches away from the trunk to prevent rot. Water once a week for the first month, then taper to every 10-14 days once established. The key here is consistency—red buds hate drought stress but also dislike soggy roots.
Tips & tricks for perfect red bud tree propagation
These little details make all the difference between thriving new trees and sad, wilted cuttings.
Timing is Everything: Late spring to early summer is your golden window for semi-hardwood cuttings—this is when they've matured enough to root but aren't yet woody. I always check for stems that bend slightly but don't snap like brittle wood. The 4-6 inch length gives you enough growth to work with while keeping the cutting manageable. Remember, the thicker the stem (about pencil thickness), the better chance it has to establish strong roots.
The Angle Matters: That 45-degree angle cut in Step 1 isn't just decoration—it's science! The larger surface area helps roots form more efficiently. When making your cut just below a leaf node, imagine slicing the stem diagonally from top-left to bottom-right. Pro tip: Use a ruler to guide your pruners for perfect consistency. And never skip the rubbing alcohol between cuts—this one tiny step prevents transferring diseases that could kill your entire batch.
Medium Magic: The 50/50 perlite to peat moss mix isn't arbitrary—perlite creates air pockets while peat holds moisture. When inserting your cuttings 2 inches deep, think "shoulders buried, leaves exposed." Tap the pot gently after planting to settle the mix without compacting it. This balance is what lets roots breathe while staying hydrated. I've seen cuttings fail because people either packed the mix too tight (no air) or left it too loose (no support).
Hardening Off Strategy: After those crucial 4 weeks under the plastic bag, start the hardening process gradually—just 1-2 hours daily at first. This slow transition mimics natural conditions and prevents shock. Watch for new leaf growth at the top as your signal that roots are forming. When you're ready to transplant, do the tug test: if the cutting resists when you gently pull, roots have formed. If it slides out easily, wait another week or two.
Pro Tips for Propagate Red Bud Tree
- These little details make all the difference between thriving new trees and sad, wilted cuttings.
- Timing is Everything: Late spring to early summer is your golden window for semi-hardwood cuttings—this is when they'...
- The Angle Matters: That 45-degree angle cut in Step 1 isn't just decoration—it's science! The larger surface area hel...
Frequently asked questions
Got questions about propagating your red bud tree? You’re not alone! Here are some of the most common concerns—and their straightforward answers—to help you grow with confidence.
When is the best time to propagate a red bud tree?
The ideal time for propagation is late winter or early spring, just before new growth begins. This timing aligns with the tree’s natural dormancy period, giving roots a head start. Avoid summer propagation, as extreme heat can stress cuttings and reduce success rates.
How do I take cuttings from a red bud tree?
Use 4- to 6-inch semi-hardwood cuttings from the current year’s growth, taken just below a leaf node. Remove lower leaves to expose the stem, then dip the cut end in rooting hormone for best results. Avoid overwatering—keep the soil lightly moist but well-draining.
Can I propagate a red bud tree from seed instead of cuttings?
Yes! Collect seeds from mature pods in late spring or summer, clean them, and plant in a well-draining mix. However, seed-grown trees may take 3-5 years to bloom, while cuttings produce faster, genetically identical replicas of the parent tree.
Why aren’t my red bud cuttings rooting?
Common issues include poor humidity (try a plastic bag or propagator), overwatering (root rot is a risk), or lack of rooting hormone. Ensure cuttings stay in bright, indirect light and maintain consistent moisture—patience is key!
How long does it take for red bud cuttings to root?
With proper care, most cuttings show root growth in 4-8 weeks. Transplant them once roots are 1-2 inches long to reduce shock. Young red buds grow slowly, so give them time—spring and summer are the fastest growth periods.
Wrapping up and next steps
Propagating a red bud tree is a rewarding journey that brings the promise of stunning spring blooms to your garden!
With the right tools, patience, and care—whether through seeds, cuttings, or grafting—you can successfully grow these vibrant trees. Remember, consistency is key: monitor moisture, protect young plants, and give them time to thrive.
Now that you’re armed with knowledge, take the next step! Start with a small batch of cuttings or seeds this season, and soon you’ll be enjoying the beauty of red buds in your own backyard. Happy gardening! 🌱✨