
Pruning
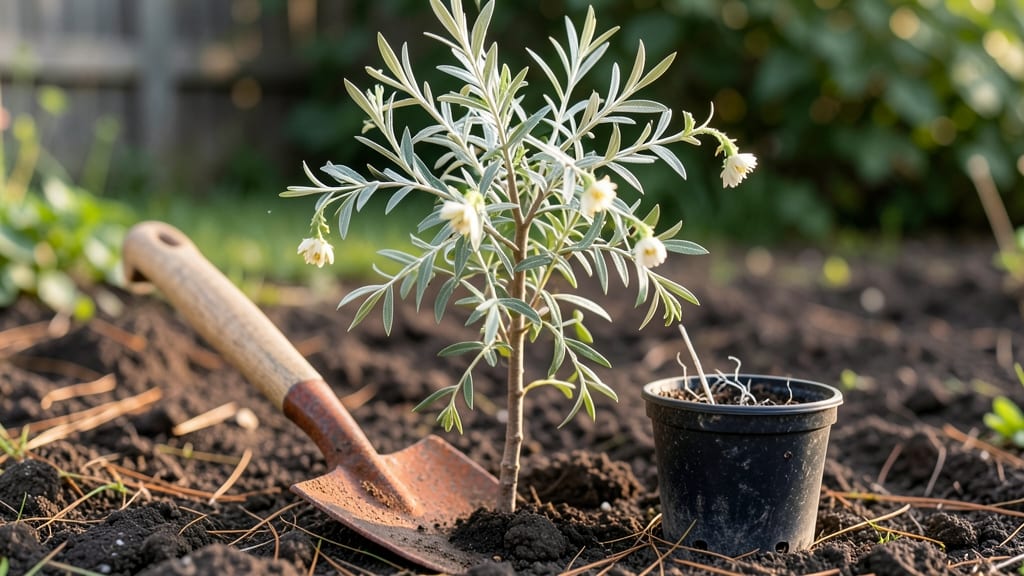
Planting a Russian olive tree sapling means you’re getting a frost-hardy survivor that thrives where other trees give up—drought, poor soil, and subzero temps won’t phase it. 🌿 I’ve watched mine push through three Colorado winters with barely a browning leaf, and the secret starts with the right spot and soil prep.
This isn’t just a tree; it’s a low-maintenance powerhouse that rewards patience with silvery foliage and wildlife-friendly berries.
The key to long-term success? Well-draining soil and full sun exposure—no compromises. Dig a hole twice as wide as the root ball but only as deep, then mix in a handful of compost for a boost.
Space saplings 15-20 feet apart to give them room to grow into their natural, sprawling shape, and water deeply once a week for the first month to encourage root spread. Russian olives hate soggy feet, so raised beds or slopes work better than low-lying spots.
Pruning isn’t just about shaping—it’s about encouraging strong branches and preventing disease. Cut back dead or crossing limbs in late winter or early spring, and thin out crowded growth to improve airflow.
The tree’s natural resilience means you’ll do less pruning over time, but those first few cuts set the stage for a taller, healthier specimen that outlasts most landscapes. By year three, you’ll have a sturdy, drought-proof anchor for your yard.
This tree handles Zone 3-9 climates, making it perfect for northern gardens, arid regions, or windy coastal areas. The trade-off? It spreads aggressively—plant it where it can roam, not where it’ll need constant containment.
For beginners, the biggest mistake is overwatering or planting too deep; stick to the rules, and you’ll have a near-indestructible tree that pays dividends for decades.
📚 In This Guide
- What you need
- Instructions
- Tips and common mistakes
- Wrapping up and next steps
What you need
- ● Russian olive tree sapling (1–3 years old, 1–3 ft tall, bare-root or potted)
- ● Shovel or spade (for digging holes, 12–18" wide/deep)
- ● Garden gloves (heavy-duty, chemical-resistant)
- ● Pruning shears or loppers (bypass pruners for clean cuts, sharp and sterilized)
- ● Mulch (3–4" layer of wood chips, straw, or pine needles)
- ● Compost or well-aged manure (5–10 lbs for amending soil)
- ● Watering can or hose with nozzle (gentle spray setting for saplings)
- ○ Soil test kit (optional but recommended for pH/fertility check, ideally 6.0–7.5)
- ● Tree stake or bamboo pole (for young saplings in windy areas, 4–6 ft tall)
- ● Tree ties or soft cloth strips (to secure saplings without damaging bark)
- ● Fertilizer (balanced 10-10-10 or slow-release granules, ½ cup per tree)
- ● Planting hole conditioner (mycorrhizal fungi or root stimulator for faster establishment)
- ● Drip irrigation kit (for consistent moisture, especially in dry climates)
- ● Safety glasses (if using power tools or handling thorny branches)
How to plant and prune Russian olive tree saplings for maximum frost hardiness
Here's my battle-tested approach for establishing these tough trees in cold climates.
🪴 Step 1: Select the Optimal Planting Site and Prepare the Soil
Russian olives thrive in full sun—choose a location with at least 6-8 hours of direct sunlight daily. These trees tolerate poor soil but grow best in well-draining loam with a pH between 6.5 and 8.0. If your soil is heavy clay, amend it with 2-3 inches of coarse sand or gravel before planting to prevent root rot.
Dig a hole twice as wide as the sapling's root ball but only as deep as the container it came in. The top of the root ball should sit 1-2 inches above ground level—this prevents waterlogging during heavy rains. I always loosen the sides of the hole with a shovel to encourage root spread into surrounding soil.
🌱 Step 2: Plant the Sapling with Proper Spacing and Watering
Gently remove the sapling from its container and tease the roots outward if they're circling. Place it in the hole so the root flare (where roots meet trunk) is visible above soil level. Backfill with native soil, tamping lightly every 6 inches to remove air pockets. For 4 saplings, space them 15-20 feet apart—this allows full growth without overcrowding.
Water deeply immediately after planting to settle the soil and eliminate air gaps. Use 5-10 gallons of water per sapling, applied slowly at the base. Avoid watering from above—this can erode soil around the trunk. Mulch with 2-3 inches of wood chips in a 3-foot diameter circle, keeping mulch 6 inches away from the trunk to prevent rot.
✂️ Step 3: Prune for Structure and Frost Resistance
Prune new saplings lightly in their first year to establish a strong framework. Remove any dead, damaged, or crossing branches using clean, sharp pruners. Cut just outside the branch collar (the swollen area where the branch meets the trunk). Russian olives respond well to pruning—you can shape them into single-trunk trees or allow multiple leaders for a bushier form.
In colder climates, delay major pruning until late winter or early spring when the tree is still dormant. This timing prevents frost damage to fresh cuts. If you must prune in fall, do so at least 6 weeks before first frost to allow wounds to heal. I always sterilize my pruners with 70% rubbing alcohol between cuts to prevent disease spread.
☀️ Step 4: Maintain Through Seasons for Long-Term Frost Hardiness
Water newly planted saplings once weekly during the first growing season, increasing to twice weekly during droughts. Mature Russian olives are drought-tolerant, but young trees need consistent moisture to establish roots. Water deeply each time—soil should remain moist 6-8 inches down—but never soggy.
Fertilize lightly in early spring with a balanced 10-10-10 formula, applying ½ pound per tree. These trees don't need much—over-fertilizing leads to weak growth that struggles in winter. In fall, reduce watering gradually to prepare for dormancy. A thin layer of mulch (renewed annually) helps insulate roots during freezing temperatures.
Tips & tricks for frost-hardy Russian olive planting
These battle-tested strategies will help your Russian olive saplings thrive in cold climates—where most gardeners give up.
Sunlight Secret: While 6-8 hours of direct sunlight is the minimum, I've found saplings planted in full sun locations with afternoon shade actually perform better in extreme cold. The afternoon sun helps harden the bark, while shade prevents midday stress that weakens winter resilience. Position your saplings where they'll get morning sun and filtered afternoon light if possible.
Root Ball Rescue: If you notice circling roots when removing saplings from containers (a common issue with nursery stock), make 2-3 vertical cuts around the root ball with a clean knife before planting. This encourages outward root growth instead of the tight spiral pattern that strangles development. The cuts should be shallow—just enough to break the root ring without damaging the main roots.
Watering Wisdom: Those 5-10 gallons per sapling might seem like a lot, but it's crucial for establishing strong root systems in cold climates. I recommend using a soaker hose for the first watering—it delivers moisture directly to the root zone without disturbing the soil around the trunk. For the first week after planting, check soil moisture 6 inches down daily; if it's dry, water again immediately. This deep watering routine prevents shallow root systems that freeze more easily in winter.
Pruning Precision: When pruning in late winter or early spring, look for branches that grow at angles less than 45 degrees from the trunk—these are prime candidates for removal. The 6-week rule before first frost is critical: wounds need time to callus over before winter arrives. I always mark my pruning calendar with the expected frost date and count backward to schedule my final fall pruning session.
Pro Tips for Russian Olive Tree Sapling
- These battle-tested strategies will help your Russian olive saplings thrive in cold climates—where most gardeners give up.
- Sunlight Secret: While 6-8 hours of direct sunlight is the minimum, I've found saplings planted in full sun locations with afternoon shade actually perform better in extreme cold.
- Root Ball Rescue: If you notice circling roots when removing saplings from containers (a common issue with nursery stock), make 2-3 vertical cuts around the root ball with a clean knife before planting.
Frequently asked questions
about Russian olive tree saplings—here’s what you need to know before planting and pruning!When is the best time to plant a Russian olive sapling?
The ideal time is early spring (March–April) or fall (September–October). Planting in spring gives roots time to establish before summer heat, while fall allows for root growth before winter dormancy. Avoid planting in extreme heat or frost.
How cold-hardy are Russian olive saplings?
Russian olives thrive in USDA Zones 3–9, tolerating temperatures as low as -40°F. Young saplings may need winter protection (mulch, burlap wraps) until fully established. Their drought resistance makes them perfect for harsh climates!
Should I prune my sapling the first year?
No—wait until spring or early summer of the second year. Prune only to remove dead/diseased branches. Over-pruning young trees stresses them. Focus on shaping in later years when growth stabilizes.
Are there alternatives to Russian olive for erosion control?
Yes! Consider seaberry (Hippophae rhamnoides) (similar hardiness) or Russian olive’s native cousin, four-wing saltbush (Atriplex canescens). Both support wildlife but may have different soil preferences—check local suitability.
Why are my sapling’s leaves turning yellow?
Yellowing leaves often signal overwatering (Russian olives hate soggy roots) or nutrient deficiency (test soil pH; they prefer slightly alkaline). Adjust watering and fertilize lightly with low-nitrogen options if needed.
Do Russian olives attract pests?
Generally pest-resistant, but watch for aphids or scale insects on new growth. Spray with neem oil or introduce ladybugs for natural control. Their drought tolerance reduces pest risks compared to thirsty trees.
Wrapping up and next steps
Growing a Russian olive tree sapling is a rewarding journey—especially when you embrace its drought-tolerant, frost-resistant nature! 🌱 With the right planting techniques, pruning know-how, and a little patience, you’ll nurture a hardy tree that thrives in even the toughest climates.
Whether you’re a seasoned gardener or just starting out, your efforts will soon yield a stunning addition to your landscape.
Ready to take the next step? Start by marking your planting spot and gathering your tools—your Russian olive’s future begins today! 🌿