Blooming
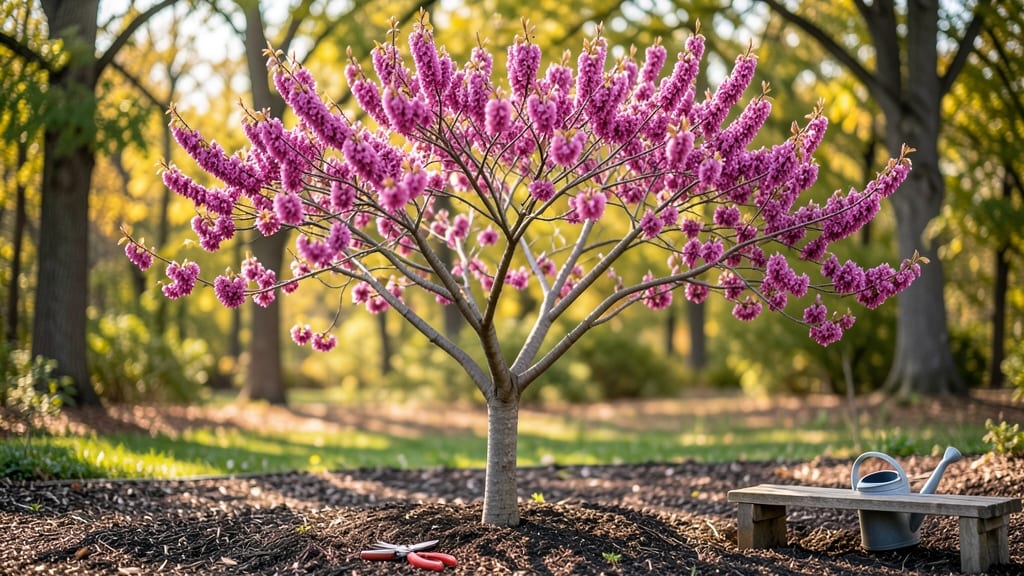
The Pacific Northwest’s early spring bursts into color when redbud trees in bloom paint hillsides pink and purple. 🌸 I remember the first time I saw a redbud forest—it felt like nature’s own confetti explosion after months of gray.
These trees don’t just bloom; they announce spring with dramatic flair, often weeks before other trees wake up.
What makes them special is their timing and versatility. In the PNW, redbuds typically bloom in late March to early April, turning even the driest winter into a hopeful prelude to spring.
They thrive in partial shade, making them perfect for woodland gardens or urban backyards where full sun isn’t guaranteed. The blooms last only a few weeks, but their heart-shaped leaves add lush green texture for months afterward.
You’ll love how they transform a space—imagine a tree with cascading pink flowers that catch the light through bare branches. Pair them with daffodils at their feet or let them stand alone as a focal point.
The key to maximizing their display? Prune in late winter to open the canopy, and avoid heavy fertilizing, which can reduce flowering.
They’re low-maintenance but high-impact, perfect for gardeners who want drama without fuss. Once established, they handle our region’s wet springs and mild summers like champions. Here’s how to make the most of their stunning season.
📚 In This Guide
- What you need
- Instructions
- Tips and common mistakes
- Wrapping up and next steps
What you need
- ● Redbud tree seedlings or saplings: 1–3 plants (choose Cercis occidentalis for native PNW varieties). Opt for 1–2 gallon containers for young trees or 5+ gallon pots for established ones.
- ● Shovel or trowel: Medium-sized (12–18 inches) for digging holes.
- ● Native soil or compost blend: 2–3 cubic feet per tree (amend with 10–20% compost for better drainage).
- ○ Mulch (optional but recommended): 2–3 inches of cedar chips, wood chips, or straw to retain moisture and suppress weeds.
- ● Watering can or hose with a gentle spray nozzle: For post-planting hydration.
- ● Pruning shears: Bypass pruners (for clean cuts on branches up to ½ inch thick).
- ○ Fertilizer (optional): Slow-release balanced 10-10-10 or native-friendly fertilizer (apply in early spring or fall).
- ● Tree ties or soft garden twine: 1–2 rolls (to support young trees in windy PNW conditions).
- ● Pest control (if needed): Neem oil spray or horticultural soap (for aphids or spider mites).
- ● Camera or smartphone: For capturing those pink-and-purple blooms at their peak!
- ○ Binoculars (optional): To spot wildlife like hummingbirds and bees buzzing around the flowers.
- ● Local PNW planting guide: Check USDA Zone 7–9 suitability for your area.
How to grow and care for stunning redbud trees in the Pacific Northwest
Here's how to coax those signature pink blooms from your redbuds every spring.
🌱 Step 1: Choose the Perfect Planting Location
Redbuds thrive in the Pacific Northwest's mild climate but need the right spot. Plant where they'll receive full sun to partial shade—at least 4-6 hours of direct sunlight daily. I always pick a location with well-draining soil because soggy roots lead to root rot, and nobody wants a sad, leafless tree.
Here's the thing—redbuds love sheltered spots that protect them from harsh winds. A spot near a fence or building works perfectly. Test the soil by digging a 6-inch hole—if water pools after 10 minutes, amend with 2-3 inches of compost to improve drainage. The goal is soil that holds moisture but doesn't stay soggy.
☀️ Step 2: Plant at the Right Time and Depth
Fall or early spring are the best times to plant redbuds in the Pacific Northwest. I prefer early spring because it gives roots time to establish before summer heat. Dig a hole twice as wide as the root ball but no deeper—redbuds hate being buried too deep, which can suffocate the trunk.
Gently remove the tree from its container and loosen any circling roots with your fingers. Place it in the hole so the top of the root ball sits 1-2 inches above ground level. This prevents water from pooling around the trunk. Backfill with native soil, tamping lightly every 6 inches to remove air pockets. Water deeply until the soil is evenly moist to a depth of 12 inches.
💧 Step 3: Water and Mulch for Early Success
Water your redbud deeply once a week during the first growing season, aiming for 1-2 gallons per tree. You'll know you've watered enough when the soil feels damp 6 inches down—stick your finger in to check. Overwatering is just as bad as underwatering, so let the top 2 inches of soil dry out between waterings after the first month.
Spread 3 inches of mulch (like wood chips or bark) around the base, keeping it 3 inches away from the trunk to prevent rot. Mulch helps retain moisture and keeps roots cool in summer. Replenish mulch annually—it breaks down faster than you think. This is the moment that matters: proper mulching sets up your tree for years of strong growth and vibrant blooms.
✂️ Step 4: Prune for Shape and Bloom Health
Prune redbuds in late winter or early spring before new growth begins. Remove any dead, diseased, or crossing branches first—these compete with healthy growth. I always start at the top and work my way down, cutting branches back to a healthy bud or lateral branch. Redbuds bloom on old wood, so avoid heavy pruning in fall or winter.
Shape your tree by thinning out crowded branches to improve airflow—this prevents fungal diseases. You'll see new growth emerge within 2-3 weeks of pruning, signaling the tree is healing well. Real talk: Don't over-prune. Redbuds are forgiving, but aggressive cuts can reduce next year's flower display. Aim to remove no more than 25% of the tree's foliage in any one year.
🌿 Step 5: Fertilize and Protect for Long-Term Blooms
Fertilize redbuds in early spring with a balanced, slow-release fertilizer (like 10-10-10). Sprinkle ¼ cup around the drip line—that's the edge of the tree's canopy—and water it in well. Too much fertilizer burns roots, so stick to this light application unless your soil is particularly poor. Test your soil every 2-3 years to check nutrient levels.
Watch for Japanese beetles or aphids in late spring—they love redbud leaves. Spray with neem oil if you see clusters of pests, but only as a last resort. Healthy redbuds in the Pacific Northwest rarely need pesticides if you keep them well-watered and mulched. The key is prevention: strong trees resist pests naturally. You'll know your tree is thriving when it bursts into bloom year after year.
Tips & tricks for perfect redbud trees in bloom
Took me years of trial and error to figure out these simple tricks that'll make your Pacific Northwest redbuds thrive and burst into those stunning pink blooms every spring.
Sunlight Strategy: In Step 1, when you're choosing your planting spot, pay close attention to those 4-6 hours of direct sunlight requirement. I've noticed the most vibrant blooms come from trees that get morning sun and afternoon shade—this prevents leaf scorch while still giving them enough energy for flowering. If your yard only gets partial sun, plant against a north-facing wall or fence to maximize light exposure.
Soil Test Hack: Before planting, dig that 6-inch hole mentioned in Step 1 and do this quick test: Fill the hole with water and time how long it takes to drain. If it pools for more than 10 minutes, your soil is too dense. Mix in 2-3 inches of compost to loosen it up—this simple step prevents root rot and sets your tree up for strong growth from day one.
Watering Wisdom: During the first growing season, those 1-2 gallons of water per week in Step 3 should be applied slowly to let it soak in deeply. I use a soaker hose for 20-30 minutes to ensure even moisture distribution. The key is keeping the soil damp 6 inches down—overwatering is just as damaging as underwatering, so let the top 2 inches dry out between waterings after the first month.
Pruning Precision: When pruning in late winter or early spring (Step 4), focus on removing no more than 25% of the foliage in any one year. I always cut branches back to a healthy bud or lateral branch—this encourages new growth while preserving next year's flower display. The 2-3 week recovery time mentioned is your signal that the tree is healing properly.
Pro Tips for Redbud Trees In Bloom
- Took me years of trial and error to figure out these simple tricks that'll make your Pacific Northwest redbuds thrive and burst into those stunning pink blooms every spring.
- Sunlight Strategy: In Step 1, when you're choosing your planting spot, pay close attention to those 4-6 hours of direct sunlight requirement.
- Soil Test Hack: Before planting, dig that 6-inch hole mentioned in Step 1 and do this quick test: Fill the hole with water and time how long it takes to drain.
Frequently asked questions
Got questions about redbud trees in bloom? You’re not alone! Here are some of the most common queries—plus quick answers—to help you make the most of this stunning early spring spectacle.
When do redbud trees typically bloom in the Pacific Northwest?
Redbud trees usually burst into vibrant pink or purple blooms in late February to early April in the PNW, often just as winter loosens its grip. Timing can vary slightly by location—cooler inland areas may see blooms a bit later than coastal regions. Keep an eye on local weather; a warm spell can trigger earlier flowers!
How tall do redbud trees grow, and are they good for small yards?
Mature redbud trees typically reach 20–30 feet tall (though some stay smaller), with a spread of 25–35 feet. Their compact size and stunning spring display make them perfect for small yards, urban landscapes, or even large containers. Just ensure they get full sun to partial shade and well-drained soil!
Why aren’t my redbud tree’s leaves or flowers looking healthy?
Common issues include overwatering (root rot risk!), nutrient deficiencies (yellow leaves? Try iron or nitrogen), or pests like aphids (spray with water or insecticidal soap). If blooms are sparse, check for too much shade—redbuds thrive in sunlight. Prune dead branches in late winter to encourage new growth.
Can I plant a redbud tree now, or should I wait for fall?
While fall is ideal (cooler temps = better root establishment), you can plant redbuds in early spring before buds break (March–April). Avoid extreme heat or drought—mulch well and water deeply. If planting in summer, opt for container-grown trees to reduce transplant shock.
Are there redbud tree alternatives with similar spring color?
Yes! If you love redbuds’ early blooms but want variety, try:
- Eastern Redbud (Cercis canadensis) – Classic pink blooms, slightly larger.
- Japanese Tree Lilac (Syringa reticulata) – Fragrant white/pink flowers, later bloom.
- Serviceberry (Amelanchier) – White blooms + edible berries!
- Dwarf Fothergilla (Fothergilla gardenii) – Compact, with showy spring flowers.
Wrapping up and next steps
Witnessing redbud trees in bloom in the Pacific Northwest is a true gift of early spring—transforming landscapes into vibrant bursts of pink and purple magic. 🌸 Whether you’re admiring them from afar, planting your own, or simply soaking in their beauty, these trees remind us that nature’s best shows arrive just in time.
Now that you’re armed with tips and insights, why not take the next step?
- 🌱 Plan a visit to a local park or garden to catch the peak bloom.
- 🌿 Consider adding one to your yard for a splash of seasonal color.
- 📸 Capture the moment—share your photos with #PNWRedbudBloom!
Spring’s fleeting beauty calls for action—go make the most of it!