
Pruning
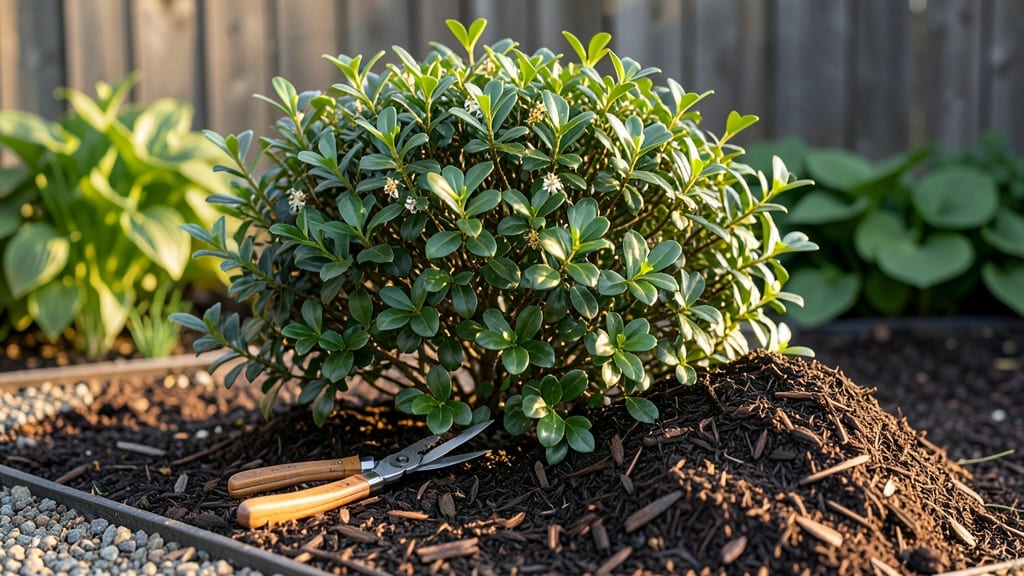
Pruning evergreen trees and shrubs in late winter unlocks their full potential for the season ahead. 🌲 I learned the hard way that timing matters—skipping this window means missing the chance to shape growth while plants are still dormant but ready to rebound.
The right cuts now encourage thicker foliage, stronger branches, and fewer pests later.
You’ll need sharp bypass pruners, a sturdy ladder, and gloves to protect your hands from rough needles. Focus on removing dead wood first, then thin out crowded branches to improve airflow—this prevents disease and lets sunlight reach the center.
My biggest mistake? Over-pruning young shrubs; now I stick to removing no more than 25% of the foliage at a time.
By spring, you’ll see fuller, healthier plants with vibrant new growth. Evergreens like junipers and arborvitae respond best to light shaping, while broadleaf types (like holly) need precise cuts to maintain their form. The key is patience—rush the job, and you’ll stress the plant for years.
Works for both backyard shrubs and towering evergreen trees, though larger jobs may require a professional’s touch. Let’s get those branches looking their best before the growing season kicks in!
📚 In This Guide
- What you need
- Instructions
- Tips and common mistakes
- Wrapping up and next steps
What you need
- ○ Pruning shears: Bypass pruners (for clean cuts on small branches, 4–6" blades, stainless steel or high-carbon steel). Optional: Anvil pruners (for thicker branches, but can crush wood).
- ● Loppers: 18–24" bypass loppers (for medium branches, 1.5–2" cutting capacity).
- ● Pruning saw: Curved-tooth pruning saw (for branches thicker than 2" diameter).
- ● Extension pole: 10–15 ft telescoping pole (for high branches, attachable to pruners/saws).
- ● Gloves: Heavy-duty, cut-resistant gloves (to protect hands from thorns and sharp tools).
- ● Safety glasses: ANSI-rated (to shield eyes from debris).
- ● Disinfectant: 70% isopropyl alcohol or bleach solution (1 part bleach to 9 parts water) (to sterilize tools between cuts and prevent disease spread).
- ● Sharpie or marking pen: Waterproof (for labeling cuts if needed).
- ● Heavy-duty trash bags: 10–20 gallon (for collecting pruned branches).
- ● Ladder: Sturdy, non-slip (for reaching higher branches safely).
- ● Work gloves with grip: For better control (if not using cut-resistant gloves).
- ● Tree wound dressing: Pruning sealant (controversial—skip if unsure; healthy trees heal best without it).
- ● Notebook or app: For sketching pruning plans (helpful for complex shrubs like boxwoods or yews).
- ● Check the weather: Prune on a dry, calm day (avoid wind or rain).
- ● Know your plants: Research specific pruning needs for your evergreens (e.g., thuja, juniper, or pine may require different techniques).
- ● Safety first: Wear closed-toe shoes and avoid pruning near power lines.
How to prune evergreen trees and shrubs for healthier growth
Late winter’s the perfect time to shape evergreens—here’s my go-to method for cleaner cuts and stronger plants.
✂️ Step 1: Gather the Right Tools and Inspect Your Plants
Start with sharp, clean pruning shears or loppers—dull blades tear tissue, inviting disease. I always sterilize tools with rubbing alcohol between cuts on different plants. Evergreens bleed sap, so work on a dry day when branches aren’t brittle from frost.
Scan each plant for dead, crossing, or rubbing branches first. These are your priorities—they compete with healthy growth. Look for brown needles or bare spots; these signal dying wood. Mark these areas with a piece of twine or flagging tape before you begin.
✂️ Step 2: Remove Dead and Problematic Branches First
Cut out dead branches at their base, making clean slices just outside the branch collar (the swollen area where the branch meets the trunk). Avoid leaving stubs—these trap moisture and rot. For larger branches, use three cuts: undercut first, then cut above, and finally remove the remaining stub.
Next, tackle crossing or rubbing branches. These create wounds that weaken the plant. Remove the smaller of the two branches at its point of origin. If they’re equal in size, cut one back to a lateral branch or bud. Watch for new growth direction—you’ll see buds forming where the branch splits.
✂️ Step 3: Thin Out Overcrowded Areas for Better Airflow
Evergreens need airflow to prevent fungal issues, so thin the canopy by removing up to 25% of the oldest or innermost branches. Focus on branches growing inward or downward—they block light and encourage disease. Start at the bottom and work upward to maintain the plant’s natural shape.
Make your cuts just above a bud or lateral branch. Angle the cut slightly away from the bud so water runs off. If you’re unsure which way to angle, imagine a line from the branch to the trunk—cut just above that. Avoid cutting flush with the trunk, which can damage the collar and invite decay.
☀️ Step 4: Shape and Refine for Balance and Form
Now’s the time to refine the plant’s silhouette. Step back frequently to check proportions—evergreens should look full but not top-heavy. For shrubs, aim for a rounded or tiered shape, while trees benefit from an open center to let light through. Use your shears to trim back overlong branches to a lateral branch or bud.
For formal hedges, use hedge shears to create clean lines. Work in sections, keeping the blades parallel to the ground. For natural shapes, avoid shearing—just remove stray branches to encourage a more organic look. Here’s the thing: evergreens grow slowly, so take your time. Rushed cuts look sloppy and stress the plant.
🌿 Step 5: Clean Up and Monitor for Recovery
Rake up all clippings and dispose of them in the trash—not the compost pile. Evergreen clippings take years to decompose and can harbor pests. Sterilize your tools again with rubbing alcohol to prevent spreading disease between plants.
Water deeply after pruning to help the plant recover. You’ll notice new growth at the cut edges within 4-6 weeks, signaling the plant is healing. Avoid fertilizing right after pruning—let the plant focus on recovery first. If you see yellowing needles or wilting, you’ve over-pruned; evergreens are tough but not indestructible.
Tips & tricks for pruning evergreen trees and shrubs
Late-winter pruning sets your evergreens up for a fuller, healthier growing season—here's how to avoid common mistakes and get professional results.
Tool Prep is Non-Negotiable: Sterilizing your tools between cuts in Step 1 isn't just about hygiene—it prevents spreading fungal diseases like needle blight. I keep a small bottle of rubbing alcohol in my tool belt and wipe blades after every 3-4 cuts, especially when moving between different plants. Dull blades tear tissue instead of making clean cuts, so sharpen your shears annually or after heavy use. A quick field test: if you struggle to cut through a small twig cleanly, your blades need attention.
The 25% Rule for Step 3: When thinning overcrowded areas, never remove more than 25% of the oldest branches at once. This might seem like a small amount, but evergreens grow slowly and can't recover from aggressive pruning. Think of it this way: you're creating space for new growth, not stripping the plant bare. I mark my 25% target by visually dividing the plant into quarters and focusing on the oldest, innermost branches in each section. These are the ones blocking light and air circulation.
Bud Direction Matters: In Step 2 and Step 4, always cut just above a bud that's facing outward. This simple technique determines where your plant will grow next. I teach my gardening students to imagine a line from the bud to the trunk—your cut should be just above that line. For formal hedges, look for buds that point in the direction you want the hedge to grow. This creates cleaner lines and reduces future maintenance.
Recovery Timeline: The 4-6 week recovery period mentioned in Step 5 is your plant's way of telling you to be patient. You'll see tiny green buds forming at the cut edges—this is new growth! If you're impatient and fertilize too soon, you'll stress the plant further. Instead, water deeply once a week and monitor for yellowing needles, which is the plant's distress signal. A little yellowing is normal, but widespread yellowing means you've over-pruned.
Pro Tips for Pruning Evergreen Trees And Shrubs
- Late-winter pruning sets your evergreens up for a fuller, healthier growing season—here's how to avoid common mistakes and get professional results.
- Tool Prep is Non-Negotiable: Sterilizing your tools between cuts in Step 1 isn't just about hygiene—it prevents spreading fungal diseases like needle blight.
- The 25% Rule for Step 3: When thinning overcrowded areas, never remove more than 25% of the oldest branches at once.
Frequently asked questions
Got questions about pruning evergreens? You’re not alone—this task can feel tricky, especially when timing and technique matter so much! Below, we’ve rounded up the most common questions (and answers) to help you prune with confidence.
When is the absolute best time to prune evergreens?
The ideal window is late winter (just before new growth starts), typically February through early March in most U.S. climates. This timing minimizes stress on the plant and encourages vigorous spring growth. Avoid pruning in fall or early winter—evergreens are more vulnerable to cold damage and pests during dormancy.
Can I prune evergreens in summer? What are the risks?
Summer pruning is possible but risky—it can stress the plant, invite pests, and stunt growth. If you must prune in summer (e.g., for safety or aesthetics), do it early morning to reduce water loss, and avoid cutting more than 25% of the foliage. Light trimming for shape is fine, but major pruning? Wait for late winter.
How do I know if I’m over-pruning my evergreen?
Watch for these red flags: bare patches (where branches died back), stunted growth, or yellowing needles. If you’ve trimmed more than 1/3 of the plant’s canopy at once, you’ve likely overdone it. Evergreens rely on their foliage for photosynthesis—too much pruning = weak recovery. Pro tip: Prune gradually over 2–3 years if needed!
Should I sterilize my pruners between cuts?
Absolutely!
Sterilizing tools (with rubbing alcohol or a 10% bleach solution) prevents spreading diseases like Phytophthora or fungal infections. Wipe blades before and after each plant, especially if pruning sickly or overgrown evergreens. Clean tools = healthier plants!
What’s the difference between “thinning” and “heading back” evergreens?
| Thinning | Heading Back |
|---|---|
| Removing entire branches back to the trunk or main stem to improve airflow and light penetration. Best for dense shrubs like Juniper or Pine. | Cutting part of a branch (e.g., the top 6–12 inches) to encourage bushier growth. Works well for Yew or Boxwood. |
| Goal: Open up the plant, reduce disease risk. | Goal: Stimulate new growth, maintain shape. |
Key rule:
Thin first, then head back if needed—but never do both in the same year for mature evergreens!
Wrapping up and next steps
Pruning evergreen trees and shrubs in late winter isn’t just about tidying up—it’s your secret weapon for healthier, more vibrant plants all season long. 🌿 By following the right techniques, timing, and tools, you’ll encourage lush growth, prevent pests, and keep your landscape looking its best.
So grab your pruners, take a deep breath, and get ready to transform your outdoor space with confidence!
Next step: Start small—pick one shrub or tree and practice your new skills. Before you know it, you’ll be a pruning pro, and your evergreens will thank you with stunning, year-round beauty!