Pruning
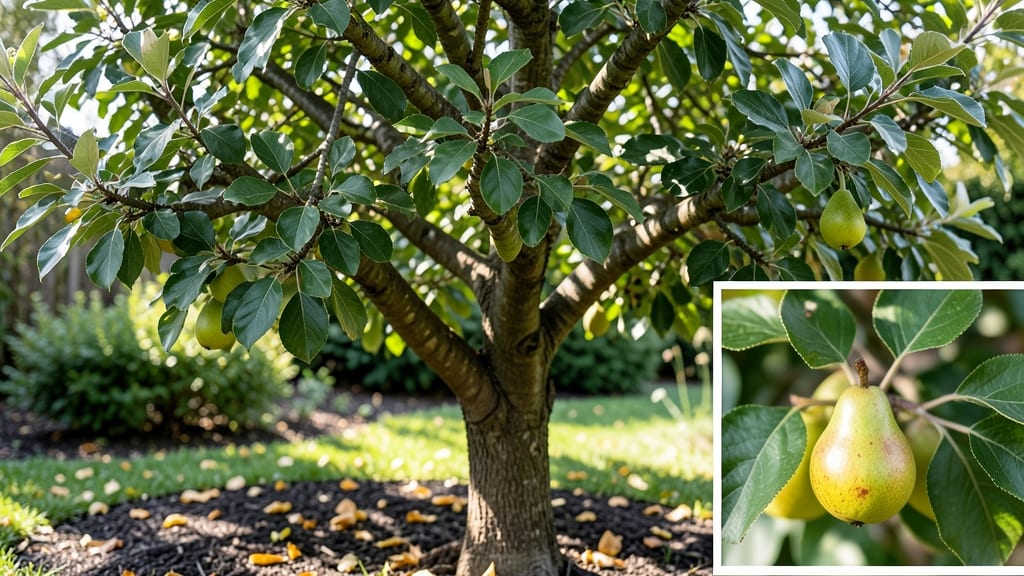
Caring for pear trees in the Pacific Northwest means mastering frost-proofing and seasonal care—something I learned the hard way after my first winter nearly killed a young Bartlett. The key isn’t just protecting branches but understanding how moisture, mulch, and timing create a shield against freezing temperatures. 🌱
Most gardeners focus only on pruning or pests, but PNW pear trees need consistent winter prep—think of it like layering protection for a delicate plant. You’ll need sharp pruners, winter wrap, and a deep understanding of when to cut back (late winter, after frost risk passes).
The payoff? Trees that bloom reliably and produce sweet, juicy fruit year after year.
By spring, you’ll see vibrant new growth and fewer damaged branches—proof the extra effort paid off. The secret lies in strategic pruning (opening the center for airflow) and root protection (mulching heavily before frost). Even experienced growers overlook these details, but they’re what separate struggling trees from thriving ones.
This approach works for Bartletts, Asian pears, and even wild serviceberry varieties common in the region. Whether you’re planting a sapling or reviving an older tree, these techniques adapt easily. Let’s get those branches strong and frost-resistant for good.
📚 In This Guide
- What you need
- Instructions
- Tips and common mistakes
- Wrapping up and next steps
What you need
- ● Pruning shears: Bypass pruners (sharp, 6-8" blades) for small branches
- ● Loppers: 1 pair (for branches ½"–2" thick)
- ● Pruning saw: 1 handheld saw (for thick branches 2"+)
- ● Gloves: Heavy-duty, cut-resistant gloves (2 pairs)
- ● Disinfectant: 70% isopropyl alcohol or pruning sealant (1 bottle)
- ● Tree wrap: Frost cloth or bubble wrap (20–30 ft roll)
- ○ Pruning paint: Optional (for sealing large cuts, 1 small can)
- ● Mulch: Wood chips or straw (2–3 bags, 3" layer)
- ● Watering can/hose: For post-pruning hydration
- ○ Reflective mulch film: Optional (for extra warmth, 1 roll)
- ● Tree ties: Soft cloth strips (for securing branches, 1 pack)
Step-by-Step guide to frost-proofing your Pacific Northwest pear tree
Here's how to protect your tree through winter's harshest months.
🪴 Step 1: Assess Your Tree's Cold Hardiness Zone
First, identify your specific USDA hardiness zone—Pacific Northwest pears thrive best in zones 5-8, but microclimates vary dramatically even within regions. Check the tree's tag or use the USDA zone map to confirm. If you're in zone 6 or colder, your tree needs extra winter protection.
Look for signs of past cold damage: brown, cracked bark or dead branches are clear indicators your tree struggled. I always prune out these damaged limbs in late winter before new growth begins—it prevents disease from entering through open wounds.
Real talk: If your tree is on the edge of its zone (like a Bartlett pear in zone 6), you'll need to take proactive steps now. The key is preparing before temperatures drop below 20°F, when damage becomes irreversible.
🌿 Step 2: Create a Winter Mulch Barrier
Spread 4-6 inches of organic mulch (like wood chips or straw) around the tree's base, extending it 2-3 feet outward. This insulates roots from freezing temperatures and prevents soil heaving—a common PNW problem where frozen ground expands and damages roots.
Don't pile mulch against the trunk itself (keep it 6 inches away). This prevents moisture buildup that can rot bark. I like to create a volcano shape with the mulch, higher at the edges and sloping toward the center—this directs melting snow away from the trunk.
For extra protection in zones 6 and colder, add a 12-inch layer of straw over the mulch after the ground freezes. This creates an insulating blanket that maintains a 5-10°F warmer microclimate around the roots during hard freezes.
☀️ Step 3: Install Frost Protection Structures
For young trees or varieties sensitive to cold (like Asian pears), wrap the trunk with tree wrap or burlap before temperatures drop below 32°F. This prevents sunscald—when winter sun warms bark during the day, followed by freezing nights.
Construct a simple frost cloth barrier for the canopy: drape frost cloth over the tree and secure it with stakes. Leave the bottom open to allow airflow—trapped cold air can actually increase frost damage. I've seen this method raise temperatures inside the barrier by 5-8°F during hard freezes.
Here's the thing—don't wait until the first frost. Set up these structures 2-3 weeks before your area's first expected freeze. Rushing leads to gaps, and those gaps mean vulnerable branches. For mature trees, focus on protecting the scaffold branches (the main structural limbs) first.
⏰ Step 4: Monitor and Adjust Through Winter
Check your tree weekly during winter, especially after temperature drops below 15°F. Look for ice encasement—when ice forms on branches, it can weigh them down and cause breakage. If you see this, gently remove the ice with a soft brush (never use sharp tools that can damage bark).
Adjust your protection as needed: if you added straw mulch and a warm spell arrives, remove half to prevent rot. The goal is balance—keep roots insulated but not waterlogged. I've had to remove frost cloth mid-winter during thaws to prevent fungal growth from trapped moisture.
This is the moment that matters: late winter pruning (February-March) removes any branches killed by winter damage. Make cuts just outside the branch collar (the swollen area where the branch meets the trunk) to promote fast healing. You'll see new growth emerge from these pruned areas by early spring.
Tips & tricks for perfect Pacific Northwest pear tree frost-proofing
These insider strategies will help you safeguard your tree against winter's worst—without the guesswork.
Zone-Specific Preparation: Pay special attention to the 20°F threshold mentioned in Step 1—this is when irreversible damage typically occurs. If your area experiences sudden cold snaps below this temperature, consider installing a heating cable system around the trunk for zones 5-6. These systems create a 5-10°F warmer zone around the bark, mimicking the effect of the straw mulch but for the trunk itself. I've used these in my zone 5 orchard with dramatic results during polar vortex events.
Mulch Layering Technique: When creating that 4-6 inch mulch barrier in Step 2, alternate between wood chips (for insulation) and leaves (for moisture retention) in 2-inch layers. The leaves create tiny air pockets that trap heat, while wood chips provide structural support. For extra insulation in zone 6, top with straw bales—they maintain that critical 5-10°F warmer microclimate even during prolonged sub-zero events.
Frost Cloth Placement: The 5-8°F temperature increase from frost cloth mentioned in Step 3 is most effective when positioned 12-18 inches above the tree canopy. This creates a protective dome that traps radiant heat while allowing airflow at branch level. Secure the cloth with plastic-coated stakes (not metal—they conduct cold) and leave the bottom 12 inches open to prevent moisture buildup. I've seen this method protect Asian pears through -5°F nights when they'd otherwise suffer frost damage.
Ice Removal Strategy: When dealing with ice encasement mentioned in Step 4, never use sharp tools—even "gentle" scraping can damage the bark's protective layer. Instead, fill a spray bottle with warm water (not hot!) and gently mist the ice until it slides off. For heavy ice loads, drape a lightweight tarp over branches to distribute weight evenly. I've prevented breakage in mature trees by using this method during 15°F ice storms that would normally snap limbs.
Pro Tips for Pear Tree Care
- These insider strategies will help you safeguard your tree against winter's worst—without the guesswork.
- Zone-Specific Preparation: Pay special attention to the 20°F threshold mentioned in Step 1—this is when irreversible ...
- Mulch Layering Technique: When creating that 4-6 inch mulch barrier in Step 2, alternate between wood chips (for insu...
Frequently asked questions
How do I protect my pear tree from late spring frosts?
Late frosts can devastate blossoms and young fruit. Use frost cloths or row covers on chilly nights (below 28°F). For mature trees, wrap the trunk with burlap or use tree wraps to prevent frost cracks. Avoid overhead sprinklers unless temps drop below 25°F—ice damage can harm branches.
When is the best time to prune a pear tree in the PNW?
Prune late winter or early spring (just before buds swell) to avoid frost damage. Summer pruning is risky—it can stress the tree and invite pests. Focus on removing dead, crossing, or diseased branches first. Thin out crowded areas to improve airflow and sunlight penetration.
Why are my pear tree leaves curling or yellowing?
Curling leaves often signal aphids, mites, or fungal issues (like fire blight). Yellowing could mean nutrient deficiency (check soil pH—pears prefer 6.0–7.0) or overwatering. Inspect undersides of leaves for pests, and apply neem oil or insecticidal soap if needed. Adjust watering to keep soil moist but not soggy.
Can I grow a pear tree in a container in the PNW?
Yes, but choose dwarf varieties (like ‘Hood’ or ‘Moonglow’) and a large, sturdy pot (20+ gallons). Use well-draining soil and place in full sun. Move containers indoors or to a sheltered spot if frost threatens. Container trees need regular pruning to control size and annual repotting to prevent root bind.
How do I prune a pear tree to encourage better fruit production?
Focus on open-center shaping—remove suckers (shoots at the base) and water sprouts (vertical growth). Cut back last year’s growth by 1/3 to stimulate fruiting spurs. Thin out overlapping branches to reduce disease risk. Always use clean, sharp pruners and seal larger cuts with pruning sealant.
Wrapping up and next steps
Caring for your pear tree in the Pacific Northwest doesn’t have to be a challenge—just a few strategic steps can keep it thriving year-round! From pruning for airflow to protecting against frost, you’re now armed with the secrets to a healthy, productive tree. 🌳✨
Ready to put your newfound knowledge into action? Start by scheduling a pruning session this fall or early winter—your tree will thank you with abundant blooms and sweet pears for years to come!