
Pruning
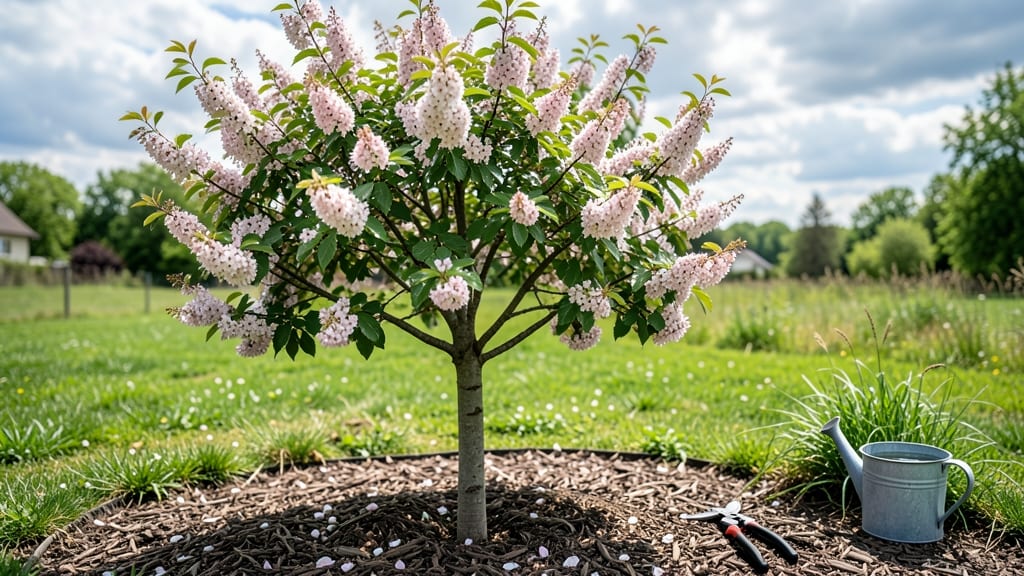
The North Star cherry tree thrives in Pacific Northwest winters because its frost-resistant branches handle snow and ice like a champ. I learned this the hard way after my first winter—when I ignored the pruning rules and ended up with a sad, lopsided tree.
The key is timing: prune in late winter or early spring before buds swell, and you’ll encourage strong growth that survives even the coldest spells.
You’ll need basic tools: sharp pruning shears, gloves, and a ladder if your tree is tall. Start by removing dead or crossing branches first—they’re the easiest to spot and the most critical to cut.
Then shape the tree by thinning out crowded areas to let sunlight reach the center. Think of it like giving your tree a haircut: less is more, and patience pays off.
What you end up with is a sturdy, productive tree that bears sweet, tart cherries year after year. The branches stay strong through storms, and the fruit ripens reliably even in cool summers.
Plus, the pruning process takes about 30 minutes once you get the hang of it—no need for fancy equipment or years of experience.
Works for backyard orchards, urban yards, or even large containers if you’re in a small space. The same principles apply whether you’re shaping a young sapling or maintaining a mature tree. Let’s get those branches looking sharp and healthy!
📚 In This Guide
- What you need
- Instructions
- Tips and common mistakes
- Wrapping up and next steps
What you need
- ● Pruning shears: Bypass pruners (sharp, 6–8" blades) for small branches (1/4"–1" thick). Pro tip: Clean blades with rubbing alcohol to prevent disease spread! 💡
- ● Loppers: 1 pair (18–24" handles) for medium branches (1"–2" thick). Look for ratcheting or bypass types for precision.
- ● Pruning saw: Curved-tooth saw (8–10" blade) for thick branches (2"+ thick). Safety first: Wear gloves to avoid splinters!
- ● Ladder: Extendable aluminum ladder (16–20 ft) with non-slip feet. ⚠️ Warning: Never stand on the top 3 rungs!
- ● Disinfectant: 70% isopropyl alcohol or 10% bleach solution (1 part bleach:9 parts water) to sterilize tools between cuts.
- ● Heavy-duty trash bags: 3–5 bags (13-gallon size) for debris disposal.
- ● Work gloves: Cut-resistant gloves (e.g., Mechanix or PIP) to protect hands from thorns.
- ● Pole saw: For high branches (20–30 ft reach). Ideal if your tree is mature!
- ● Tree wound dressing: Pruning sealant (e.g., Tanglefoot Tree Wound Pruning Seal) for large cuts (>2" diameter). 💡 Debate: Many arborists skip this—research first!
- ● Safety gear: Goggles, ear protection (if using a chainsaw), and a dust mask for sawdust.
- ● Marking twine: Colored twine to flag branches for removal (great for complex pruning plans).
- ● Wheelbarrow: For hauling heavy debris away from the work area.
- ● Timing: Prune during dormant season (late winter/early spring, before buds swell) for frost-resistant growth. Avoid pruning in wet or icy conditions!
- ● Weather check: Choose a dry, calm day (no rain forecast for 24 hours).
- ● Safety brief: Clear a 10-foot radius around the tree. Remove tripping hazards (hoses, toys, etc.).
- ● Tree health assessment: Inspect for disease or pests (e.g., canker spots, borer holes). Note any issues for post-pruning action.
Step-by-Step guide for pruning your North Star cherry tree
Here’s how to maintain a healthy, frost-resistant cherry tree that thrives in Pacific Northwest winters.
Time Your Pruning for Optimal Growth
Prune your North Star cherry tree during late winter or early spring, just as buds begin to swell but before new growth starts. This timing ensures you remove dead wood while avoiding the risk of frost damage to fresh cuts. In the Pacific Northwest, aim for February through early March—after the worst winter storms have passed but before the tree wakes up for spring.
If you notice broken branches after winter storms, remove them immediately to prevent disease. However, avoid heavy pruning in fall, as new growth won’t harden off before cold snaps. The tree’s natural dormancy period is your best ally—work with it, not against it.
Assess and Remove Dead or Damaged Wood
Start by inspecting the tree for dead, diseased, or storm-damaged branches. Dead wood is typically brittle, lacks bark, and may appear gray or black. Use sharp pruning shears to make clean cuts just outside the branch collar—the swollen area where the branch meets the trunk. This ensures the tree can seal the wound quickly and prevents rot.
If a branch is too large for hand pruning shears, use a pruning saw for branches over 1 inch in diameter. Cut on the outside of the branch bark ridge to maintain the tree’s natural shape and reduce the risk of water pooling in the wound. Remove any branches that cross or rub against each other, as these create entry points for pests and diseases.
Thin the Canopy for Airflow and Light
North Star cherry trees benefit from an open canopy that allows sunlight and airflow to reach the center of the tree. Focus on removing branches that grow inward or downward, as these create dense shade and encourage fungal growth. Aim to thin the canopy by 20-30% to maintain a balanced structure without over-stressing the tree.
When thinning, prioritize branches that are thinner than a pencil—these are easier to remove and less likely to leave large wounds. Step back frequently to visualize the tree’s shape. The goal is to create a rounded, vase-like silhouette that allows light to penetrate to the lower branches. Avoid removing more than one-third of the tree’s foliage in a single season.
Shape for Frost Resistance and Structural Integrity
To enhance frost resistance, prune to reduce wind exposure on the tree’s outer branches. Long, whip-like branches are more susceptible to winter breakage, so shorten them by one-third to create a sturdier framework. Use the third-cut method for larger branches: First, make an undercut, then an overcut, and finally remove the branch just outside the collar.
Pay special attention to the tree’s central leader—the main vertical stem. If competing leaders emerge, remove all but the strongest one to avoid a weak, multi-trunked structure. In the Pacific Northwest’s wet climate, avoid excessive topping (cutting back the top of the tree), as this can lead to water sprouts and weak regrowth. Instead, focus on selective pruning to maintain a natural, balanced form.
Tips & tricks for perfect North Star cherry tree pruning
Here's what I've learned from years of working with these hardy trees in the Pacific Northwest—these details make all the difference between a healthy tree and one that struggles.
Timing is Everything: The February through early March window is critical for North Star cherries. I've seen trees stressed when pruned too early—watch for those first swollen buds as your cue. If you miss this window, wait until after harvest in summer, but avoid fall pruning entirely in our wet climate. The tree's natural dormancy period is your best friend here, and pushing it risks frost damage to fresh cuts.
Tool Precision Matters: I can't stress enough how important sharp tools are for clean cuts. Dull pruning shears tear bark, creating larger wounds that invite disease. Always use a sharp pair of bypass pruners for branches under 1 inch, and a clean pruning saw for anything thicker. Disinfect your tools between cuts with rubbing alcohol to prevent spreading any potential pathogens from diseased branches.
Visualize the Canopy: Step back frequently during Step 3 to check your progress. I like to imagine the tree as a vase—open at the top, gradually narrowing toward the base. The goal is that rounded silhouette that lets sunlight reach all branches. When thinning, prioritize branches growing toward the center first. These are the ones that create dense shade and trap moisture, creating perfect conditions for fungal diseases in our wet climate.
Frost Resistance Strategy: In Step 4, focus on reducing wind exposure by shortening those long, whip-like branches by one-third. I've seen too many trees with these branches snap under winter storms. The third-cut method is worth mastering—it prevents bark from tearing and gives you more control. Remember, you're not just shaping the tree; you're preparing it to withstand our harsh winters.
Pro Tips for North Star Cherry Tree
- Here's what I've learned from years of working with these hardy trees in the Pacific Northwest—these details make all the difference between a healthy tree and one that struggles.
- Timing is Everything: The February through early March window is critical for North Star cherries.
- Tool Precision Matters: I can't stress enough how important sharp tools are for clean cuts.
Frequently asked questions
When is the best time to prune a North Star cherry tree?
The ideal window is late winter or early spring (February–March), before buds swell but after severe frosts pass. This balances frost resistance and growth stimulation. Avoid pruning in fall—new growth can’t harden before winter, risking damage. Pro tip: If pruning in summer, do it early (June) to minimize stress.
How do I protect cuts from frost damage?
Use sterilized pruners to make clean cuts at a 45° angle, just above a bud or branch collar. Seal larger wounds (over ½ inch) with pruning sealant to prevent disease and frost cracks. For young trees, wrap the trunk with tree guard or burlap during extreme cold snaps. Remember: Healthy trees handle frost better—focus on air circulation during pruning!
How long does it take for a North Star cherry tree to recover after pruning?
Most trees show new growth within 4–6 weeks of pruning, but full recovery (callus formation, wound closure) can take 1–2 years for larger cuts. Monitor for epicormic sprouts (suckers)—these indicate stress. If growth stalls, check for pests (e.g., borers) or fungal issues like canker disease.
Can I prune a North Star cherry tree in winter?
Yes, but only in mild winters (temperatures above 20°F). Avoid heavy pruning during hard freezes—sap flow slows, increasing risk of dieback. If you must prune, do it on warmer days (40°F+) and remove no more than 25% of foliage. Quick fix: Prune in stages if winter stretches on.
What’s a good alternative if my tree won’t stop bleeding after pruning?
Excessive bleeding (sap oozing) is normal but can be reduced by:
- Pruning on dry, cool days (not warm or rainy).
- Using sharp tools to minimize tissue damage.
- Applying pruning paint (only on cuts >1 inch) to slow moisture loss.
- Watering deeply before pruning to reduce sap pressure.
Bonus: How do I encourage more fruit production?
Prune to open the canopy (remove dense branches) for sunlight penetration, which boosts fruit set. Thin out water sprouts and dead wood annually. For established trees, light summer pruning (July) can redirect energy to fruit rather than foliage. Fun fact: North Star cherries thrive with 50–70% sunlight—balance pruning for both fruit and frost hardiness!
Wrapping up and next steps
The North Star cherry tree thrives with the right pruning care—especially in the Pacific Northwest’s frosty climate! By following these steps, you’ll ensure a healthy, productive tree that rewards you with stunning blooms and delicious fruit for years.
Whether you’re a seasoned gardener or just starting, confidence grows with each snip—so grab those shears and get pruning!
Ready to take it further? Mark your calendar for seasonal checks and explore local nurseries for frost-resistant varieties. Your tree—and future harvests—will thank you! 🌿✂️