Pruning
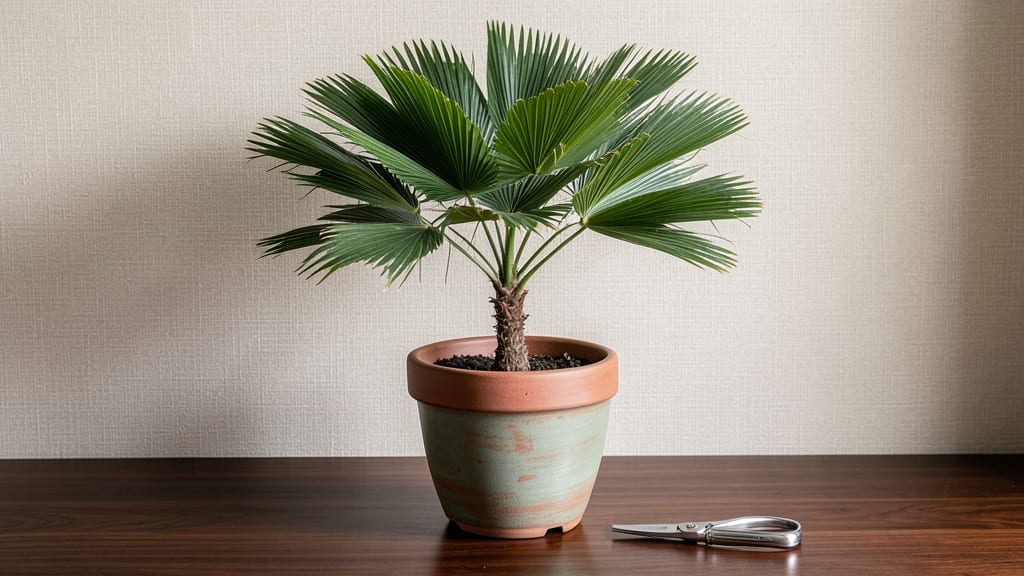
A mini coconut tree in your home isn’t just a dream—it’s a sun-drenched reality waiting to unfold. I’ve nurtured these palm wonders for years, and their lush fronds bring the beach vibe indoors, even in apartments.
The key? Mimicking their tropical roots with the right balance of warmth, humidity, and space to stretch those iconic fronds.
You’ll need a large container (at least 15 gallons), fast-draining potting mix, and a spot with bright, indirect light—think south-facing windows or a grow light setup. These trees thrive in USDA Zones 10-12, but with the right care, they’ll reward you with slow-but-steady growth year-round, even indoors.
The first year is all about patience; their signature fronds take time to unfurl, but once they do, they become the showstopper of any room.
By summer, you’ll notice new leaves emerging, each one a little wider and more dramatic than the last. Prune carefully—only remove dead fronds—and watch as your tree develops that classic palm silhouette.
The real magic? Those tiny, edible coconuts (yes, really!) may take years, but the journey is pure tropical joy. Let’s get your mini paradise growing.
Works for balconies, sunrooms, or even a cozy corner—just avoid drafts and sudden temperature swings. With consistent care, your mini coconut tree will outlive you (they can reach 50+ years!) and become the heart of your indoor jungle. Ready to start?
📚 In This Guide
- What you need
- Instructions
- Tips and common mistakes
- Wrapping up and next steps
What you need
- ● Mini coconut tree (Cocos nucifera) sapling: Choose a dwarf variety (e.g., "Malayan Dwarf" or "Queen Palm") from a nursery. Size: 1–3 feet tall, potted in a 3–5 gallon container.
- ● Container: A well-draining pot with drainage holes. Size: 12–18 inches in diameter (or larger for mature trees). Material: Terracotta, ceramic, or plastic (avoid metal).
- ○ High-quality potting mix: A blend of cactus/succulent mix (60%), perlite or pumice (20%), and peat moss or coco coir (20%). Optional: Add 1 cup of orchid bark for aeration.
- ● Slow-release fertilizer: A balanced, organic fertilizer (e.g., 5-5-5 or 3-4-6 NPK ratio). Quantity: 1–2 tablespoons per planting.
- ● Pruning tools: Bypass pruners (for clean cuts on small branches).
- ● Sterilized hand pruners or a small saw (for thicker stems).
- ● Garden shears (for shaping fronds).
- ● Disinfectant: Rubbing alcohol (70%+) or hydrogen peroxide (3%) to sterilize tools.
- ● Container saucer or tray: To catch excess water and prevent root rot.
- ● Mulch (orchid bark or pine needles): 1–2 inches to retain moisture and regulate temperature.
- ● Support stake or bamboo pole: For young trees to prevent toppling (especially in windy areas).
- ● Growth regulator (e.g., paclobutrazol): To control height if growing indoors (follow label instructions carefully).
- ● Humidity tray or pebble tray: To increase humidity for indoor-grown trees.
- ● A sunny location with 6+ hours of direct sunlight daily (south-facing window or outdoor patio).
- ● Warmth: Ideal temperatures between 70–90°F (21–32°C). Avoid drafts or cold windows.
- ● Patience: Mini coconut trees grow slowly (1–2 feet per year) and may take 3–5 years to produce coconuts in containers.
Step-by-Step guide to growing a mini coconut tree indoors
Here’s how to cultivate a lush, container-friendly coconut palm that thrives year-round.
Select the Right Coconut Variety and Container
Choose a dwarf coconut palm variety like Cocos nucifera 'Malayan Dwarf'—it stays under 6 feet tall and adapts well to indoor conditions. The container must have drainage holes and be at least 12 inches wide and deep to accommodate root growth. I prefer unglazed terra cotta because it breathes and prevents root rot, but a sturdy plastic pot with drainage works too.
Fill the bottom 2 inches with coarse gravel or perlite to improve drainage. This prevents water from pooling at the roots, which is critical for tropical plants. The coconut palm’s roots are sensitive to soggy conditions, so this layer acts as a buffer. If your pot lacks drainage, add an extra 1-2 inches of gravel to compensate.
Prepare the Potting Mix for Optimal Growth
Use a well-draining potting mix specifically formulated for palms or tropical plants. I blend 50% peat moss, 30% perlite, and 20% coarse sand to create a loose, airy medium. Avoid garden soil—it compacts and suffocates roots. Moisten the mix lightly before filling the pot to 1 inch below the rim, leaving space for watering.
Gently tap the pot on the table to settle the soil without compacting it. The mix should feel light and fluffy, like a damp sponge. Press it down just enough to remove air pockets, but don’t pack it tightly. Coconut palms need aerated roots to thrive, so a dense mix will stunt growth and invite fungal issues.
Plant the Seedling and Establish Early Care
Remove the coconut palm seedling from its nursery pot and loosen the roots if they’re circling. Place it in the center of your prepared pot and backfill with the remaining potting mix, pressing lightly around the base. The top of the root ball should sit ½ inch below the pot’s rim—this prevents soil from spilling out when you water.
Water deeply until water drains freely from the bottom. Let the pot sit in a saucer for 10-15 minutes to absorb excess moisture, then empty the saucer. Place the pot in a bright, indirect light location—think east or west-facing window—where it receives 4-6 hours of filtered sunlight daily. Direct sun will scorch the leaves, while too little light causes leggy growth.
Maintain Ideal Conditions for Year-Round Growth
Keep the soil evenly moist but never soggy. Stick your finger 1 inch deep into the mix—if it feels dry, water thoroughly. In winter, reduce watering slightly since cooler air slows evaporation. Mist the fronds 2-3 times weekly to replicate humidity levels of 50-70%, which mimics the tropical climate the coconut palm craves.
Fertilize every 6-8 weeks during spring and summer with a balanced liquid fertilizer (10-10-10) diluted to half strength. Avoid fertilizing in fall and winter, as the plant enters a natural dormancy. Rotate the pot quarter-turn weekly so the palm grows upright toward the light, preventing it from leaning toward one side.
Prune and Troubleshoot for Long-Term Health
Remove yellow or brown fronds at the base with sterilized pruners, cutting them off cleanly. Never trim healthy fronds—this weakens the plant. If you notice pests like spider mites or mealybugs, wipe the fronds with a neem oil solution (1 tsp neem oil per quart of water). Coconut palms are generally pest-resistant, but indoor dryness can attract these critters.
If the palm grows too tall for its space, trim the top 6-12 inches of the stem in late winter. This encourages bushier growth, though it may take 3-6 months for new fronds to emerge. Watch for overwatering signs like yellowing leaves or mushy stems—these indicate root rot. Adjust your watering routine immediately if you see these symptoms.
Tips & tricks for perfect mini coconut tree cultivation
Here's what nobody tells you about keeping your tropical palm thriving indoors—these insights save time and frustration.
Drainage Layer Precision: The 2-inch gravel or perlite layer in Step 1 isn't just about drainage—it's about creating an oxygen-rich zone at the roots. I've seen coconut palms fail within weeks when this layer was skipped because the roots suffocate. For pots without drainage, that extra 1-2 inches of gravel becomes your lifeline, preventing the classic "mushy stem" disaster that signals root rot. This is especially critical during winter when evaporation slows and moisture lingers longer.
Potting Mix Science: The 50-30-20 blend in Step 2 might look arbitrary, but each component plays a vital role. The peat moss retains moisture while the perlite and sand prevent compaction. When mixing, I always sift the components together to eliminate clumps—this ensures uniform aeration throughout the pot. The "light and fluffy" test isn't just about feel; it's about creating pore space that mimics the coconut palm's native sandy soil conditions. After filling the pot, I give it one final gentle press to eliminate air pockets without compacting.
Light Position Strategy: That 4-6 hours of filtered sunlight in Step 3 is a tight window, and positioning matters more than you'd think. I've found that east-facing windows provide the most consistent light without the intensity of south-facing exposure. If your only option is a south window, use a sheer curtain to diffuse the light—direct sun will scorch those delicate fronds within days. For indoor growers without good windows, a quality LED grow light on a timer can supplement the light cycle, but it's not a perfect replacement for natural light's spectrum.
Winter Watering Adjustment: The instructions mention reducing watering in winter, but what "slightly" means can vary dramatically by climate. In my experience, winter watering should be about 30% less frequent than summer, and I check moisture by pushing my finger 1 inch deep—if the soil feels cool rather than warm, it's time to water. The key is preventing the soil from drying out completely while avoiding the stagnant moisture that leads to root rot. A moisture meter ($10 at garden centers) becomes your best friend during these cooler months when visual cues become unreliable.
Pro Tips for Mini Coconut Tree
- Here's what nobody tells you about keeping your tropical palm thriving indoors—these insights save time and frustration.
- Drainage Layer Precision: The 2-inch gravel or perlite layer in Step 1 isn't just about drainage—it's about creating ...
- Potting Mix Science: The 50-30-20 blend in Step 2 might look arbitrary, but each component plays a vital role. The pe...
Frequently asked questions
Got questions about growing your own mini coconut tree? You’re in the right place! Whether you’re a pruning pro or a curious beginner, these answers will help you nurture your tropical beauty—without the hassle.
How long does it take for a mini coconut tree to produce coconuts?
A dwarf coconut tree (like Cocos nucifera ‘Malayan Yellow Dwarf’) typically takes 5–7 years to bear fruit indoors or in containers. Patience is key—focus on proper light (6+ hours of direct sun daily) and well-draining soil to speed up maturity. Prune strategically to encourage bushier growth and earlier flowering!
Can I grow a mini coconut tree indoors year-round?
With the right care, your mini coconut tree can thrive indoors all year. Use a 10–15 gallon container, ensure bright light (south-facing window or grow lights), and maintain humidity (mist leaves or use a pebble tray). In winter, reduce watering slightly—overwatering is the #1 killer of container-grown coconuts.
What’s the best alternative if my mini coconut tree isn’t thriving?
If your coconut struggles with slow growth or pests, try these low-maintenance tropical alternatives:
- Dwarf Date Palm (Phoenix roebelenii) – Hardy and coconut-like!
- Schefflera ‘Amate’ – Compact, glossy leaves, and pet-friendly.
- Kentia Palm – Loves shade and purifies air.
Why are my coconut tree’s leaves turning yellow or brown?
Yellowing leaves usually signal overwatering or nutrient deficiency, while brown tips often mean low humidity or fluoride buildup (from tap water). Fix it by:
- Letting the top 2–3 inches of soil dry between waterings.
- Using rainwater or filtered water (fluoride-free!).
- Grouping plants together to boost humidity.
How often should I repot my mini coconut tree?
Repot your tree every 2–3 years or when roots circle the container’s base. Spring is ideal! Choose a pot just 2–3 inches larger in diameter, with drainage holes, and use a well-draining mix (50% coconut coir, 30% perlite, 20% orchid bark). Pro tip: Trim 10–20% of roots during repotting to encourage new growth.
Wrapping up and next steps
Growing a mini coconut tree in containers is a rewarding way to bring a taste of the tropics into your home—no beach required! 🌴 With the right pruning techniques, you’ll keep your plant healthy, compact, and thriving year-round.
Whether you’re trimming for shape, encouraging fruit production, or simply maintaining its size, consistency is key.
Ready to take the next step? Start by observing your tree’s growth habits and adjusting your pruning schedule as needed. Soon, you’ll have a lush, manageable tropical beauty that’s as functional as it is stunning. Happy pruning!