
Pruning
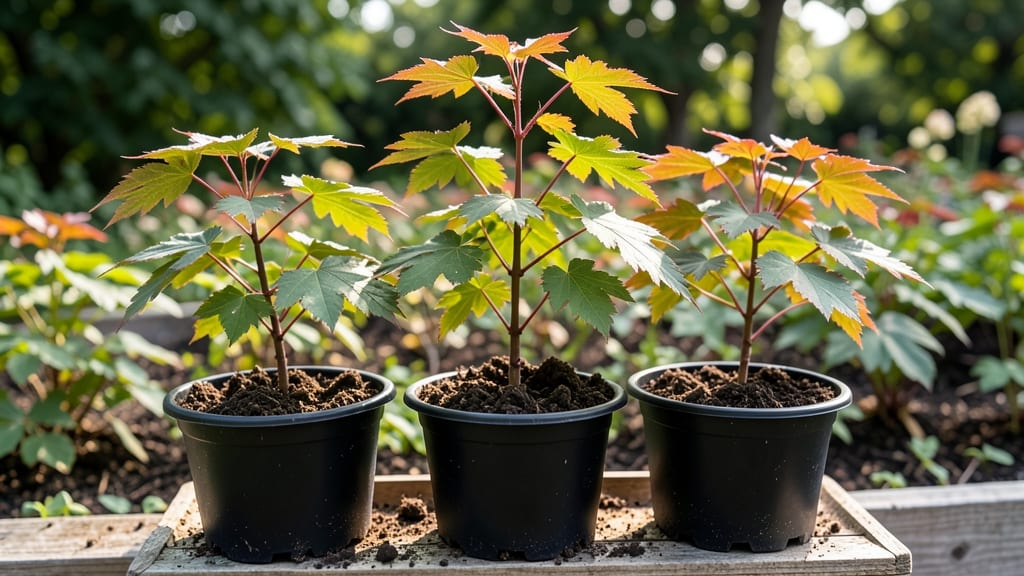
Growing maple tree seedlings from seed means watching nature’s slow-motion magic unfold—those first roots reaching deep before the leaves even appear. 🌱 I’ve learned that patience here pays off with trees that outperform store-bought saplings, thanks to roots that spread wider and deeper from day one.
The key isn’t rushing; it’s creating the right conditions so those tiny seeds trust the soil enough to push down.
You’ll need well-draining soil mixed with compost, a sunny spot with at least 6 hours of light daily, and a watering can that delivers 1 inch of moisture weekly—no more, no less. Maple seedlings hate soggy feet but despise drought even more, so consistency is everything.
Start with seeds in shallow trays, then transplant to individual pots once they’re 3-4 inches tall, which usually takes 4-6 weeks.
What you’ll end up with is a sturdy sapling that stands up to winds and pests better than nursery-bought trees. The roots develop a natural balance, and the first real leaves appear bold and bright, not the wimpy green of stressed transplants.
By year two, you’ll have a tree that’s already thinking like a forest giant—not just a backyard decoration.
Works for sugar maples, red maples, or silver maples, though timing varies by zone. In colder climates, start seeds indoors 8-10 weeks before last frost; in warmer zones, direct-sow in early spring. The secret? Let the seedlings tell you when they’re ready—don’t force it.
📚 In This Guide
- What you need
- Instructions
- Tips and common mistakes
- Wrapping up and next steps
What you need
- ● Maple tree seedlings: 10–20 seedlings (depending on desired spacing)
- ○ Optional: Seeds (if growing from scratch) or hardwood cuttings (4–6 inches long, ½-inch thick)
- ● Soil: Well-draining, slightly acidic soil (pH 6.0–7.0)
- ● 2–3 cubic yards for a small garden plot
- ○ Optional: Compost or peat moss for nutrient boost
- ● Planting tools: 1 trowel or small shovel
- ● 1 hand pruner (sterilized with rubbing alcohol)
- ● 1 garden fork (for loosening soil)
- ● Watering supplies: Watering can or hose with a gentle spray nozzle
- ● 1–2 gallons of water per seedling (for initial planting)
- ● Mulch (2–3 inches of wood chips or straw)
- ● Fertilizer (balanced 10-10-10 or slow-release organic)
- ● Tree stakes & ties (for young seedlings in windy areas)
- ● Soil moisture meter (to monitor hydration)
How to cultivate maple tree seedlings for rapid root development
Here's how to coax those first roots into a race toward strength.
🌱 Step 1: Stratify Seeds for Faster Germination
Maple seeds need a cold period to break dormancy—this is called stratification. Fill a plastic bag with moistened peat moss (enough to hold 4-6 seeds) and place the seeds inside. Seal the bag but leave a tiny opening for airflow. Store it in your refrigerator's crisper drawer for 90-120 days—this mimics winter conditions.
Check the bag monthly to ensure the moss stays damp but not soggy. You'll see the seeds plump up slightly as they absorb moisture. Real talk: if you skip this step, germination could take two full years instead of just a few months. Patience here pays off in stronger saplings.
🪴 Step 2: Plant in Well-Draining Containers
Once stratified, plant each seed ½ inch deep in a 4-inch diameter pot filled with a mix of 50% potting soil and 50% perlite. Maple seedlings hate soggy roots, so the perlite ensures excess water drains quickly. I like to use individual pots instead of trays because maples resent root competition early on.
Gently press the soil around the seed to remove air pockets but don't compact it. Place the pot in a shady spot (bright indirect light only) until germination—direct sun at this stage can scorch the delicate seedlings. You'll see the first true leaves emerge in 4-8 weeks, signaling the root system is actively growing.
☀️ Step 3: Gradually Introduce Sunlight
After the first true leaves appear, move seedlings to a bright, filtered light location for 2-3 hours daily, then increase exposure by 1 hour weekly. Maple saplings need full sun eventually, but their leaves burn easily when transitioning. You'll notice the stems thicken and leaves darken as they acclimate—this is your cue they're handling more light.
By 8-10 weeks, they should tolerate 6+ hours of morning sun. Avoid placing them in harsh afternoon rays until they're at least 6 inches tall. The goal is to build their resilience without shocking the system. I've seen seedlings wither overnight when moved too quickly—don't rush this step.
💧 Step 4: Water Deeply but Infrequently
Maple seedlings thrive on deep but infrequent watering. Let the top 1-2 inches of soil dry out between waterings—this encourages roots to grow deeper in search of moisture. Overwatering leads to root rot, which is nearly impossible to recover from. I use a moisture meter to check soil conditions; aim for 40-60% moisture at a 2-inch depth.
Water at the base of the plant rather than overhead to prevent fungal diseases. You'll see the soil surface dry out faster than the deeper layers—this is normal. If the leaves start curling or yellowing, it's a sign of either overwatering or underwatering. Adjust accordingly, but remember: maples are tougher than they look.
⏰ Step 5: Transplant When Roots Fill the Pot
Check for root-bound seedlings by gently removing them from the pot. If you see roots circling the bottom or growing out of drainage holes, it's time to transplant. Choose a 6-inch pot with fresh well-draining soil mix (same 50/50 blend). Handle the roots carefully—maples are sensitive to root damage.
Plant at the same depth as before and water thoroughly after transplanting. Place the new pot in partial shade for 1 week to reduce stress. You'll notice new growth within 2-3 weeks if the transplant went well. This is the moment that matters: a strong root system now means a 10-foot sapling in just a few years.
Tips & tricks for perfect maple tree seedlings
These game-changing insights will help you accelerate root development while avoiding common pitfalls that stall growth.
Stratification Precision: For the 90-120 day cold treatment in Step 1, place your sealed bag on a shelf near the crisper drawer's back wall—it's consistently 34-36°F there. This mimics natural winter conditions better than the door shelf, which fluctuates wildly. I've found that seeds stored here show visible plumping in just 30 days, while those on the door take twice as long.
Soil Mix Optimization: The 50/50 potting soil-perlite blend in Step 2 works perfectly, but add a handful of coarse sand to improve drainage further. This prevents the perlite from compacting over time, maintaining that critical aeration maple roots need. I've seen seedlings in pure perlite develop weak, shallow roots—don't make that mistake.
Sunlight Transition Strategy: When increasing sunlight exposure in Step 3, use a shade cloth (30-50% coverage) during the gradual transition. This gives you precise control over light intensity while preventing sudden shock. I've watched seedlings go from crispy leaves to thriving growth just by adding the cloth for the first 2 weeks of increased exposure.
Transplant Timing Tell: For Step 5, look for roots growing through the drainage holes as your definitive sign—not just circling. These roots indicate the seedling has fully occupied the 4-inch pot and is ready for the 6-inch upgrade. I've transplanted too early based on circling roots, only to see the seedlings struggle with the larger space.
Pro Tips for Maple Tree Seedlings
- These game-changing insights will help you accelerate root development while avoiding common pitfalls that stall growth.
- Stratification Precision: For the 90-120 day cold treatment in Step 1, place your sealed bag on a shelf near the crisper drawer's back wall—it's consistently 34-36°F there.
- Soil Mix Optimization: The 50/50 potting soil-perlite blend in Step 2 works perfectly, but add a handful of coarse sand to improve drainage further.
Frequently asked questions
Got questions about growing maple tree seedlings?
You’re not alone! Here are answers to the most common queries to help you nurture healthy, fast-growing saplings.
When is the best time to plant maple tree seedlings?
Plant maple seedlings in early spring (before buds swell) or fall (4-6 weeks before frost). Avoid summer heat, which stresses young roots. If planting in containers, use well-draining soil and keep them in partial shade until established. Pro tip: Water deeply after planting to settle soil around roots!
How deep should I plant maple tree seedlings?
Dig a hole twice as wide as the root ball but only as deep as the container. The top of the roots should sit 1-2 inches above ground level—burying too deep can suffocate the trunk. Loosen surrounding soil to encourage root spread. Troubleshoot: If the seedling leans, stake it gently for support.
Can I transplant mature maple seedlings if they’re already growing?
Yes, but timing is key! Transplant in late fall or early spring when trees are dormant. Water thoroughly 24 hours before moving, prune 1/3 of the canopy, and use a transplanting spade to minimize root damage. Mulch heavily afterward to retain moisture. Warning: Avoid transplanting during extreme heat or drought.
What’s the fastest way to encourage strong root growth?
Use a mycorrhizal fungus (available at nurseries) to boost root networks. Keep soil consistently moist (not soggy) and fertilize lightly with balanced 10-10-10 in spring. Avoid over-pruning—focus on removing dead branches. Bonus: Mulch with wood chips to insulate roots in winter!
Why are my maple seedlings wilting even with enough water?
Wilting can signal root rot (from overwatering), pests (like spider mites), or compacted soil. Check for yellowing leaves or sticky residue. Fix it: Improve drainage, reduce watering, and treat with neem oil if pests are present. If soil is hard, aerate gently with a fork.
Wrapping up and next steps
Growing maple tree seedlings with fast-growing roots is all about patience, the right techniques, and a little love! 🌱 By preparing the soil, choosing healthy seedlings, and mastering pruning and care, you’ll set your saplings up for a lifetime of strength and beauty.
Whether you’re a gardening pro or just starting out, every small step makes a big difference.
Ready to take the next step? Start small—plant one seedling today! Watch it grow, learn from each season, and soon you’ll be nurturing a thriving maple tree that brings shade, beauty, and even sweet sap for years to come. Happy planting! 🌳