Pruning
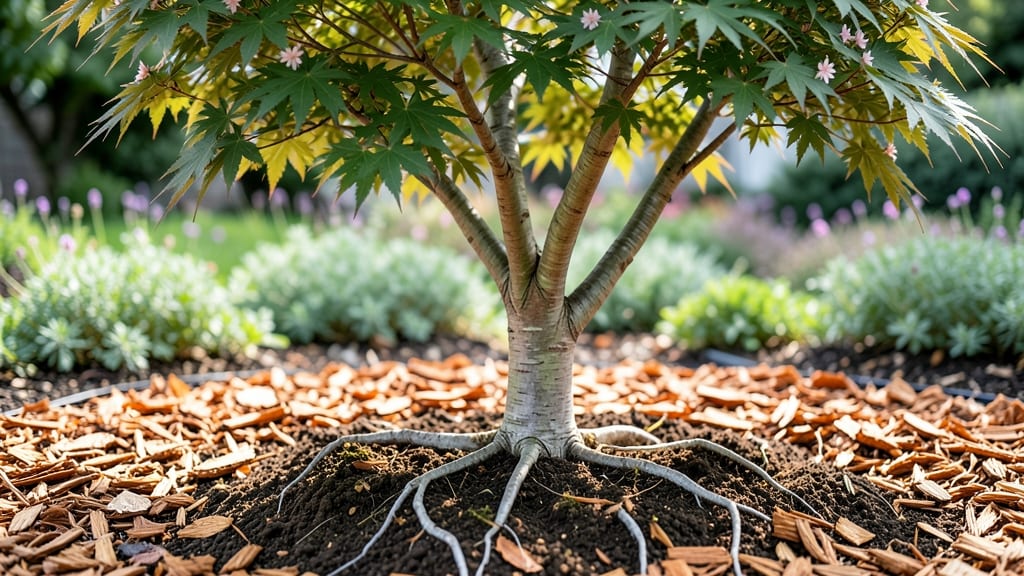
Japanese maple roots need strategic cuts to survive winter while keeping your tree thriving. 🌱 I’ve seen frost damage turn vibrant foliage into brittle branches—until I learned how to prune roots without killing the tree. The key is timing and technique, not brute force.
Most gardeners overlook roots until they’re already struggling, but a little prevention goes a long way. You’ll need sharp pruning shears, a clean work area, and a clear understanding of where to cut—too deep, and you risk shock; too shallow, and roots won’t adapt.
My trees now bounce back every spring, even after harsh winters.
What you’ll achieve is a tree that stays sturdy through frost while maintaining its graceful shape. The roots will spread stronger, the canopy will fill in more evenly, and you’ll avoid that heartbreaking sight of wilting branches come March. Ready to give your Japanese maple the care it deserves?
This method works for both container-grown and in-ground trees, so whether you’re dealing with a mature specimen or a young sapling, the same principles apply. Let’s get those roots in shape before the next freeze hits!
📚 In This Guide
- What you need
- Instructions
- Tips and common mistakes
- Wrapping up and next steps
What you need
- ● Pruning shears or loppers: Sharp, clean tools with bypass blades (avoid anvil-style shears to prevent crushing roots). Size: 6–8 inches for small roots, 10–12 inches for larger ones.
- ○ Pruning saw (optional but helpful): For roots thicker than 1 inch in diameter. Look for a curved-tooth saw to minimize tearing.
- ● Garden gloves: Heavy-duty, cut-resistant gloves (e.g., mechanics' gloves) to protect hands from thorns and sharp tools.
- ● Disinfectant (70% isopropyl alcohol or bleach solution): 1 part bleach to 9 parts water to sterilize tools between cuts and prevent disease.
- ● Root stimulator or mycorrhizal fungi: A powder or gel (e.g., Rootone) to promote healing and root growth after pruning.
- ○ Mulch (optional but recommended): 2–3 inches of organic mulch (e.g., wood chips or pine straw) to retain moisture and protect exposed roots.
- ● Watering can or hose with a gentle spray nozzle: For post-pruning hydration. Aim for 1–2 gallons of water per tree.
- ● Measuring tape or ruler: To assess root diameter and spacing for precise cuts.
- ● Root exposure tools: A garden fork or mattress shovel to gently loosen soil for better root visibility.
- ● Root paint or sealant: A water-based root sealer to protect larger cuts from drying out.
- ● Camera or sketchbook: To document the tree’s root structure before and after pruning—great for tracking progress!
- ● Knee pads or a small stool: For comfort during extended work in the soil.
Step-by-Step guide for reviving Japanese maple roots after frost
Here’s how I nurse frost-damaged roots back to health—without killing the tree.
🌱 Step 1: Assess Root Damage Before Pruning
Start by gently probing the soil around the trunk with your fingers or a small trowel. Healthy roots should feel firm and white, while frost-bitten roots will appear mushy or blackened. I like to work on a dry, sunny afternoon—this makes it easier to spot damaged areas without muddying your hands.
Focus on the outer 3-6 inches of roots, as these are most vulnerable to cold. If the soil feels icy or frozen, wait until it thaws completely before proceeding. You’ll know the roots are ready when the ground feels cool but workable—not rock-hard.
✂️ Step 2: Make Clean Cuts on Damaged Roots
Use sterilized pruning shears (wipe blades with rubbing alcohol first) to trim away any roots that look shriveled, black, or ooze when cut. I aim for a 45-degree angle on each cut to maximize the surface area for new growth. Avoid cutting healthy roots—these will be firm, white, and springy when bent slightly.
Work in small sections—don’t overdo it in one session. If you remove too much at once, the tree may struggle to recover. After trimming, sprinkle 1 inch of fresh mulch (like shredded bark) over the root zone to insulate remaining roots from future temperature swings.
💧 Step 3: Water Deeply and Monitor Soil Moisture
Water the tree slowly and deeply—aim for 1-2 gallons spread evenly around the root zone. The goal is to rehydrate the soil without shocking the roots. You’ll know it’s right when water seeps down 6-8 inches into the soil. Avoid overhead watering, as wet foliage can invite fungal issues.
After watering, check soil moisture every 3-4 days by sticking your finger 2 inches deep. If it feels dry, water again. Overwatering now can suffocate recovering roots, so let the top layer dry slightly between sessions. This balance keeps roots hydrated without drowning them.
☀️ Step 4: Shield New Growth from Late Frost
If your region still faces late frosts, drape frost cloth lightly over the tree’s canopy for 2-3 weeks after pruning. Secure it loosely—you want airflow, not a suffocating blanket. I use stakes to prop it up 6-12 inches above the branches to prevent damage from wind or snow.
Watch for new pale green shoots emerging from the trunk or branches—this is your sign the tree is reviving. Once these appear, remove the frost cloth gradually over 3-5 days to avoid shocking the tender growth. Keep an eye out for yellowing leaves, which could signal stress from either too much sun or insufficient water.
Tips & tricks for reviving frost-damaged Japanese maple roots
Here's what I've learned from years of nursing frost-bitten Japanese maples back to life—these little details make all the difference.
Timing is Everything: In Step 1, when assessing root damage, work during the warmest part of the day. The soil warms up enough to be workable but hasn't absorbed too much moisture from morning dew. I've found that roots are easiest to evaluate between 11 AM and 3 PM—this gives you the clearest picture of actual damage versus temporary cold-induced softness.
Precision Cutting Technique: For Step 2, the 45-degree angle on your cuts isn't just about aesthetics—it's about maximizing the root's ability to regenerate. When you make a clean angled cut, you expose more surface area for new root growth. I like to make my cuts just beyond where the root turns black or mushy, leaving about 1/8 inch of healthy tissue. This buffer zone gives the root a fighting chance to regrow.
Mulch Application Strategy: After pruning, that 1-inch layer of mulch in Step 2 should cover the entire root zone—not just around the trunk. Think of it as creating a protective blanket that extends out to where your pruning cuts ended. I use shredded hardwood bark because it breaks down slowly, providing insulation while also improving soil structure over time. Just avoid piling mulch directly against the trunk to prevent rot.
Watering Wisdom: When you're watering in Step 3, that 1-2 gallon target is perfect for most Japanese maples, but there's a trick: split the water into two sessions. Give half in the morning and half in the evening. This two-part approach prevents water from pooling at the roots, which can lead to anaerobic conditions that actually harm recovery. The evening watering also helps the tree prepare for the next day's heat.
Pro Tips for Japanese Maple Tree Roots
- Here's what I've learned from years of nursing frost-bitten Japanese maples back to life—these little details make all the difference.
- Timing is Everything: In Step 1, when assessing root damage, work during the warmest part of the day.
- Precision Cutting Technique: For Step 2, the 45-degree angle on your cuts isn't just about aesthetics—it's about maximizing the root's ability to regenerate.
Frequently asked questions
Got questions about your Japanese maple’s roots? You’re not alone! Here are some common concerns—and expert-backed answers—to keep your tree thriving.
How deep do Japanese maple tree roots grow?
Japanese maple roots typically spread wider than they grow deep—usually within the top 12–18 inches of soil. Their shallow root system makes them vulnerable to drought and compaction, so mulch lightly (2–3 inches) and avoid heavy foot traffic near the trunk. Pro tip: Test soil moisture regularly to prevent root stress!
Can I prune Japanese maple roots in winter?
Yes, but timing matters! Prune roots in late fall or early winter (after leaf drop but before hard frost) to minimize stress. Avoid pruning during extreme cold (<15°F) or when soil is frozen—roots heal best in 50–60°F soil temps. Use sterilized tools to prevent disease. Key: Wait until the ground thaws slightly for easier cuts!
What if my Japanese maple’s roots are lifting sidewalks?
Roots growing under pavers or driveways are a common issue! Gently lift and redirect aggressive roots (3–4 inches deep) with a sharp spade, then plant them 2–3 feet away from the original tree. For severe cases, install root barriers (1/4-inch corrugated metal) during planting to guide growth. Warning: Never saw roots—it can kill the tree!
Are there root-pruning alternatives for small gardens?
If space is tight, opt for container-grown Japanese maples (like ‘Bloodgood’ or ‘Emperor I’). Their roots stay contained, but ensure the pot has drainage holes and use a well-aerated mix (50% soil, 30% compost, 20% perlite). For ground-planted trees, mulch heavily (4–6 inches) to discourage lateral spread. Bonus: Dwarf varieties (under 10 ft tall) need less root control!
Why are my Japanese maple’s leaves yellowing after root pruning?
Yellowing leaves post-pruning often signal root shock or nutrient loss. Boost recovery with a balanced fertilizer (10-10-10) in spring and water deeply 2–3 times weekly for 4–6 weeks. If yellowing persists, check for fungal issues (like verticillium wilt) or over-pruning. Fix: Avoid pruning during flowering (spring) to reduce stress!
Wrapping up and next steps
Caring for your Japanese maple tree’s roots—especially in frost-prone climates—is all about strategic pruning and patience. By following the right techniques, you’ll not only protect its health but also encourage vibrant, frost-resistant growth.
Now that you’re armed with the know-how, take action this season—grab those pruners, assess your tree’s needs, and give it the TLC it deserves!
🌱 Next step: Schedule a gentle pruning session before the next frost hits. Your Japanese maple will thank you with stunning foliage for years to come!